This post is all about living room deep clean.

Table of Contents
Are you unsure where to begin with deep cleaning your living room? You’re not the only one. Deep cleaning can feel overwhelming, especially when most online checklists are either too intense or impractical for a busy schedule.
That’s why I put together this practical, step-by-step checklist for deep cleaning your living room. It’s an easy-to-follow guide to help you refresh your space without feeling stressed. If you want a simple and realistic way to clean your main living area, this guide will help.
Don’t forget to download your free copy of our Ultimate Deep Cleaning Checklist and use it to track your progress. If you’d like a full routine for your whole home, take a look at my Complete Home Cleaning System.
Ultimate Living Room Deep Clean Routine
How Does the Bedroom Deep Clean Checklist Work?
At first glance, it might feel overwhelming. You might think, “How am I supposed to get all of this done?” And here’s the thing—you’re not supposed to do it all at once. (Get the full details of how I suggest using our cleaning checklist for best results)
Living Room Deep Clean Checklist
Here is the list of what I clean in my living room when deep cleaning:
- Declutter:
- Relocate items that don’t belong in the room and purge unused items. Includes drawers, baskets, and cabinets. Reorganize the remaining items
- Dust and wipe light fixtures
- Dust and wipe the ceiling and crown molding
- Wash curtains or detail-dust blinds
- Detail clean windows and sliding doors:
- Including screens and window sills
- Clear and clean behind furniture:
- Dust walls and baseboards behind large furniture pieces
- Vacuum and mop the floor space underneath
- Vacuum/ wipe inside drawers, cabinets, baskets, etc.
- Detail and sanitize all remaining touchpoints and surfaces:
- Walls, baseboards, decor, switches, knobs, outlets, remotes, vent covers, and all other hard surfaces
- Deep-clean upholstery: Vacuum cushions and seating base
- Remove sofa cushions and wash (if safe)
- Refresh all linens and fabrics:
- Includes throw blankets, pet bedding, and pet toys
- Deep-extract and steam (or wash) area rugs
- Deep clean and sanitize hard flooring. Detail grout lines and crevices
Free Cleaning Checklists vs. the Complete Home Cleaning System: Which is Right for You?
If you like how simple this checklist is and want an easy way to manage all your household maintenance, all in one cohesive cleaning system, I can help.
The Free Living Room Deep Cleaning Checklist is great; however, the Complete Home Cleaning System goes further. Everything is organized into one easy, cohesive system, making it much easier to follow throughout the year, always know what to clean next, and track it all in one place.
You can check out the main differences between the two options below.
Download our free Living Room Deep Clean Checklist Here.
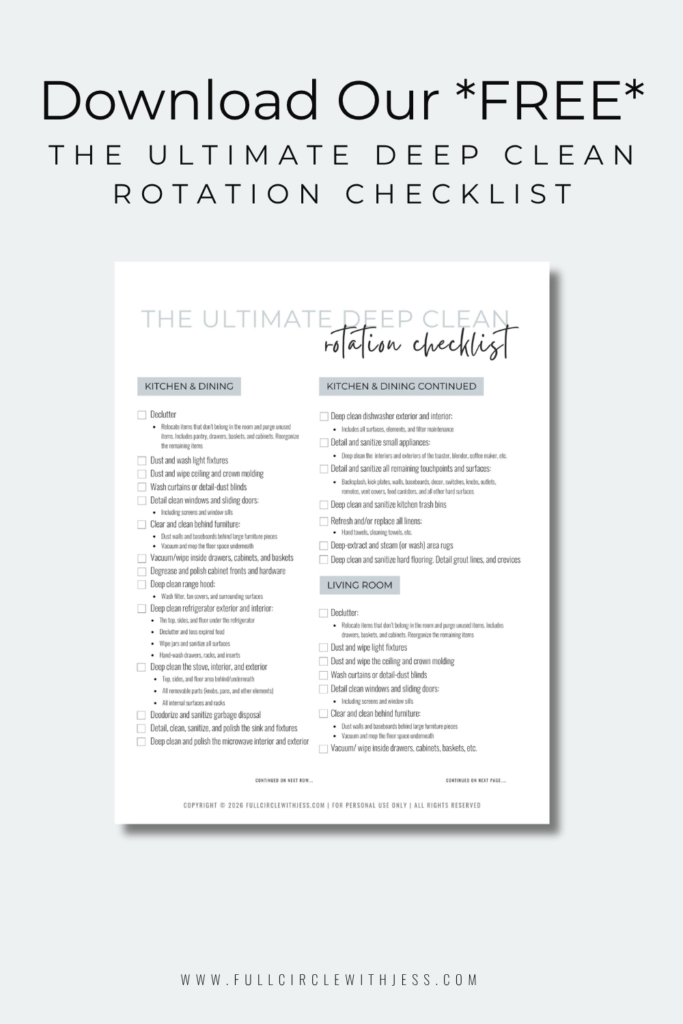
Click Here to Download Deep Cleaning Rotation Checklist PDF
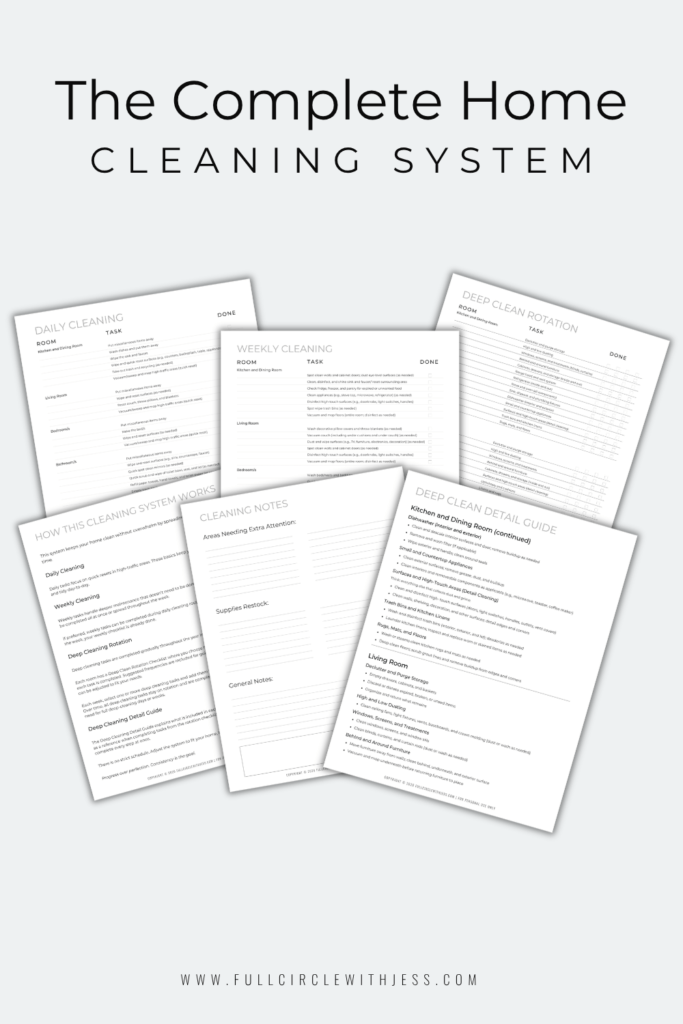
View The Complete Home Cleaning System
| Feature | Free Daily, Weekly, Deep Cleaning Checklists | Complete Home Cleaning System |
|---|---|---|
| “How it Works” Page PDF | ❌ | ✅ |
| Daily Cleaning Checklist PDF | ✅ | ✅ |
| Line Space to Add Weekly/Deep Cleaning Rotation Tasks | ❌ | ✅ |
| Weekly Cleaning Checklist PDF | ✅ | ✅ |
| Line Space to Add Deep Cleaning Rotation Tasks | ❌ | ✅ |
| Deep Clean Rotation Checklist PDF | ✅ | ✅ |
| Extra Space to Track Completed Deep Cleaning Tasks | ❌ | ✅ |
| Deep Clean Room-by-Room Detail Guide PDF | ❌ | ✅ |
| Suggested Frequencies | ❌ | ✅ |
| Cleaning Notes Page PDF | ❌ | ✅ |
| Lifetime Free Updates Sent to Your Inbox | ❌ | ✅ |
Below, I share how to clean the living room step by step:
Living Room Deep Clean Essentials Used:
Here is a complete list of living room cleaning tools I use to deep clean the living room.
- Bucket
- Water
- Rags
- Microfiber towels
- Swiffer Duster
- Dawn dish soap
- Hand-held steam cleaner
- Vacuum
- Mop
- Tide Powder
- Bleach
- Brush
- OxiClean
- Magic Eraser
Tide formula: 1 Gallon of water, 1/3 cup of bleach, and one teaspoon of powdered Tide detergent. I learned this recipe from @gocleanco and have used it ever since.
How to Clean the Living Room Step By Step
I always recommend starting from the top and working your way down when cleaning. This method is more efficient because dust and debris from higher surfaces will naturally fall onto lower ones as you clean. If you start with the lower surfaces, youll likely have to clean them again. By tackling the top area first, you avoid unnecessary rework.
1. Declutter
The first step in deep cleaning, whether you tackle the whole room at once or follow the suggested deep clean rotation method, is always to declutter and purge. I do a quick pass every two months or so, so it only takes a few minutes to stay ahead of the clutter!
Since I keep up with this routine, none of our drawers fill with random junk for too long, which makes deep cleaning much easier.
As I mentioned above, I suggest doing this regularly in bite-sized pieces, but if you want to tackle one whole room at once, the method is the same.
Here is how to dive in:
- Clear the surfaces: Gather up and relocate any items that have drifted into the living room but don’t actually belong there.
- Purge the hidden spots: Open up your drawers, cabinets, and storage baskets to discard or donate anything you no longer use or need.
- Reset your storage: Neatly organize the remaining items back into their designated spots so everything has a home.
And that is it. Do this regularly as part of your living room deep-clean rotation, and you will be surprised by how much more you can manage the clutter and how much easier it will be to keep your home clean.
Cleaning supplies I used to declutter: trash bags (for sorting or purging items)
2. Dust and Wipe Light Fixtures
Ceiling light fixtures are often forgotten, but they collect a ton of dust very quickly. And before you know it, the dust is so thick you can’t remove it in one piece lol. Let’s avoid that!
How you clean your fixtures might depend on their style and your ceiling height. If your fixtures are easy to reach, like mine, taking them down for a quick wash is really easy.
Here’s my fast and simple way to make them shine again:
- Wash the removable parts: Safely reach the fixture using a step stool, unscrew the glass covers, and wash them right in the sink with warm water and a squeeze of dish soap.
- Wipe down the base: While the glass covers dry, use a damp microfiber cloth to dust and wipe the parts of the fixture that stay mounted.
- Swap the bulbs: While you have the step stool out, check and replace any burnt-out bulbs.
- Dry and reassemble: Use your microfiber cloth to wipe the glass covers completely dry, then screw them back into place.
Cleaning supplies I use to clean light fixtures: Step stool, warm water, dish soap, and a microfiber cloth.
3. Dust and Wipe the Ceiling and Crown Molding

Dusting your ceiling and crown molding is easy with a vacuum attachment or a duster. Personally, I like using a handy duster because it’s so simple to use and I dont have to deal with the vacuum, haha!
Random stains or debris usually show up on the kitchen ceiling, but they can appear in your living area too. Where do they come from? It’s a mystery in my home, haha! That’s why I add these tasks to my deep clean rotation checklist.
Here’s how I quickly freshen up the highest spots in the room:
- Clear the dust: Use a dry Swiffer Duster along your crown molding and ceiling corners to quickly remove cobwebs and dust.
- Spot-clean stains: If you see any marks, wipe them away with a rag dipped in clean water and a little dish soap. If that doesn’t work, try a Magic Eraser or similar item. Just be careful and don’t scrub too hard; it can remove your paint.
- Rinse and repeat: Wipe the area with a clean, damp cloth if needed until the stain is gone.
Cleaning supplies I use to clean ceilings and crown molding: Swiffer Duster, rags, bucket, clean water, and dish soap.
4. Wash Curtains or Detail-Dust Blinds
Whether you have fabric curtains or horizontal blinds, window treatments tend to collect a lot of dust over time.
You only need to wash your curtains deeply a few times a year. For blinds, wiping them down every 4 months helps keep them clean with minimal effort.

Here’s a simple way to refresh both curtains and blinds:
- For curtains: If yours are machine-washable, just take them down, put them in the washer, and follow the care label instructions.
Tip: Hang them lightly damp to avoid wrinkles.
- For blinds:
- Leave them hanging on the window. Use your vacuum’s brush attachment to remove dust from each slat, making sure to clean both sides.
- Next, dip a rag in warm, soapy water and gently wipe each slat one by one.
- Finally, leave the blinds down and open so they can air dry completely while the window stays closed.
I have a full blog post of these steps here.
Cleaning supplies I use to clean blinds: a vacuum with a brush attachment (or a Swiffer), a bucket, warm water, dish soap, and rags.
{Related Post: House Cleaning Supplies | Essential Cleaning Products You Need For a Professionally Clean Home}
5. Detail Clean Windows and Sliding Doors
When I clean my windows, I also take care of the sills and screens.
A handheld steamer is my favorite tool for cleaning window sills because it quickly removes dirt from tight spots you usually can’t reach.
Here’s the simple process I use to get my windows, tracks, and screens clean:
- Steam the sills: Use your steamer to loosen dirt in the window tracks and sills, then wipe them clean with a cleanign rag. Repeat until they are clean to your liking.
- Wash the glass: Clean the window panes with warm water, a little dish soap, and a rag.
- Dry streak-free: While the glass is still wet and soapy, use a squeegee to remove water, then dry the edges with a clean, dry microfiber cloth to finish streak-free.
- Clean the screens in place: For a quick refresh, use a soapy rag and microfiber cloth to wipe down your window screens while they’re still hanging. Rinse and repeat until screens are clean. This will help remove dust quickly without having to take them off.
- Deep-clean the screens outside: For a deeper clean, remove the screens and take them outside. Scrub them with soap, rinse them with a garden hose, and let them air-dry before putting them back in.
Use this same method for sliding doors.
Cleaning supplies I use to wash windows and sliding doors: Handheld steam cleaner, bucket, warm water, dish soap, rags, squeegee, and a microfiber cloth.
6. Clear and Clean Behind Furniture
Deep cleaning really means moving your largest furniture and cleaning the spaces behind and under it.
You probably sweep your floors often, but you only need to move everything and clean behind it every three to four months. If you have a pet that sheds a lot, like my Husky, you might need to do this more often to keep up with all the fur.
Here’s how you can quickly clean those hidden dusty spots:
- Start by moving your large furniture away from the walls so you have enough space to clean.
- Dust the walls and baseboards first, then use a rag and warm, soapy water to wipe down the walls, trim, and the backs of the furniture.
- Vacuum the floor you just uncovered to pick up any hidden pet hair and dust, then mop it well.
- Wait for the floors to dry completely before moving your furniture back to where it belongs.
Cleaning supplies I use to clean behind furniture: rags, a bucket, water, dish soap, a vacuum, and a mop.
7. Vacuum/ Wipe Inside Drawers, Cabinets, Baskets, etc.
Sticky spills usually happen in the kitchen, but living room storage areas also collect dust and debris over time. Wiping them down a few times a year during deep cleaning is enough to keep them clean and organized. This should be easy once you consistently declutter.
Here’s how I quickly refresh storage spaces:
- Clear the contents: Take everything out of the drawer or basket to reach every corner.
- Vacuum the crumbs: Use the narrow crevice or brush attachment to remove dust, lint, or debris from the corners.
- Wipe it clean: Next, wipe the inside and outside surfaces with a damp soapy microfiber cloth or rag to remove any remaining residue.
- Dry and reload: Let the surfaces air dry, then put your organized items back inside.
Cleaning supplies I use to clean inside drawers, cabinets, and baskets: dish soap, a vacuum with attachments, and a microfiber cloth (or rag).
8. Detail and Sanitize all Remaining Touchpoints and Surfaces

When it comes to the remaining hard surfaces in your living room, my motto is simple: if it’s a surface, clean it! This includes everything from your walls and decor to everyday touchpoints like light switches, doorknobs, outlets, remotes, and vent covers.
To deep-clean and disinfect these areas safely, I use a simple two-step method: first, dry dusting, then a strong cleaning solution.
Here’s how to make sure every surface and touchpoint is fully sanitized:
- Clear away dust by running a dry Swiffer Duster over all surfaces, decor, and switch plates to pick up loose dust and hair.
- Wash and disinfect bleach-safe surfaces with a bucket of warm water, 1/3 cup of bleach, and 1 teaspoon of Tide Powder.
- For surfaces that can’t handle bleach, use warm water with a few drops of Dawn dish soap instead. Wipe with a damp rag and repeat if needed.
- If you see stubborn scuffs or marks on your walls that don’t come off with a rag, gently rub them with a damp Magic Eraser.
Cleaning supplies I use to detail and sanitize all remaining touchpoints and surfaces: Swiffer Duster, bucket, warm water, Tide Powder, bleach, Dawn dish soap, rags, and a Magic Eraser.
Tide formula: 1 Gallon of water, 1/3 cup of bleach, and one teaspoon of powdered Tide.
9. Deep-Clean Upholstery: Vacuum Cushions and Seating Base
When I vacuum my couch each week, I usually do it quickly and don’t usually get into every crevice. That’s why I add a thorough upholstery refresh to my living room deep clean checklist. It helps me make sure I do a real deep vacuum regularly.
Cleaning those hidden cracks really helps, especially for removing trapped dust and pet hair.
Here’s how I make sure my couch is completely clean and free of hair:
- Change your vacuum attachments by removing the main head and using the narrow crevice tool and brush.
- Use the attachments to go over every seam, corner, and fold. This helps pick up crumbs, lint, and loose fur that gets trapped in the crevices.
- For tight spots the vacuum can’t reach, use a damp microfiber cloth and a small brush or old toothbrush to gently remove any leftover debris, then vacuum it right up.
Cleaning supplies I use to deep-clean living room upholstery: a vacuum with crevice and brush attachments, a small brush, and a microfiber cloth.
10. Remove Sofa Cushions and Wash (if safe)
If your sofa has removable cushion covers and the care tag says it’s safe, putting them in the washing machine can save you a lot of time and effort.
Some people like to use deep-cleaning fabric vacuums on their entire couch, but I avoid them on large cushions because I’m concerned about moisture getting trapped and causing mold. I only use these machines on the armrests when needed and stick to simple spot-cleaning for the rest.
Here’s how to keep your sofa looking clean and free of stains:
- Washing Machine Method: For removable covers, zip them up and wash them with a scoop of Tide Powder and a scoop of OxiClean. They always come out looking clean.
- Daily Spot-Cleaning: For regular cleaning or for surfaces you can’t remove, use warm water, a few drops of Dawn dish soap, and a microfiber cloth to gently wipe away spills. Doing this regularly really helps.
- In-Between Refreshes: For tough stains that show up between deep cleans, use a spot remover to treat the stain directly without soaking the fabric.
Cleaning supplies I use to clean sofa cushions: Tide Powder, OxiClean, Dawn dish soap, microfiber cloth, and spot remover.
{Related Post: House Cleaning Supplies | Essential Cleaning Products You Need For a Professionally Clean Home}
11. Refresh all Linens and Fabrics
When you want to freshen up the fabrics in your living room, there isn’t one set rule for how often to wash or replace them. It really depends on how your family uses the space!
I’ve found that setting up a simple schedule for your linens makes it much easier to stay on top of odors and dust. Some things need to be washed every week, while others can go a month or two between washes.
Here’s how I manage the fabrics in my living room:
- Weekly essentials: Wash items that get a lot of use and hold onto odors, like pet bedding or favorite pet toys, every week to keep your room smelling fresh. (This is included in my weekly checklist)
- Bi-weekly refreshes: Wash your cozy throw blankets every two weeks to keep them soft, clean, and free of pet hair. (This is included in my weekly checklist; I just skip it one week)
- Bi-Monthly maintenance: Wash your decorative couch pillow covers every couple of months or more, since they don’t get used as much.
- Check for replacements: During a deep clean, look for any wear and tear. If a blanket is fraying or a pet bed is worn out, add it to your shopping list so you can replace it when needed.
12. Deep-Extract and Steam (or Wash) Area Rugs
I don’t have wall-to-wall carpets or big area rugs at home, and the small accent rugs I use are easy to wash in the machine. If you have larger rugs or full carpeting, though, it’s important to give them a deep clean to remove trapped odors and dirt.
Here’s how you can clean your floor textiles during a deep cleaning:
- Machine-Wash Method: For small accent rugs or machine-washable runners, check the care tags, shake out any loose dirt, and let your washing machine handle the rest.
- Deep-Extract Method: For wall-to-wall carpeting or large area rugs that can’t be washed, renting or buying a steam-shampoo carpet cleaner is usually the best way to remove deeply embedded dirt. Or hire a professional as needed.
- Shampoo Alternative: If you don’t have a steam cleaner, try using a good shampoo-based carpet cleaner with a sturdy brush to spot-treat high-traffic areas and stains.
13: Deep Clean and Sanitize Hard Flooring. Detail Grout Lines and Crevices

When you mop your floors as usual, it might seem like they’re clean. But if you look closer, you’ll see that grout lines can get stained, and dirt often builds up in the small spaces where the floor meets the baseboards.
To really deep clean your floors, pay special attention to these problem areas. Cleaning the grout lines can be tough work, but doing this thorough cleaning just once a year can make a big difference in how your space looks.
Here’s how I get hard floors and grout looking like new, step by step:
- Deep-clean the grout: Use a handheld steam cleaner to loosen dirt from the grout lines without causing any damage. For tough stains, scrub the lines with a sturdy brush dipped in warm water mixed with Tide Powder and bleach.
- Clean the corners and baseboard edges: Use your steam cleaner to get into the corners and small spaces where the floor meets the baseboards. Then, scrub away any buildup with your Tide powder solution and a brush until the edges are clean. (DON’T SOAK IT)
- Finish with a thorough mopping: After you’ve scrubbed the details, mop the whole floor with a bucket of warm water, 1 teaspoon of Tide Powder, and 1/3 cup of bleach.
- Rinse: Rinse your mop and go over the floor a few more times with clean water. Your floors will look fantastic when you’re done!
Cleaning supplies I use to deep-clean and sanitize hard flooring: a handheld steam cleaner, a bucket, warm water, Tide Powder, bleach, a grout brush, and a mop.
And there you have it! That is my entire living room deep cleaning list, along with step-by-step instructions for cleaning each area. I hope this helps you get your living room nice and clean, and that you found these living room cleaning tips helpful!
View Free Ultimate Deep Cleaning Checklist
View The Complete Home Cleaning System
This post was all about living room deep clean.
Other Posts You Might Like:
Leave a Reply