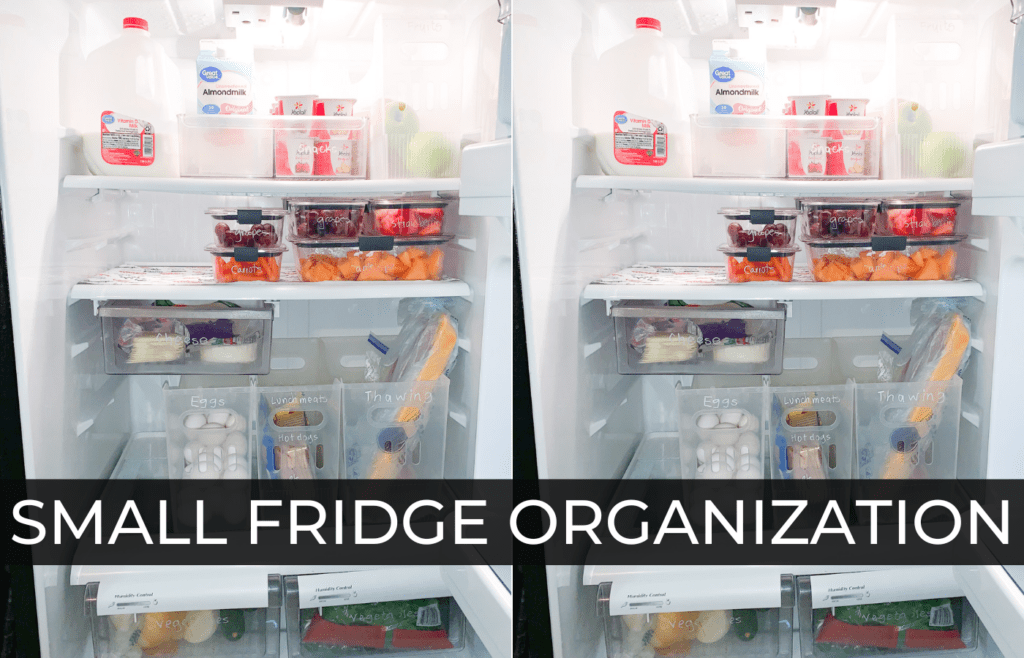
If you have a small fridge like me, and you’re looking for the best small fridge organization ideas you can recreate in your fridge, you’ve come to the right place!
There is no right or wrong way to organize a fridge. What works for one person may not work for the next since we all have different size families, favorite foods, etc. However, I believe my small fridge organization tips can be recreated in any fridge regardless of size. And can easily be modified to anyone’s needs too!
And even though we would all love that Pinterest-worthy organized refrigerator, the reality is many of those looks aren’t realistic for many. Especially with a small fridge. That’s why, when organizing any space, I first focus on functionality rather than aesthetics.
And yes, I also want my spaces to look nice, but my main goal is to organize the spaces in my home in a realistic and functional way. All that to say that I have tried many small fridge organization tips and hacks over the years and the tips and hacks I share below are the ones that have finally helped me have a functional refrigerator that is also organized and super easy to maintain. So if you are ready for a functional and organized fridge, follow the tips and tricks I share below, and I am certain you will not regret it!
This post is all about small fridge organization.
Table of Contents
Practical Small Fridge Organization Tips and Hacks
- Don’t overbuy food – for refrigerated items, only buy what you need for the week. This will help with minimizing wasting food and also help keep the fridge organized.
- Create zones – create designated zones inside your refrigerator for all your staple food items. Example: Deli, eggs, vegetables, fruits, snacks, etc.
- Create a designated area for thawing – include a zone for thawing meats/poultry. Make sure it’s not anywhere where it can leak into other foods.
- Use large bins for zones – you’ll be able to fit more food per zone.
- Make your zones as broad as possible – create zone categories that are broad rather than very specific.
- Label your zones – if possible, label the zones you create. This is especially helpful so that everyone in the home can easily see where each item belongs. And this aids in keeping the refrigerator plus freezer nice and tidy between deep cleans.
- Use stackable containers – to optomize space, make sure to use stackable containers as much as possible for items like leftovers, sliced fruits, and vegetables. Especially if you have a small refrigerator like mine.
- Assign specific containers for leftovers – have designated containers for leftovers and fruits, vegetables, etc. And only use them for that.
- Label leftovers with the cooked date – if possible, label your leftovers with the date that you cooked and refrigerated the food. This will help with making sure you are tossing leftovers regularly and this will also help with minimizing wasted food.
- Toss expired food regularly, condiments, etc. – to avoid unpleasant odors and food waste, try to use up all your food before it goes bad and throw it out immediately, if/when it does. Check for expired items weekly.
How Do You Organize A Small Fridge?
Below, I am sharing exactly how I implement the tips and hacks mentioned above for my small fridge and the zones we use in our fridge to maintain an organized fridge.
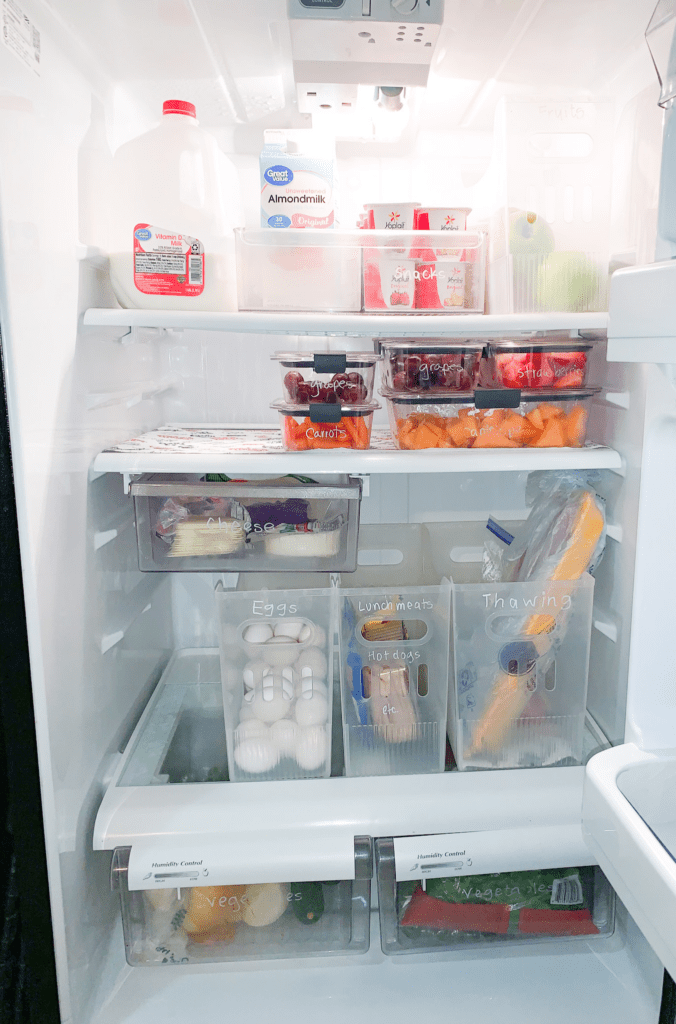
Creating zones is the key to keeping your refrigerator organized. However, keep in mind that “zones” will vary from home to home as we all have different foods that are staples to our family. But as an example, here is a picture of ours.
As you can see, everything is in its own zone. Creating zones for all your staple items makes it easier for everyone in the family to maintain the refrigerator tidy AND put food away when you go grocery shopping.
As an example, I’ll list all my zones below and my thought process behind the way I set the zones up.
Zone 1: Poultry, Meats, Etc:
We mostly keep this in our freezer and only take it out to thaw as we need it. If you are interested in learning more regarding the safe handling of poultry and meat, you can find more info here.
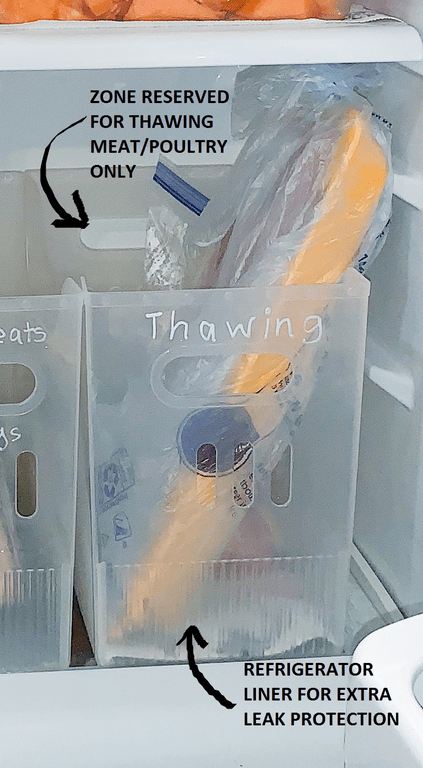
Now, I have a designated area and bin with a refrigerator liner inside my refrigerator that we specifically use for thawing and storing items such as meat/poultry. Having it inside this bin, as it thaws out, protects the rest of our food from contamination in case it leaks. I keep whatever I am thawing inside a bag for extra protection.
So, if you have not already, set a designated area to store and thaw your poultry and meat. Make sure you do the same for the freezer. Have a specific zone in your freezer to keep it frozen until you need it.
I also separate our meat/poultry into freezer bags and remove them from the package before freezing. So I only thaw out what I need rather than the entire package. I do this mostly with larger meat/poultry packages unless I know we will be using the entire thing.
Zone 2: Condiments
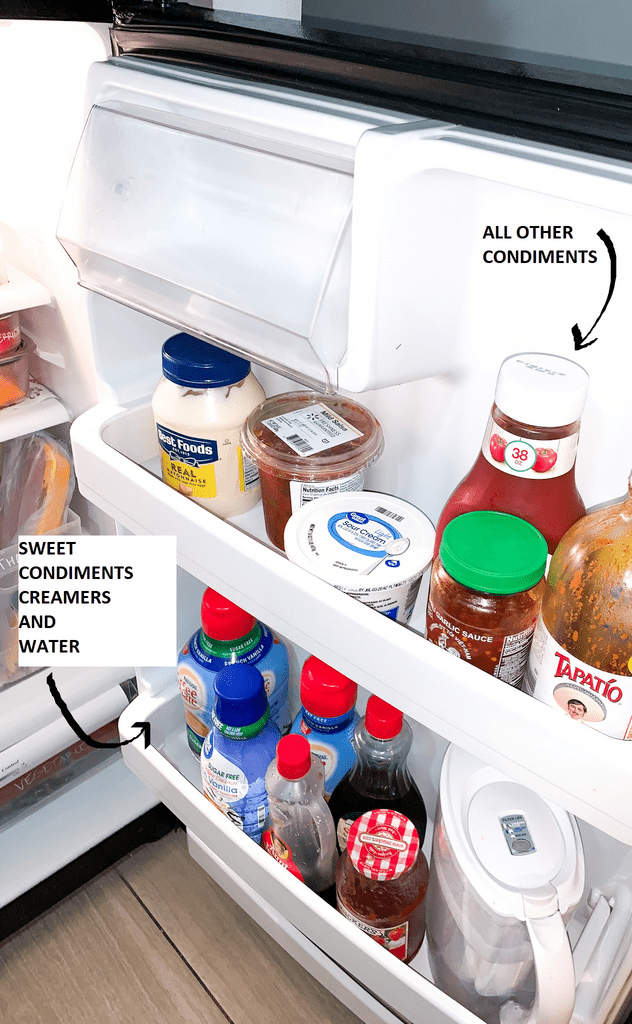
We keep all our condiments on the door shelves. This area is our condiment zone. On the middle shelf, we keep all the sweet condiments and all other condiments go on the top shelf.
I like to separate them this way for no good reason other than it makes sense to me that way. But you can separate or consolidate them in whatever way makes sense to you.
I store mostly condiments on these door shelves because the temperature on the door shelves varies much more than the inside of the refrigerator. And that is because when you open the door, it removes these shelves from the cold. So it is best to not store items on here that require refrigeration at all times. Such as milk and cheese.
{Related Post: Places Most People Forget To Clean In Their Homes}
Zone 3: Fruits
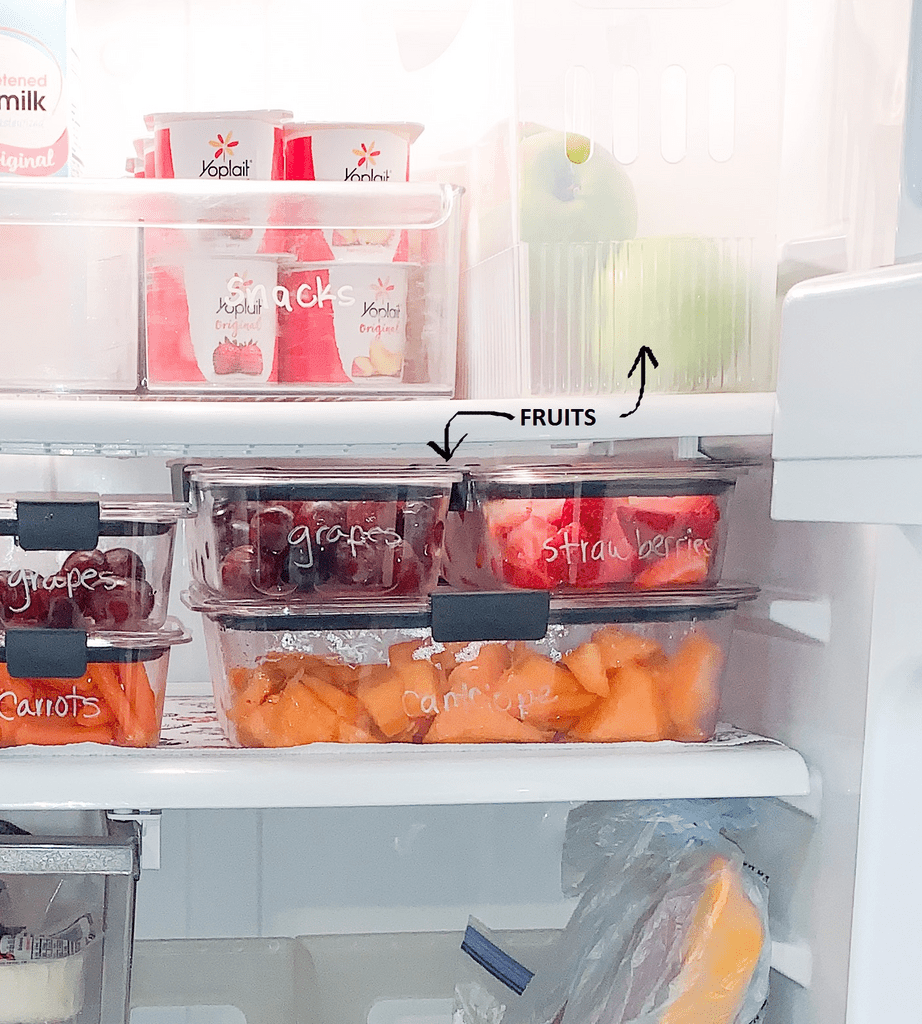
Fruits such as apples and oranges I store in these container bins. Because I like to keep them visible, otherwise we forget about them and they go bad before we get to them.
And any other fruits such as grapes, strawberries, and watermelon, I wash, cut, and store into these Rubbermaid storage containers. I just store them like that for easy access and because I can stack them up and optimize the space. Plus, they look pretty too!
So keep that in mind when investing in organizational containers for your refrigerator. Try to use stackable containers wherever possible to optimize storage space.
ZONE 4 – Vegetables
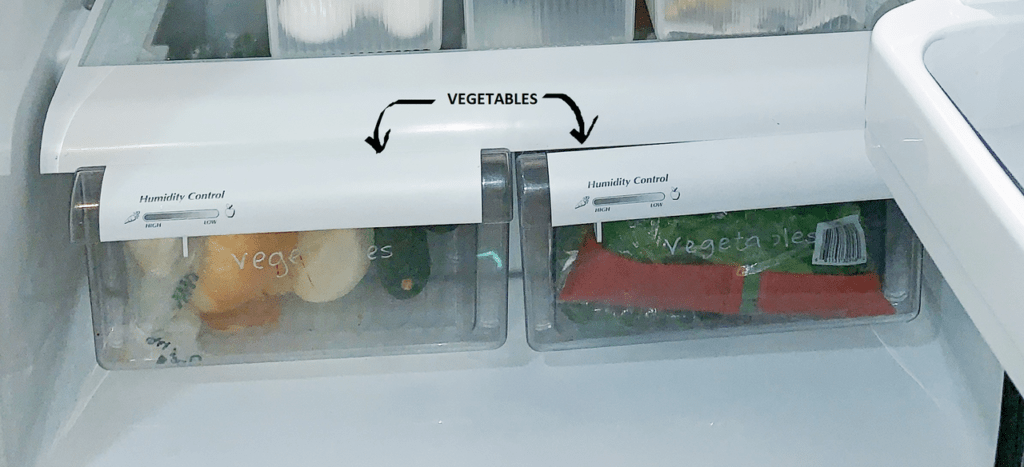
Most vegetables we keep in the vegetable drawers.
But the vegetables, I know my kids enjoy eating. I wash, cut, and store them in these Rubbermaid storage containers, too. And those get stored along with the fruits in our fruit/vegetable zone.
ZONE 5 – Leftovers
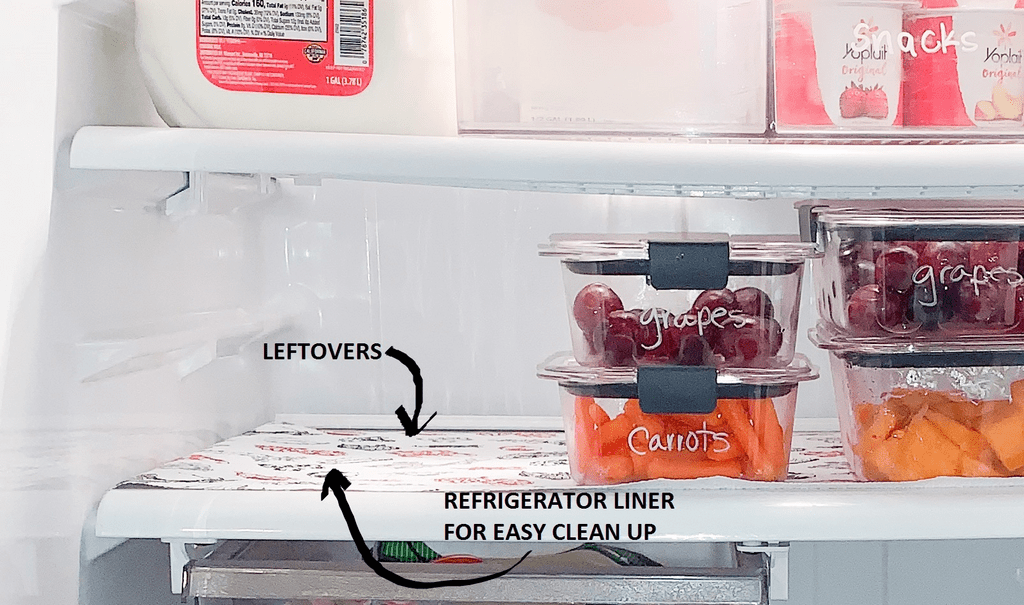
For leftovers, we just started using the Rubbermaid storage containers for leftovers, too. And I write the date cooked on the container with these Sharpie poster-paint markers. This way, we can easily see how long leftovers have been in the fridge.
How Long Should You Keep Leftovers
We used to just throw it away if it smelled weird. But now that I have researched more about how long meats/poultry, etc are good for after cooking, I have a better idea of how long it is safe to keep leftovers.
And according to the USDA website, leftovers can be kept in the refrigerator for 3 to 4 days or frozen for 3 to 4 months. So to be on the safe side, I will just stick to that.
Using the containers and labeling the leftover containers with the date the food was made and refrigerated has helped us a lot in making sure we aren’t wasting food and also not eating food that is no longer safe to consume.
Zone 6 – Snacks
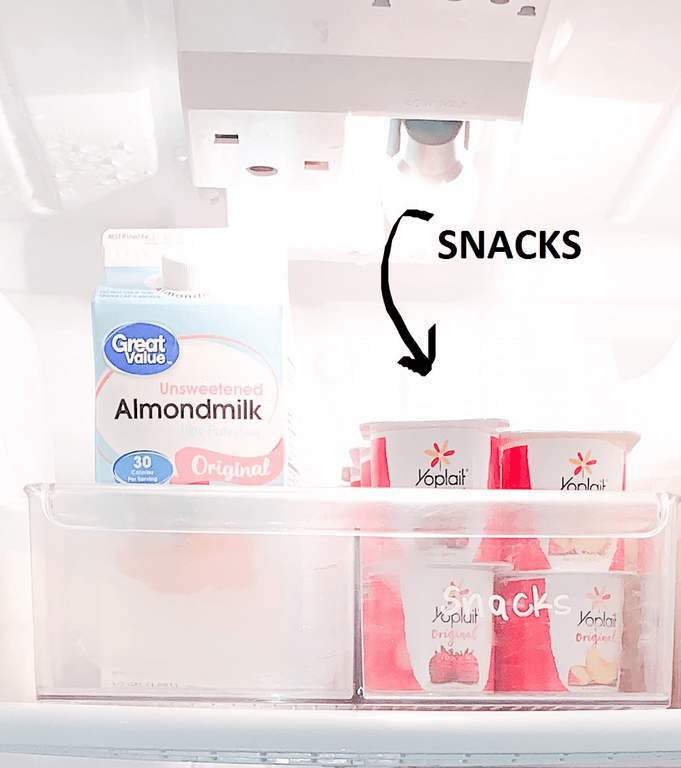
We don’t buy a ton of snacks in our house, but the ones we do buy also have a designated area in the refrigerator. My only tip for snacks is to not overbuy. We only buy a week’s worth of refrigerated snacks for our family. However, we get more pantry-type snacks in bulk.
During school time, our snack zone/s changes a bit as my kids do take lunch to school. But the concept stays the same, just make a designated zone for it.
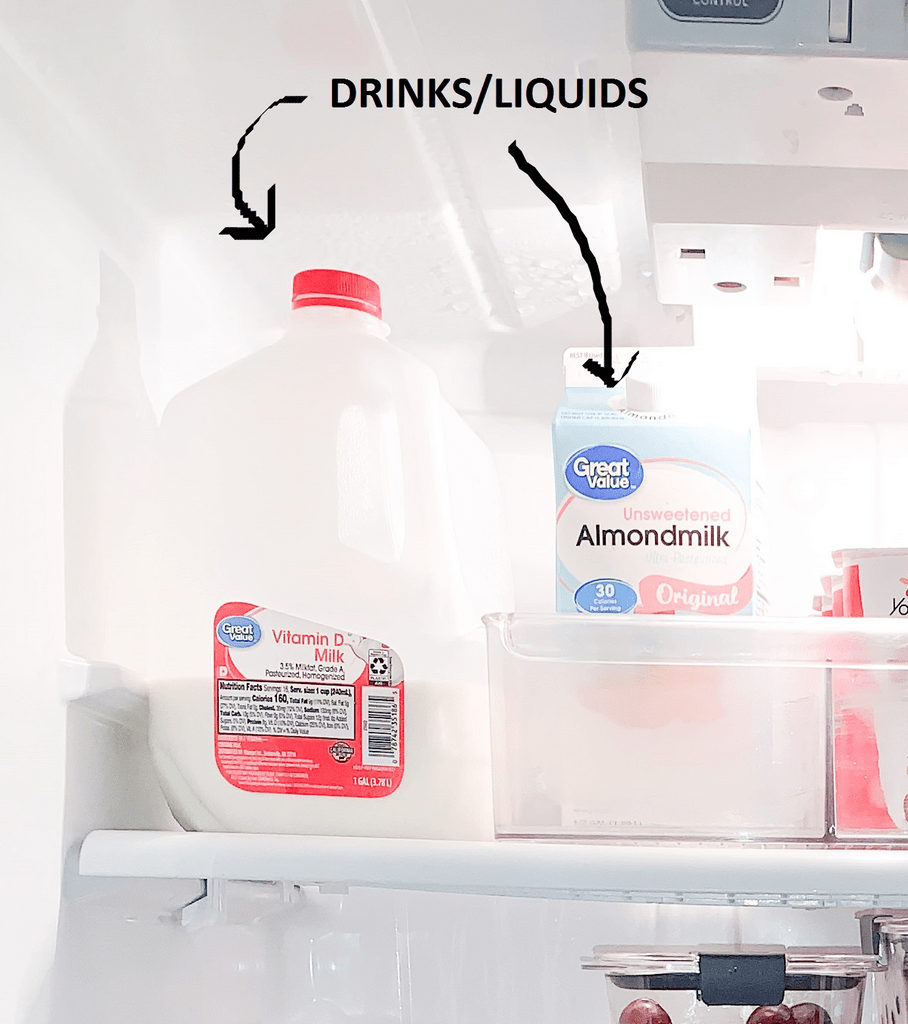
Zone 7 – Drinks, Liquids Etc.
I keep these on the top shelf of my refrigerator since these are tall items. And like everything else, I assigned a zone for drinks, too. So they are not just scattered all throughout the refrigerator.
We do not buy a lot of different drinks in our home as we try to drink mostly water. So usually we can fit them all in one area on the top shelf. We occasionally buy soda but that fits fine here too since we only refrigerate as we need them.
But if you have a small refrigerator like mine and buy drinks consistently, such as sodas, water bottles, sports drinks, and juices. I would suggest having an assigned area in your pantry where you can store the overage and only keep what fits inside the refrigerator and restock as needed.
And there you have it! I hope that showing you how I implement my small fridge organization tips and hacks in my own fridge will inspire you to do it in yours!
Small Fridge Organization | Products I used
Here are the products I use to organize our small fridge.
- Multi-Purpose Bin Translucent
- iDesign Linus Deep Divided Fridge Bin
- Rubbermaid Storage Containers
- Sharpie Poster-Paint Markers
- Freezer Bags
- Refrigerator Liner – I get mine at the dollar store
This Post Was All About Small Fridge Organization Tips And Hacks.
Other Posts You Might Like:

Nice post!
Thank you! Glad you liked it!