This post is all about how to organize games into bags and photo boxes.

Over the years, we have collected many games and puzzles in our home. Unfortunately, in the house we live in now, we do not have any closet storage other than the closets in the bedrooms. So, for years, we have stored all our games and puzzles in the kids’ closets. And while that worked for a while, it was no longer an option as we ran out of space.
Additionally, aside from the storage space issue, many of the game boxes were falling apart. Some games were missing the original box, while the box was too large for others. The pieces would roll around inside the boxes, making it hard to keep them organized. So, I had enough and started searching for puzzle and game organization ideas online.
I went on Pinterest and saw so many great game ideas. Still, ultimately, I decided to try zipper pouches after seeing how blueistyleblog.com used zipper pouches to organize jigsaw puzzles. I knew this was the solution I was looking for! That said, below are all the details of how I organized our games and puzzles, so if you decide to organize yours, you can see exactly how I did it.
This post is all about game organization into bags and photo boxes.
Best Game Organization Into Bags And Photo Boxes | The Steps
Table of Contents
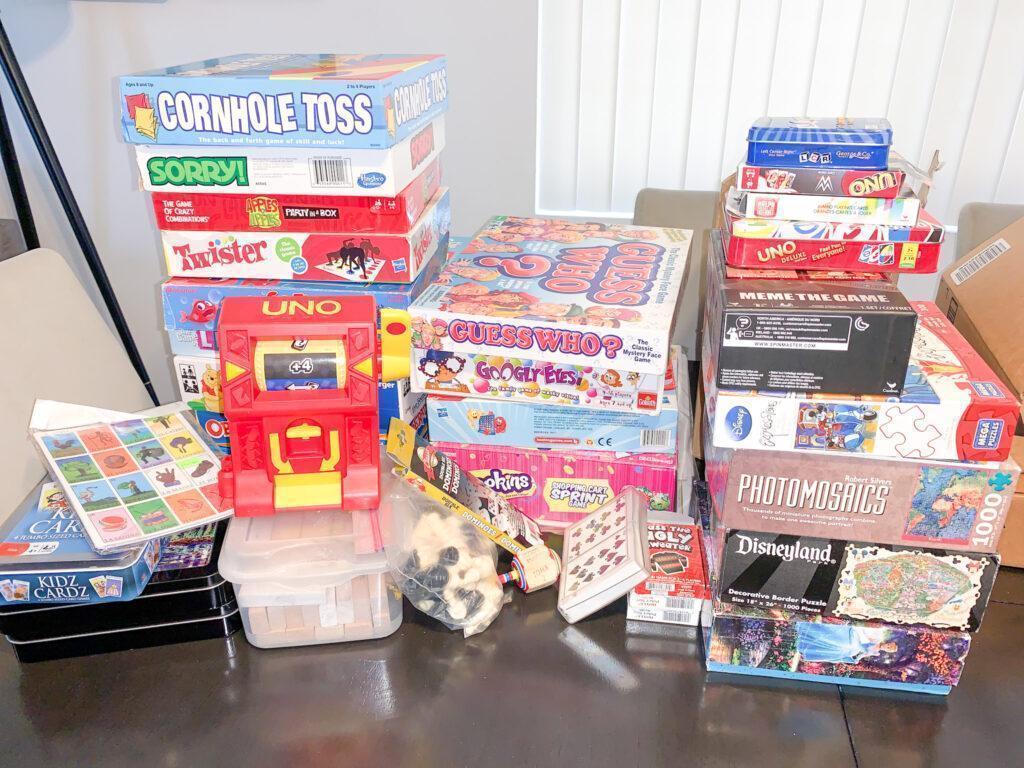
Step 1: Consolidate All Your Games And Puzzles In One Area
I recommend you gather ALL your games and puzzles from every room in your house. (I’m serious, ALL of them) And put them all in one area, such as your kitchen table. Don’t leave any board games, card games, or puzzles behind.
Step 2: Purge And Donate
PURGING is one of my favorite things to do when organizing or resetting a space in my home. It’s a perfect opportunity to reevaluate the things you have in your home. Make sure to only keep games/puzzles that you are actually using.
Don’t just keep games because you “might” play with them someday. If you haven’t played a game or used a puzzle in over a year, you will likely not play it again. Just donate it. Someone else will actually enjoy it instead of collecting dust in your closet. Trust me, you will feel SO much better. 🙂
Step 3: Take Inventory And Determine The Supplies Needed
This is very important. Don’t just go buying a ton of supplies and end up with not enough or too much. I recommend that, at the very least, you measure and estimate how much of each container, etc., you will need.
Lucky for you, though, most board games, game cards, puzzles, etc., are about the same size. So I have already done all the measuring. All you have to do now is figure out how many zipper pouches and photo boxes you would need for your games and puzzles.
Based on my experience, here is what I found worked best. Hopefully, this will help you determine what and how much you need from each product before tackling your game organization project.
LARGE BOARD GAMES
The best board game zipper pouch for games such as Monopoly, The Game of Life, Sorry, etc., these size A3 zipper pouches fit the large boards perfectly. Additionally, for the small pieces that come with these types of games, the smaller zipper pouches that come with this variety pack worked great!
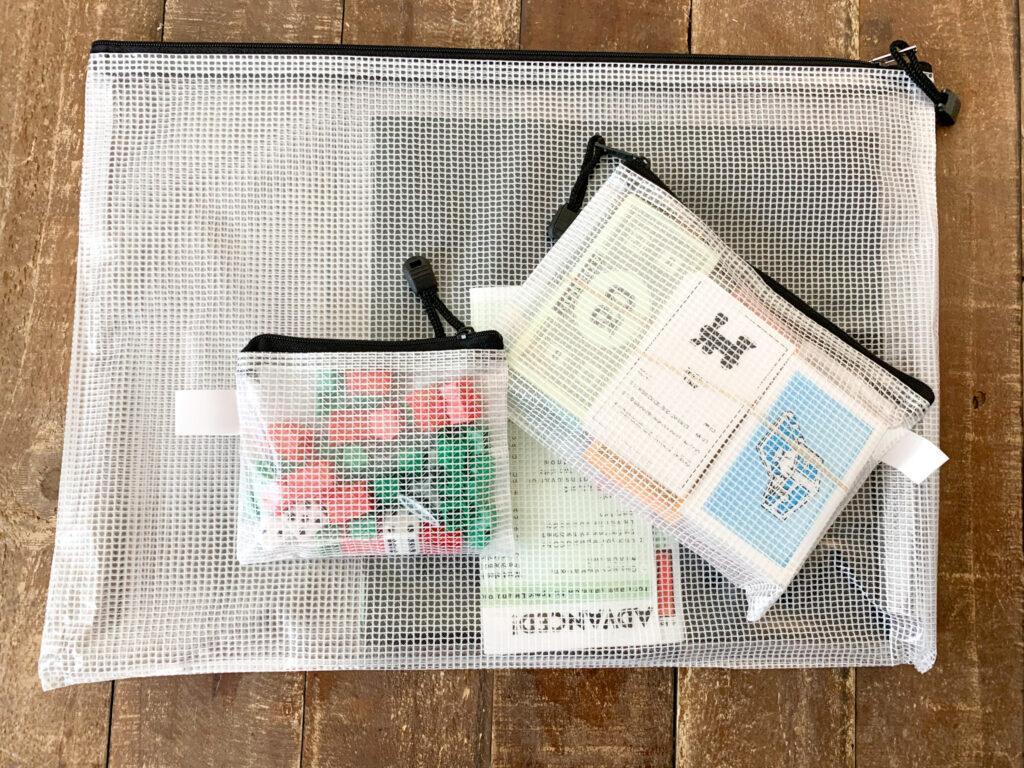
I also used rubber bands for cards and money that come with some of these types of games. The rubber bands work great, in my opinion. Especially because you can easily replace them if they break. But you can also use the same small pouches that come in the variety pack. Or a mix of both. It is totally up to your preference.
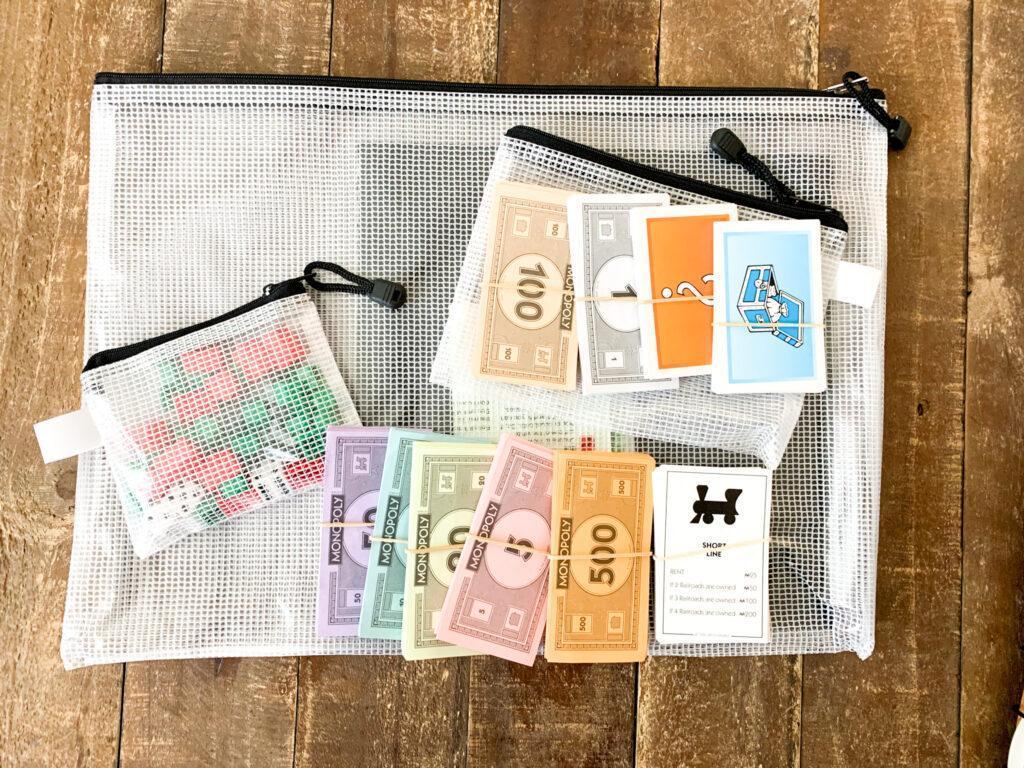
Here is what one game looks like complete. (This is the Monopoly)
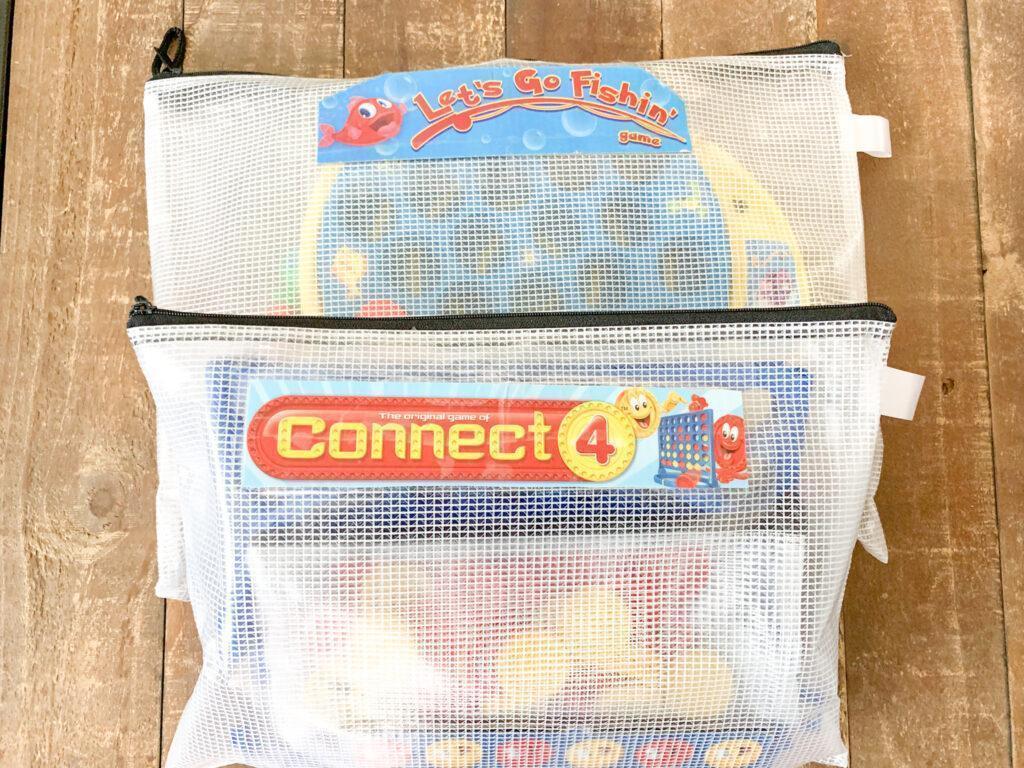
SMALL BOARD GAMES AND LARGE PUZZLES
The zipper pouches in A5 and B5 fit great for larger puzzles and smaller games. The two sizes come in various packs, but you can buy them individually here.

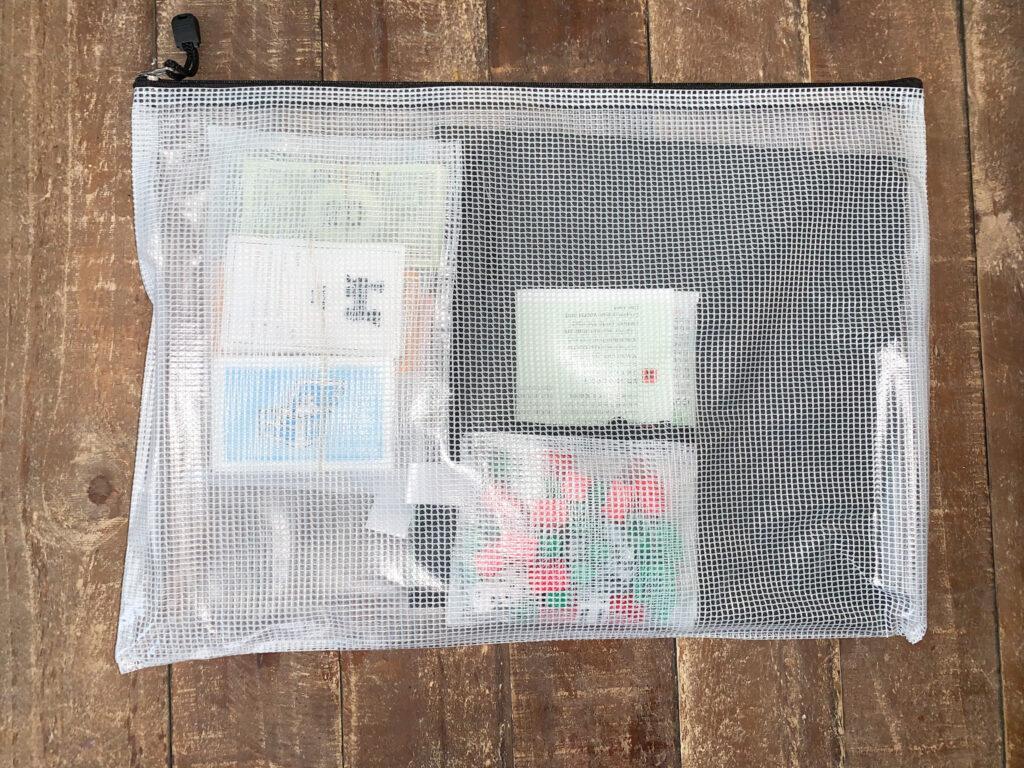
Also, like I showed you for the larger games, you can use the smaller zipper pouches from the variety pack and/or rubber bands for the smaller pieces, cards, etc. Then, place all those small zipper pouches inside the larger pouch with the board.
CARD GAMES AND SMALL PUZZLES
These photo boxes worked best for storing smaller puzzles (by smaller, I mean 30-40 puzzles or fewer) and card games. I also used rubber bands to secure the cards before putting them into the photo box.
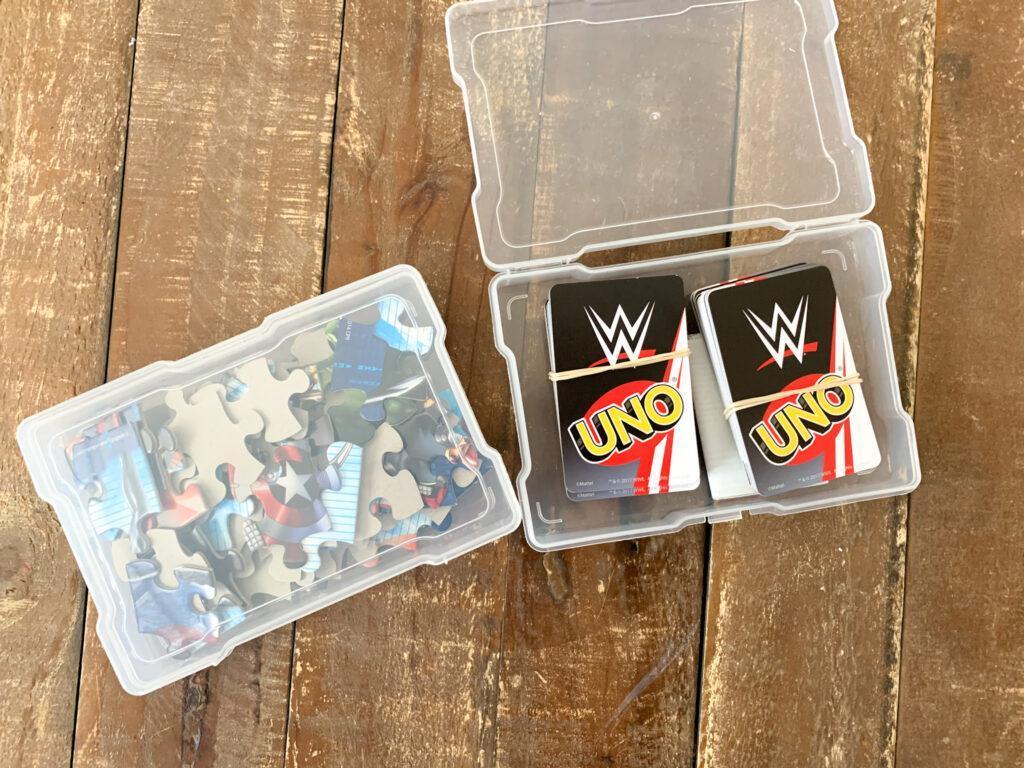
Okay, I think that pretty much covers all the types/sizes of games and puzzles you’ll come across. Anything else not mentioned should fit into any of the other zipper pouch sizes that come in the variety back and/or in the photo boxes. Don’t forget the rubber bands! Those come in handy a lot.
Note: Don’t forget to save the puzzle image so you can use it to refer back to when putting the puzzles together. I saved mine inside the zipper bag with its designated puzzle.
LABELS For Game Organization

Click Here To BUY Game Organization Editable Template
If you know me, you know this is my favorite part of organizing: labeling everything! It just makes everything look nice and put together. I LOVE it! Anyway, now that you have all your games and puzzles in their designated pouches or photo boxes, you’ll need to label your zipper pouches and photo boxes.
Now, there are MANY ways to label. But here is the way I labeled mine.
At first, I started cutting out the game names from the boxes and applying them to the front of the zipper pouch and photo boxes using packing tape.
But in the end, I made my own labels and relabeled everything with these labels instead. I was missing many boxes, so I did not have all the boxes to cut out labels from the original boxes. So, to keep it all uniform, I made my own matching labels for everything. But using the cardboard and cutting out the game’s name is a great option, too.
Here is how it looks labeled with the box cutout.
Here is how it looks with the labels I made. I just like the cleaner look.
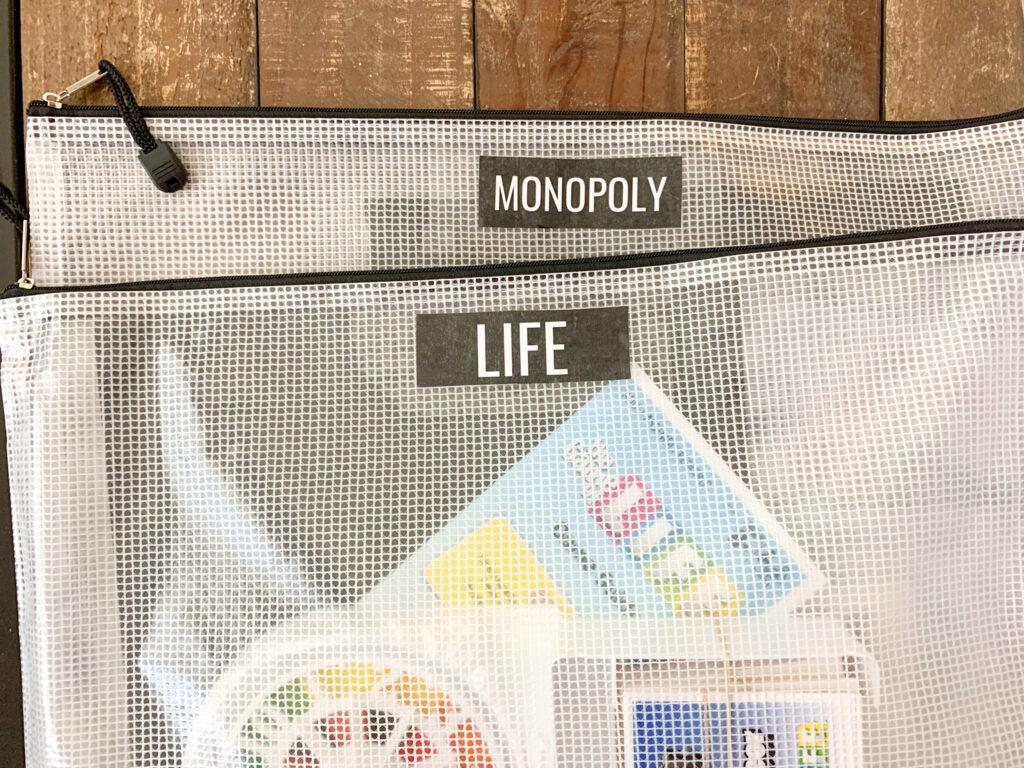
Another way to label is, well, the obvious way, with a label maker. But if you don’t have a label maker and/or you don’t have all the game boxes, you can download the FREE labels I’ve linked below.
I googled a list of popular games and included them all in the download. I’m sure I am missing many, so feel free to comment below if any of the ones you need are missing; I’ll be more than happy to update the download.
Step 4: Purchase Supplies & Organize
Now that you know what products would fit your games and the sizes you’ll need, you can order and organize your games!
Here is a full list linking to the exact products I used.
- Zipper Pouches – Variety Pack. You can also get specific sizes here.
- Large Zipper Pouches (A3)—These are the best board game bags for games with large boards, such as Monopoly and Checkers.
- Packing Tape – To apply labels. (if you are using a label maker, you won’t need this)
- Rubber Bands—I got mine at Dollar Tree and recommend getting them there. They have a variety-size pack that works perfectly for this project.
- Photo Boxes.
- Large Storage Container—This is not necessary. This is just the one I used. Make sure to get one that is at least 17.5 or 18 inches wide so that all your games fit.
- Narrow Storage Container—This is not necessary. It is just an option. I used this one to store the photo boxes.
- Labels.
- Scissors.
Update: I recently came across these zipper pouches. They have several sizes, the largest one being 23 X 31. They are a great option for those of you with larger games that don’t fit into the size A3 I mentioned above.
And here is the end result! I used these containers, which I had on hand already, to “file” all the games. All three containers are from The Container Store.
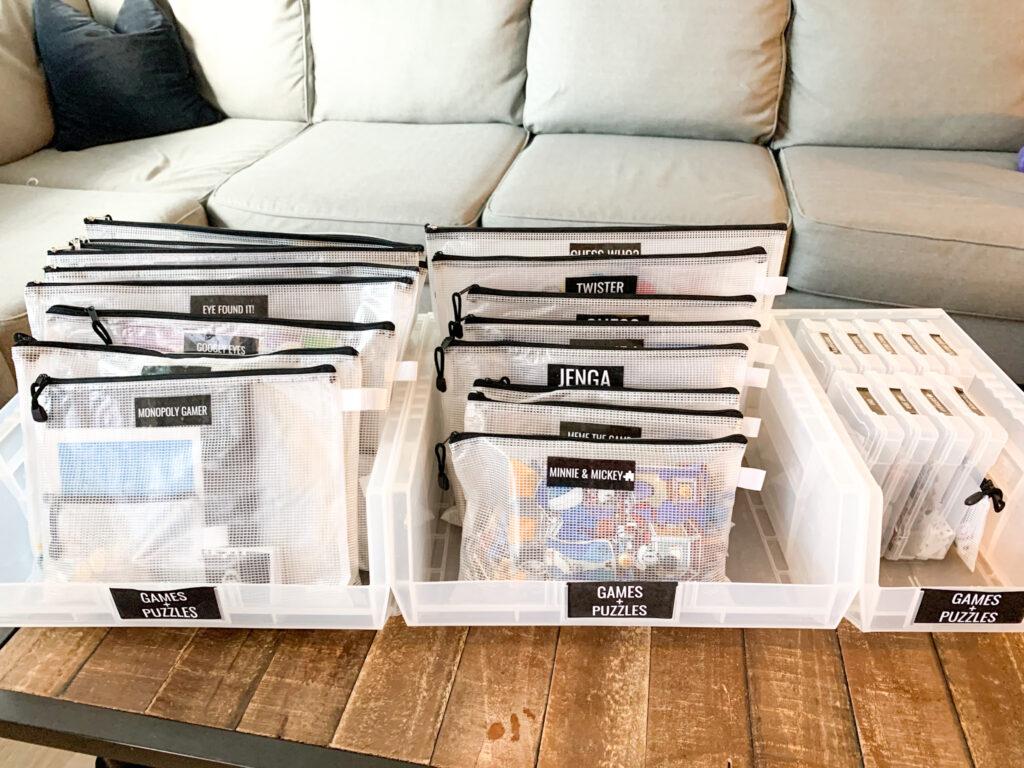
Isn’t it crazy? I love how everything turned out and am so excited about all the storage space this will save us! If, after reading this, you decide to start organizing board games in bags, below are the labels I used, which you can download for free!
Game Organization Into Bags And Photo Boxes | Free Labels To Print
Printing and application instructions: You should be able to print on regular 8.5 X 11 printer paper. You can also use packing tape to attach the labels to the zipper pouches and/or photo boxes.
Due to popular demand, we have added these game organization labels to our shop; you can now purchase the game organization template and make any edits you need to make! Enjoy!
Click Here To BUY Game Organization Editable Template
What do you think? Are you giving this a try?
If you do, make sure to come back and tell me all about it! I also have a story highlight on my Instagram account where you can watch how I tackled this project. (in case you are more of a visual person)
This post was all about game organization into bags and photo boxes.
Other Posts You Might Like:
What do you do with the instructions for these games or the reference pictures for the puzzles?
Hi Denise!
I put the instruction in the zipper pouch as well. And as for the puzzles, I cut out the image from the box and put it in the zipper bag along with the puzzle. (you can tape it to the outside of the zipper pouch if you want to) Also, some puzzles come with a poster of the puzzle image, so for those I keep the poster instead of cutting out the puzzle image from the box.
Hello Jessica! I was wondering if you would consider selling this resource and making it editable? I have an entire closet full of board games and love this label system but wouldn’t want you to have to type them all up!
That’s a great idea! When I first posted the labels, I had no clue how many people would actually reach out for edits to add additional games to the list, so I didn’t bother making editable. But this is definitely going on my to-do list this week or next. Thank you so much for the suggestion. 🙂
Thank you! I am looking forward to seeing your resource, and getting my entire game closet organized this summer!! Thanks again!!
Hello! Will the labels be in a new post? Or will this post be updated?
Thanks!
Hi Taylor! Sorry for the delay. I have added the option to edit the labels. It’s in the same post. Just scroll all the way to the bottom.
Hey, I saw comments that this resource would be updated to be editable. I was looking, but don’t see it. I have some games in my classroom that have more unique names that I’d love to be able to have these labels for. Thanks for all of your help! I love this post!
Hi Ashleigh! I have just added the option today. Scroll all the way to the bottom of the page. Thank you!
Hi! I can not find the editable link for Canva. Please help!
Hi Regina, you have to scroll all the way to the bottom. And it will prompt you to provide an email.
What do you do with games that have bigger parts to them? I have younger kids so we have games like don’t break the ice, ants in the pants, a dinosaur game where the bones hook on, operation?? basically games that aren’t really board games. How do you store those bigger pieces?
Games like the break the ice should fit in the largest pouches linked. It would just be a little bulky, instead of flat.
Games like operations, I would either leave in the original box if still in good condition OR put all the small pieces in one of the smaller zipper pouches and leave the bigger piece separate. Just store them in the same area as the rest of the games, such as in a basket or container as I show in this post.
And ants in the pants, I would leave it in the original box too if still in good condition. Otherwise I would use those clear shoe containers that are sold at Walmart, Target or the container store. I believe they are the 6qrt size. And then label it the same way as the zipper pouches. Hopes this helps.
What do you do with the actual boards? Mine are too large to fit into the bags.
What games specifically? The largest board I have are from games such as monopoly and The Game of life. And the largest bag (size a 3) fit them perfectly.
A lot of older versions of board games the boards only fold in half not into a square so they are long rectangle the length of the box I have several of these as they were games we kept from when I was a kid. Like several versions of monopoly, Candy Land, Parchesi, Eureka. They would be longer then letter or A4 sized pounches.
If the board doesn’t fit, I would just leave those in the original box if the box is still good. Or I would put the board right behind the corresponding pouch stored in a basket/container.
I also linked larger pouches I found on Amazon they should be linked under supplies. They might work for these larger boards, however check sizing before buying.
Search (PRO ART PRO-7215H Mesh/Vinyl Bag with Handle and Zipper, 19 by 25-Inch) on Amazon. For the larger pouches I have been able to find.
Ok, you saved mE. I was about to speND a small fortune on sterilite boxes to deal with all the board games. Thank you!! I’D love to use the labels you created, but i’ve got about 2 dozen games that aren’t listed! 😂
Hey! Yay! I’m glad you found this helpful! Send me the list of game names you need to my email [email protected] and I will gladly add them and forward you an updated version. 🙂