This post is all about how to DIY dresser drawer dividers with hobby board and adhesive tabs. Super easy project and even better it’s super budget-friendly. You do not have to spend an arm and a leg to get your dresser drawers organized.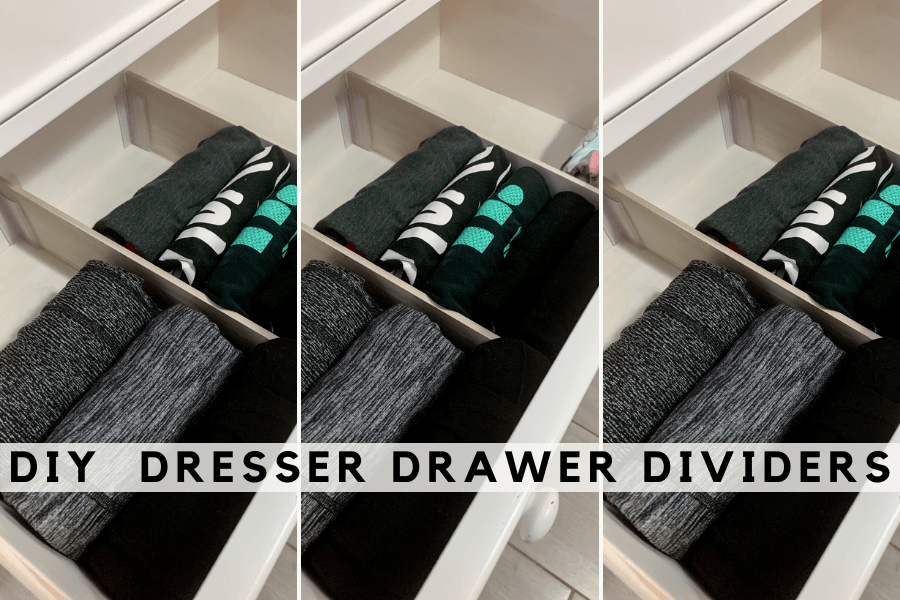
For a while now, I have been one click away from buying adjustable drawer dividers more times than I like to admit. I’d put them in my cart then change my mind every time I’d see the total! The cost can add up real fast with those.
So when I saw Monica over @house.of.esperanza build DIY drawer dividers for her kitchen drawer, I was inspired by her to try and DIY dresser drawer dividers for my kids’ dresser drawers.
Inspired by @house.of.esperanza drawer dividers and a few tweaks, here is how they turned and I have to say, I am pretty impressed with myself! Ha-ha! Seriously, I am so happy with the way they turned out.
This post is all about how to DIY dresser drawer dividers.
From the beginning, my goal was to make the drawer dividers adjustable. Similar to the adjustable dividers sold online and in many stores but without the price tag!
So because I wanted the dividers adjustable, I did not want to use wood glue. So I searched and searched for a different way to attach the dividers to the drawers, and I came across these adhesive tabs. And BOOM, I knew I had found the solution to my problems!
With these adhesive tabs, I could attach the dividers to the drawers with no damage at all. And if I ever wanted to move them or take them off, the adhesive tab is super easy to remove.
It’s safe to say that I am so happy I never pulled the trigger on those expensive drawer dividers.
Okay so enough about me, here is how you can do them yourself!
The easiest way to DIY dresser drawer dividers
Supply list:
- Hobby Board – I used “poplar hobby board” from The Home Depot. Mine are size 0.25 x 3.5 IN x 4 FT. But you want to measure your drawers to see what size would fit your specific drawers.
- Adhesive tabs – It is a 24 pack and you can get as many packs as you need. (Update: Original product sometimes becomes unavailable so here is a similar product here)
- Mitre Box with Saw– Mine is this one from The Home Depot. But here is another one from Amazon too.
- Measuring Tape
- Sandpaper
- Pencil
Step-by-step
Step 1- Prepare the drawers
The first thing you want to do is empty the drawer you will be starting with. Then pull the drawer out if you can and vacuum it, then wipe it clean. Pulling the drawer out makes it easier to work with.
Tip: If you want extra cuteness, you can also add contact paper to the bottoms of each drawer.
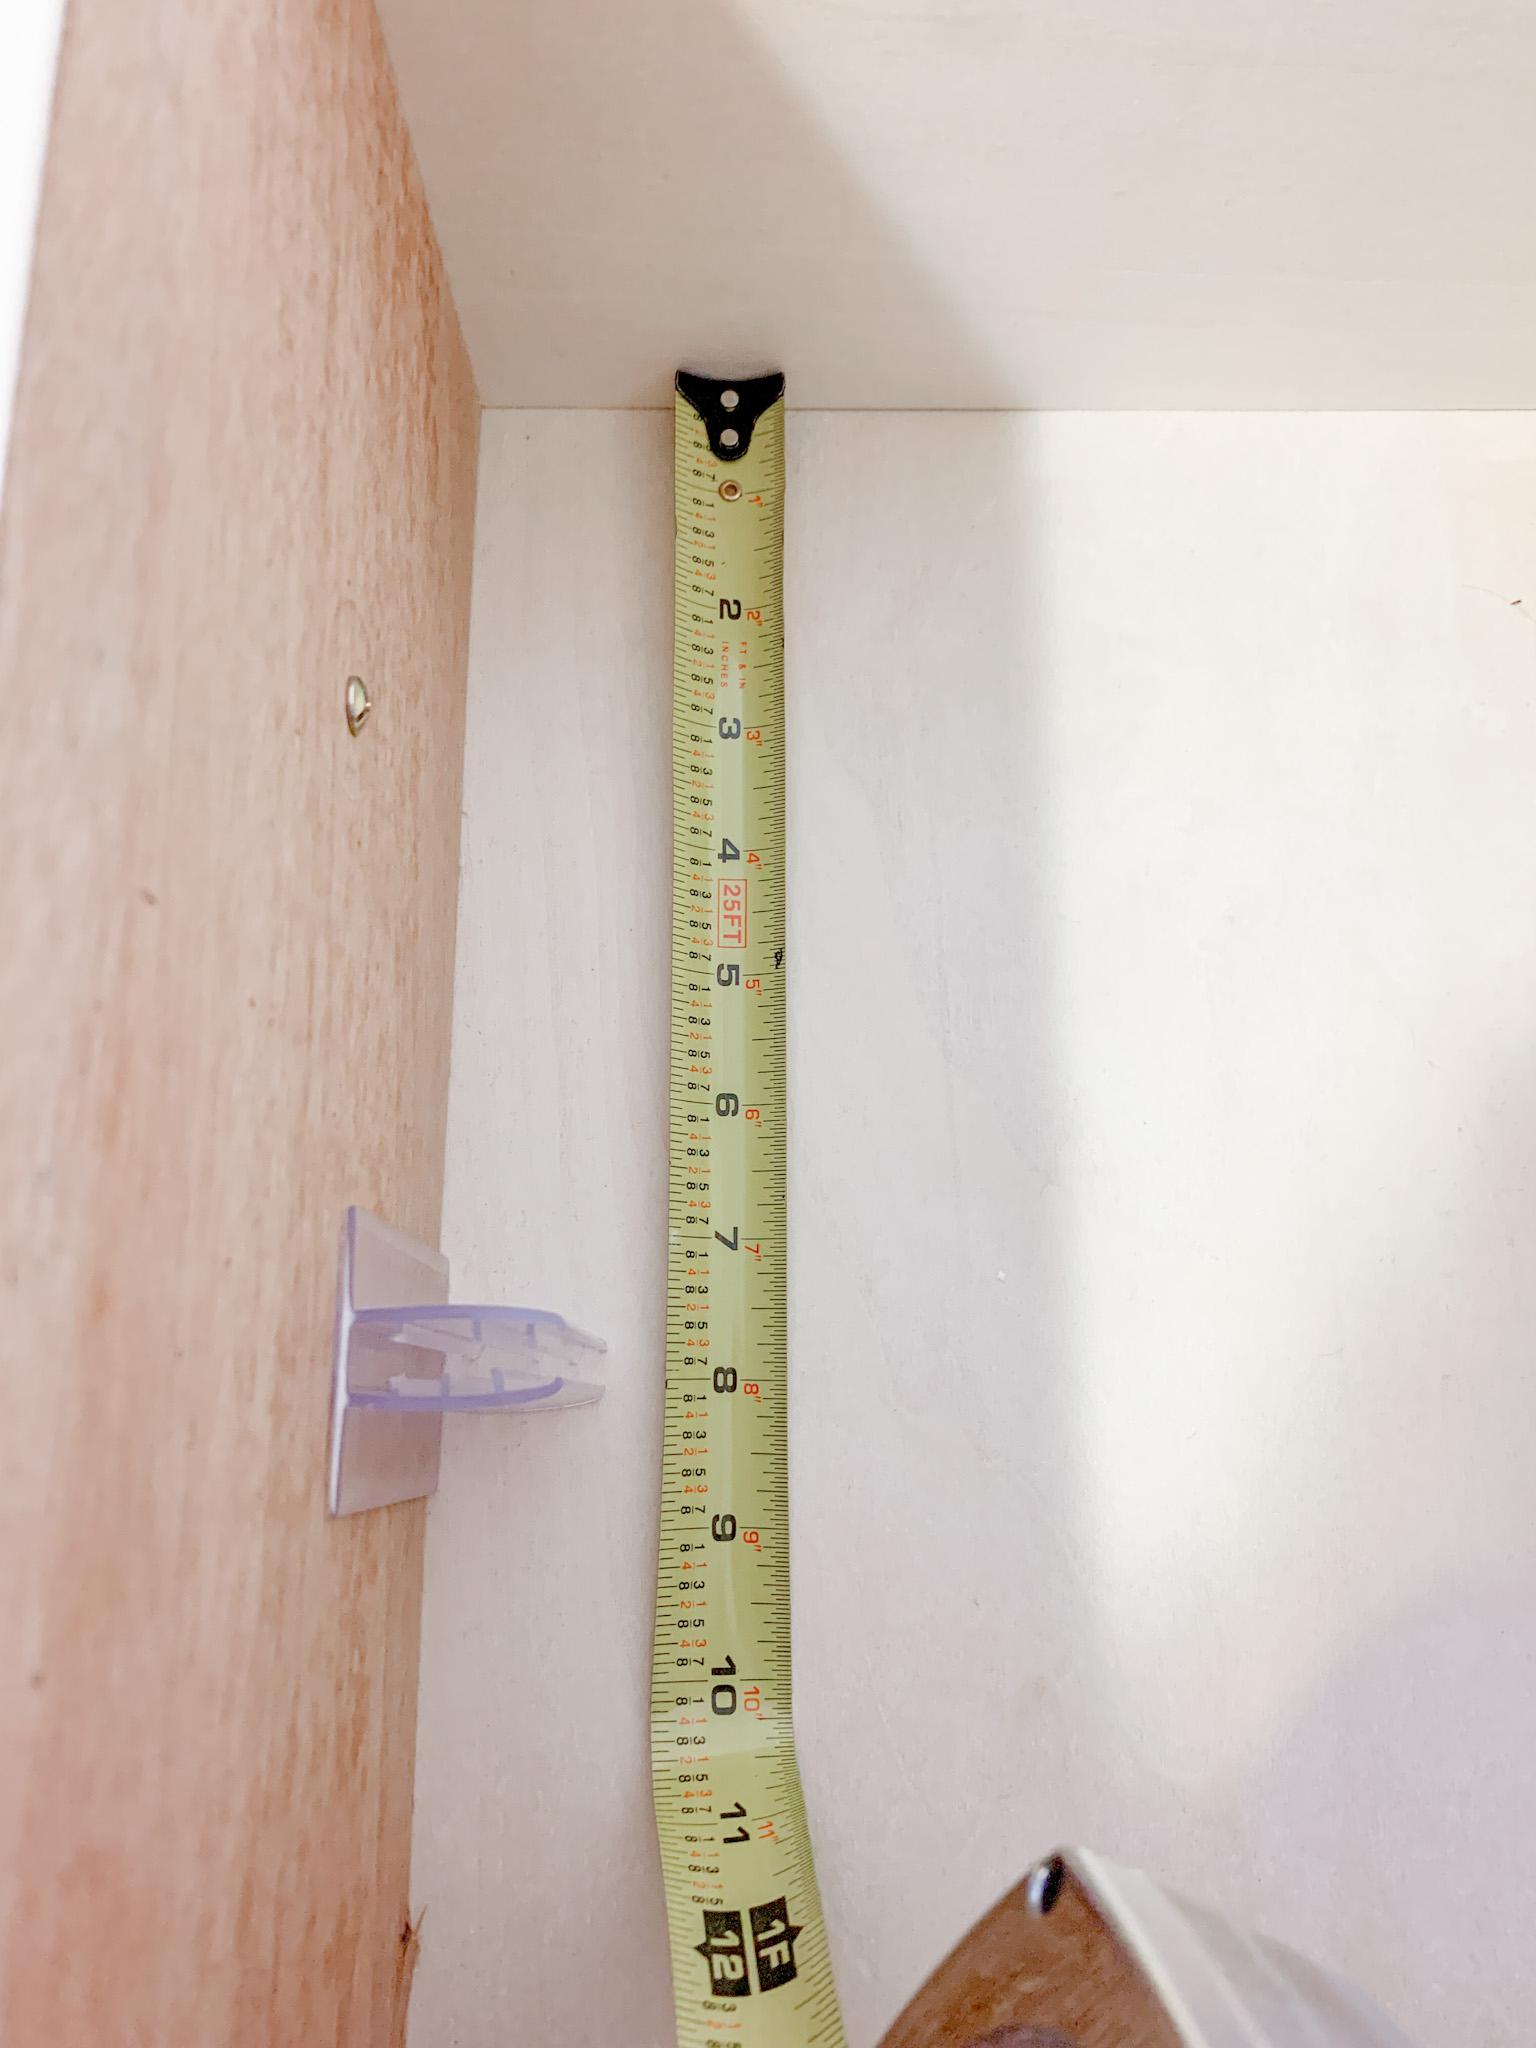
Step 2 – Measure the drawers and apply adhesive tabs
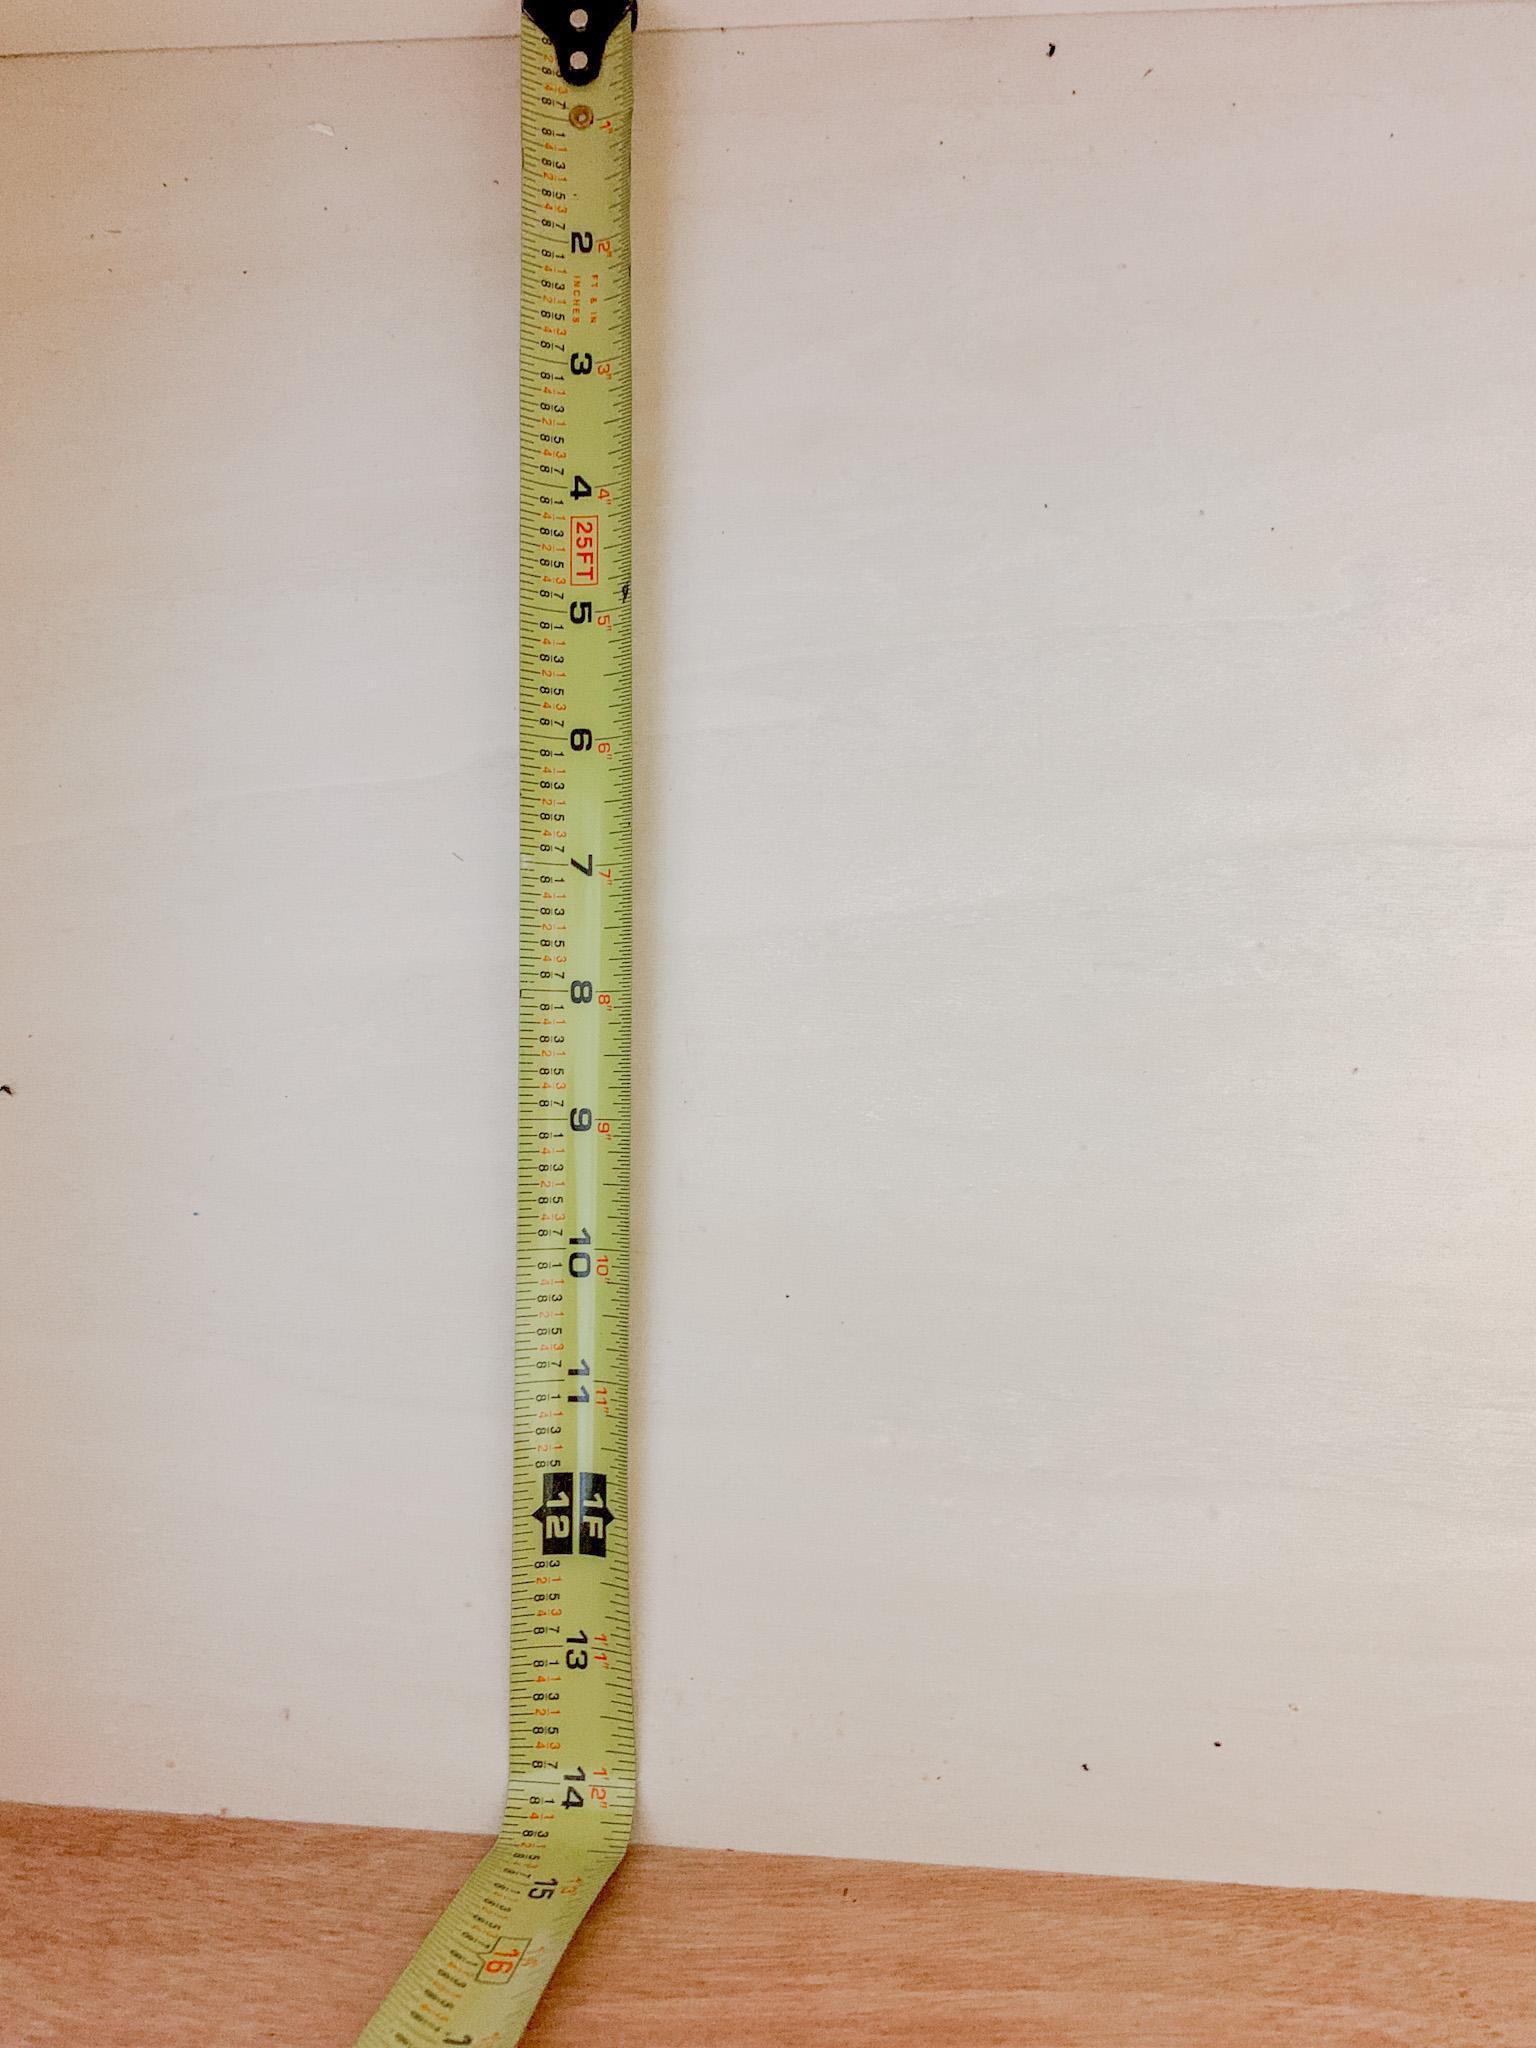
You want to measure based on what direction you want the board dividers to sit on the drawers.
For example, I measured the depth of mine to know what size to cut my boards because I wanted my dividers to go front-to-back.
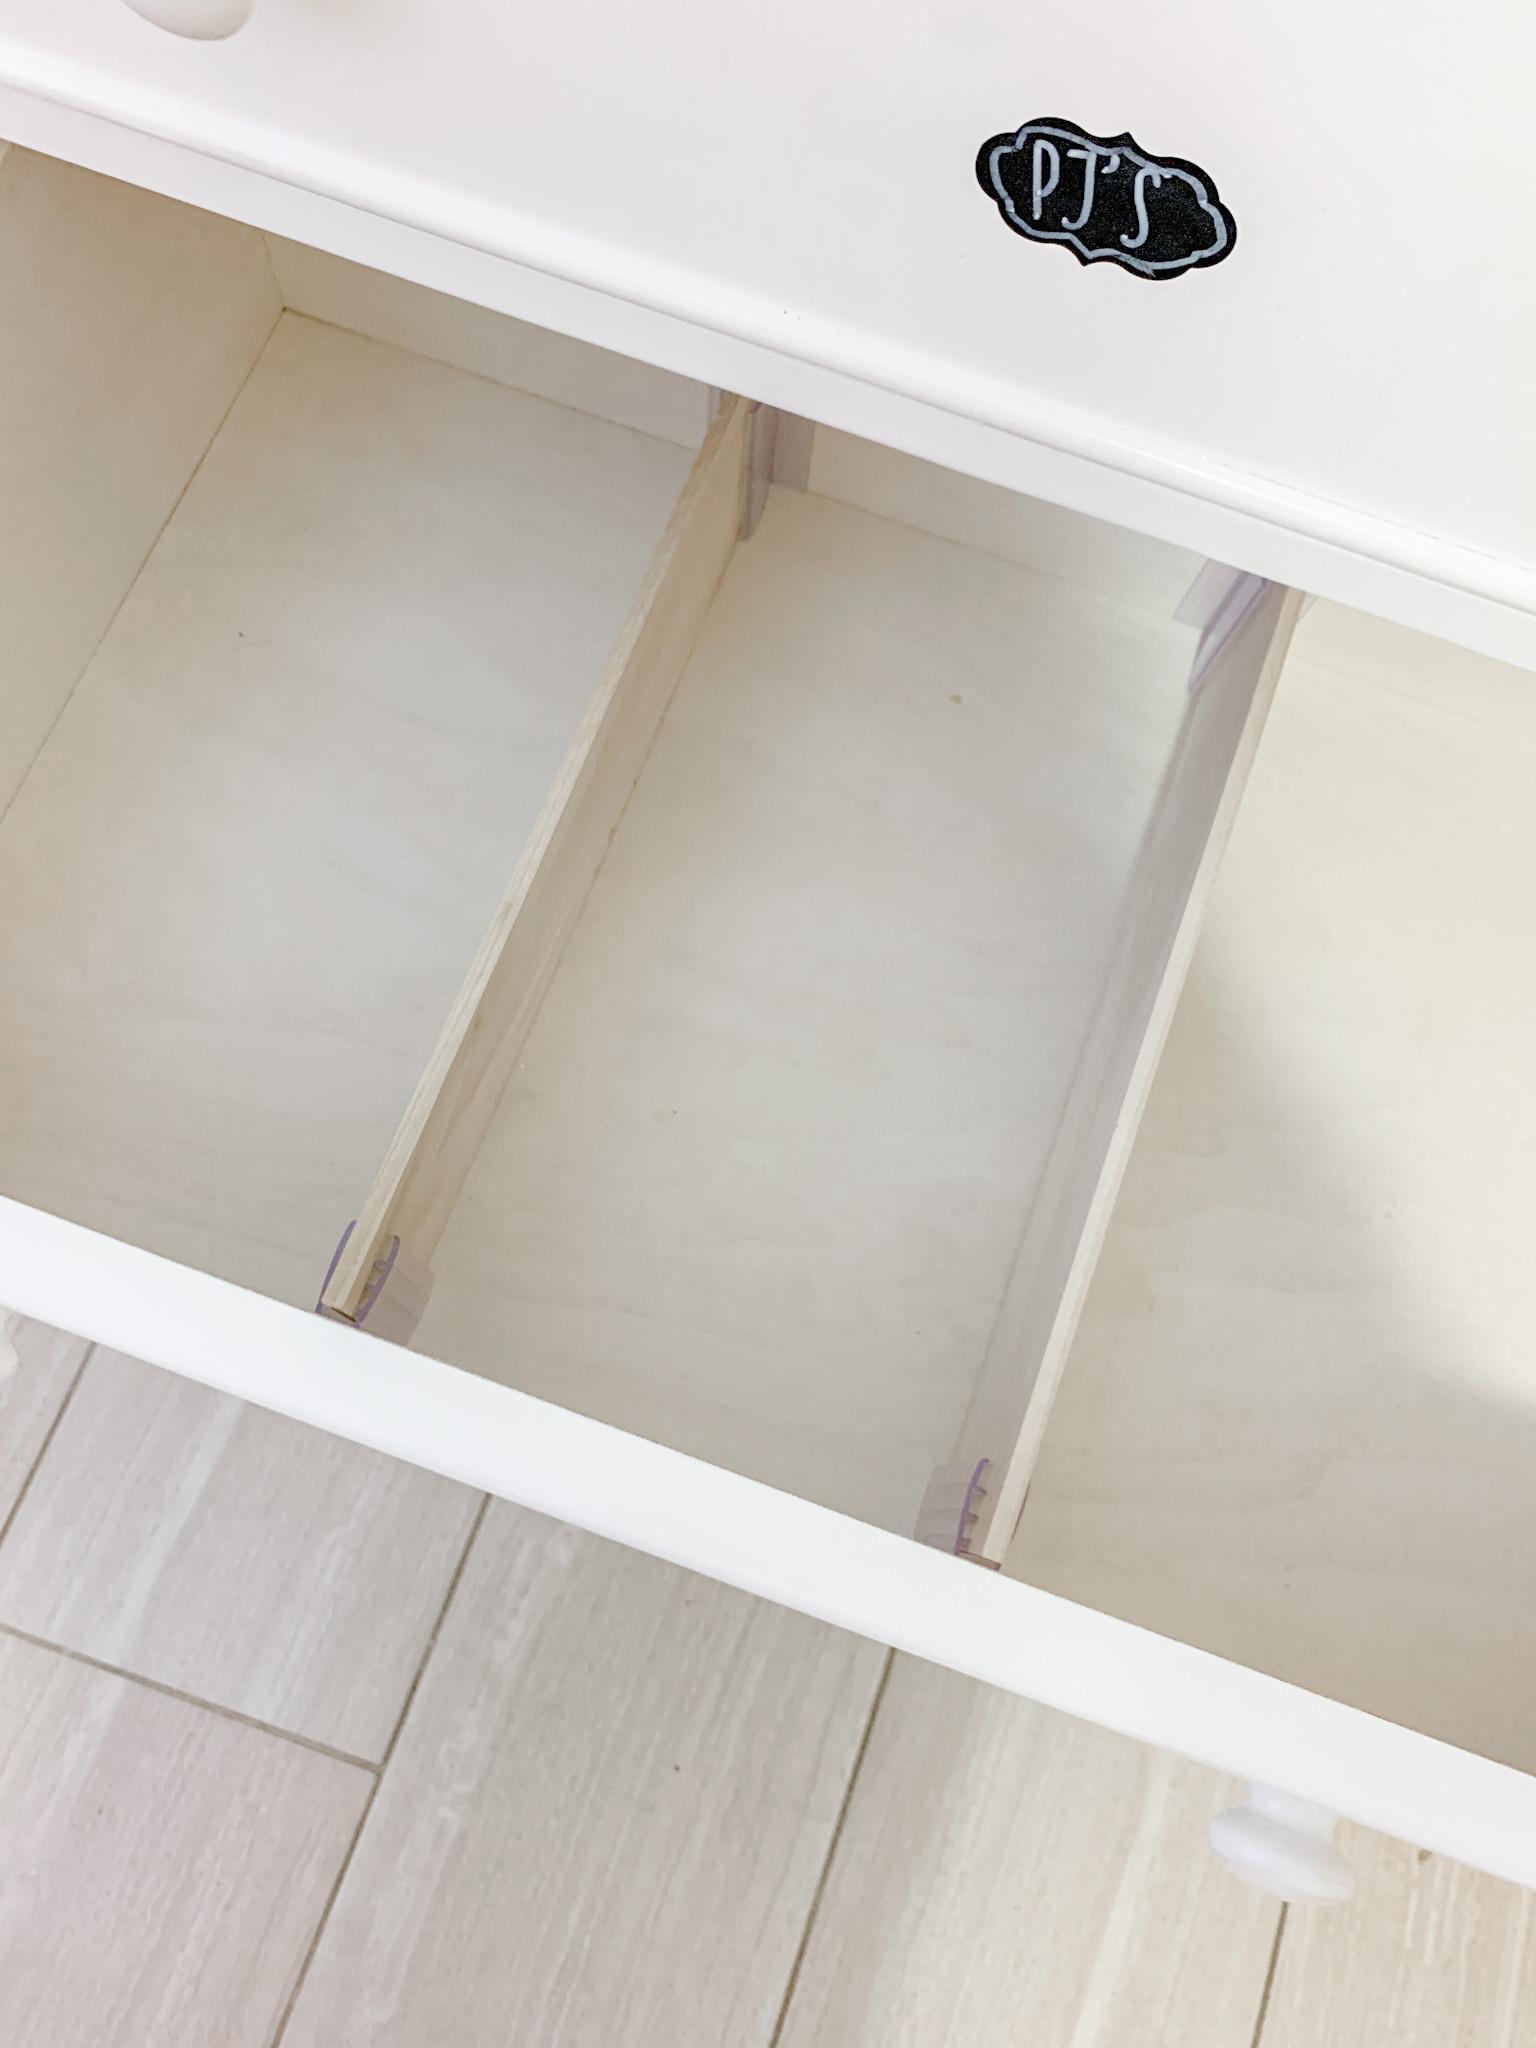
Then I measured the width to see how many board dividers id be able to fit into each drawer. With my drawers, I could add two dividers per drawer, giving me three sections.
Then with a pencil, lightly mark exactly where the board dividers will go inside the drawer and apply the adhesive tabs in place.
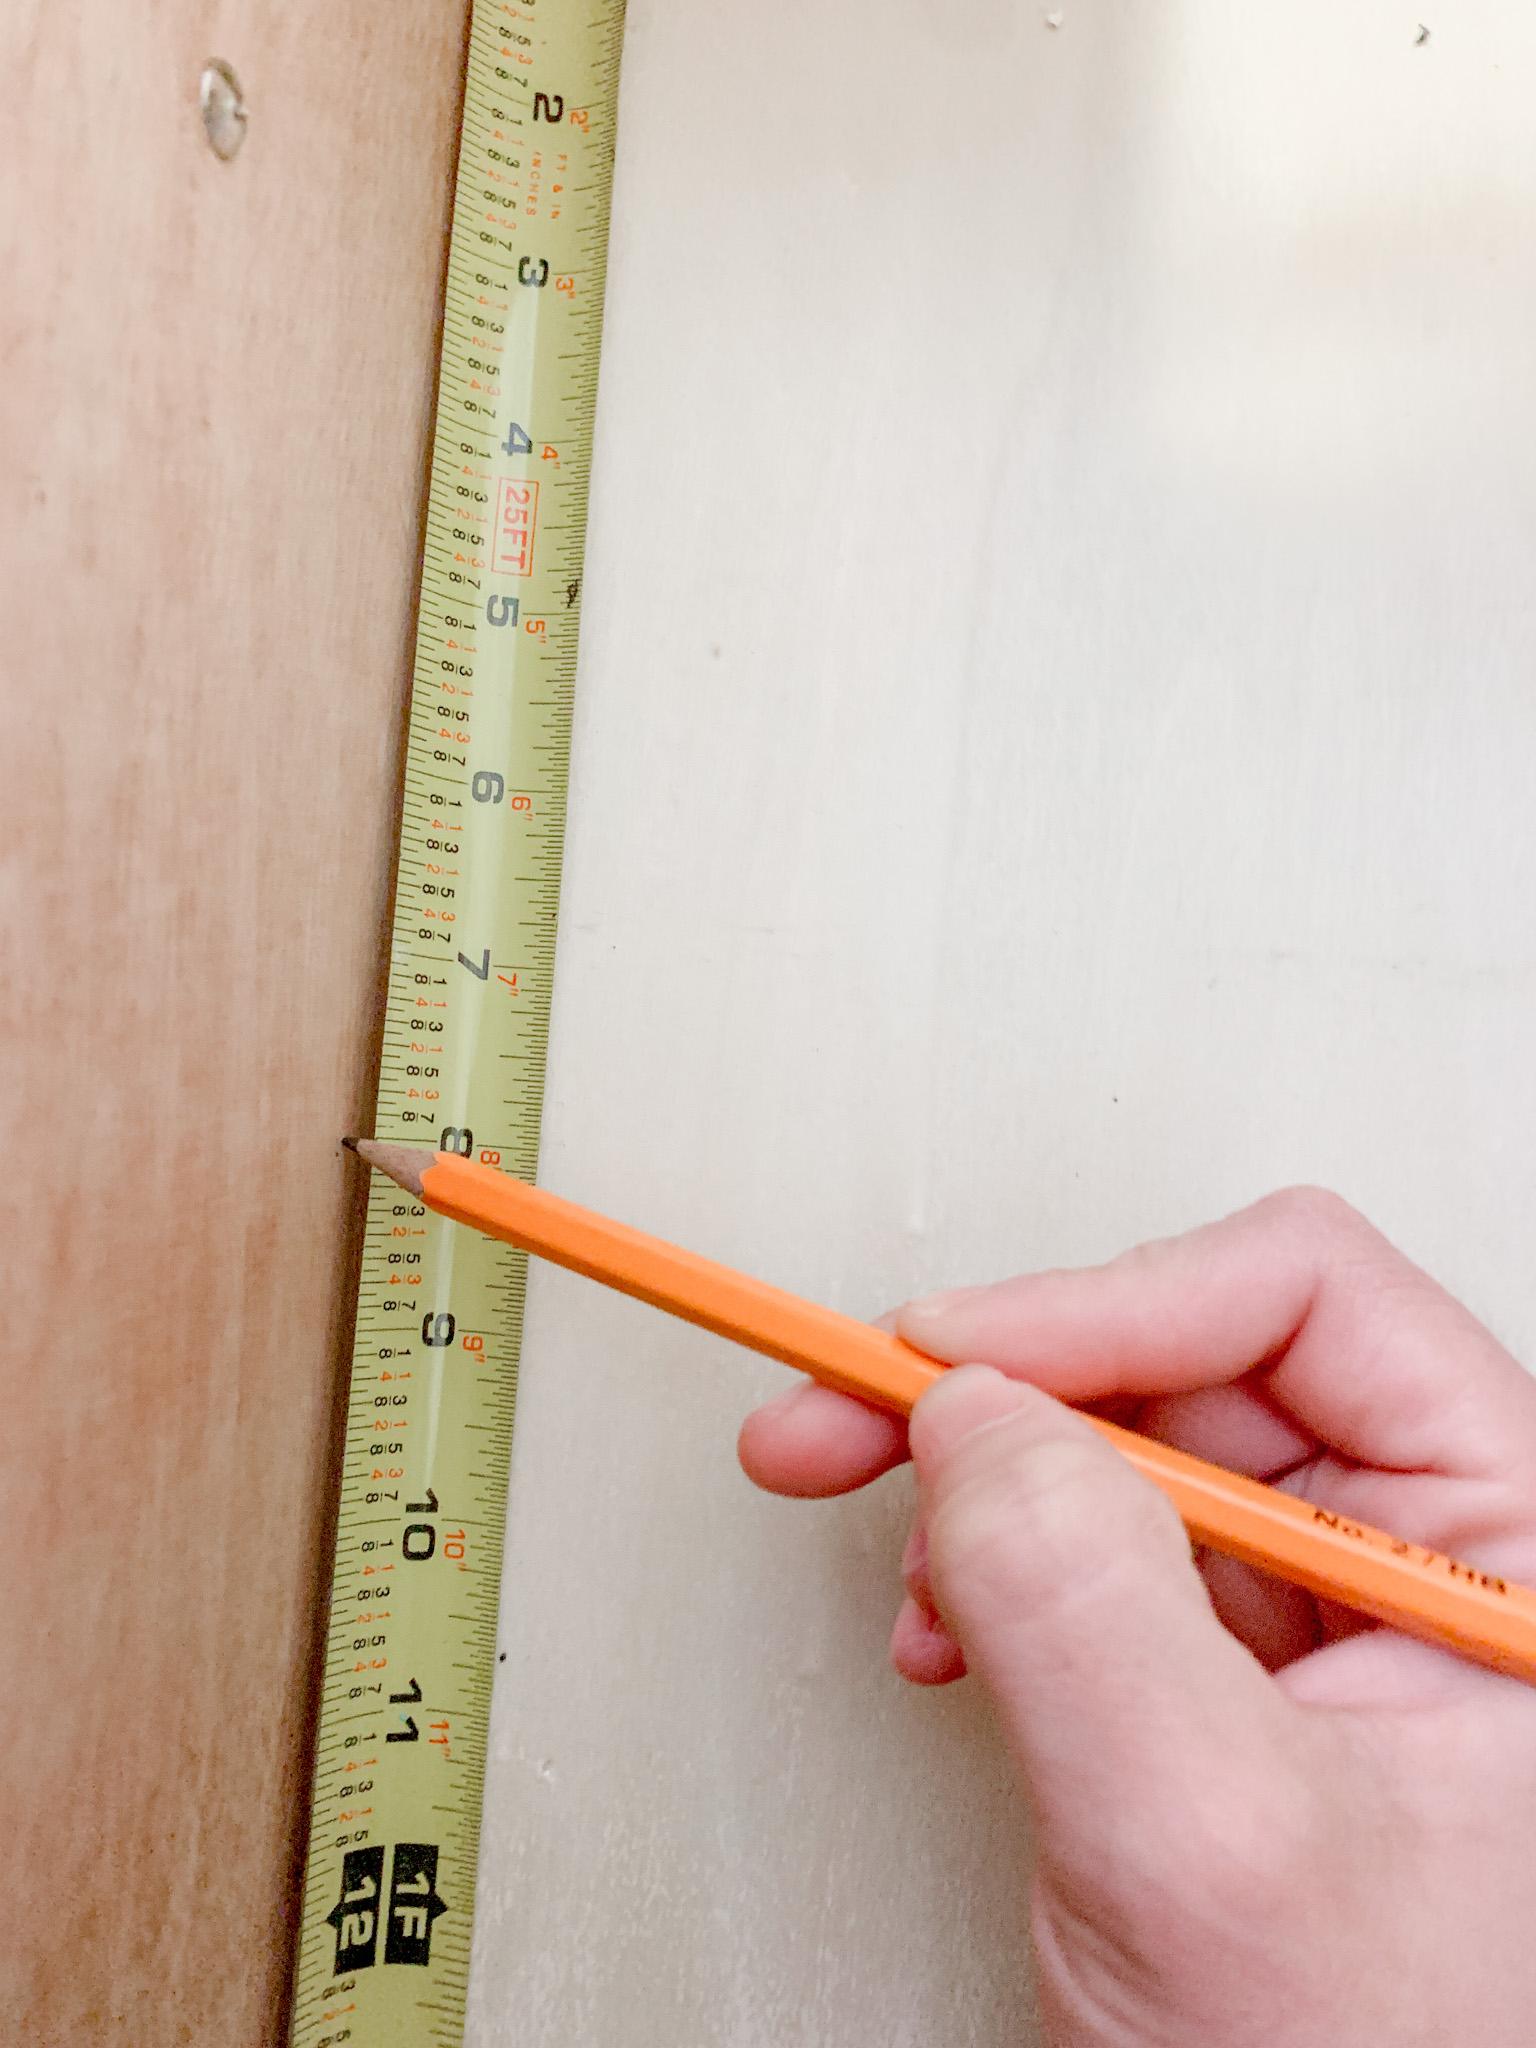
Step 3 – Measure, cut, and sand the boards.
Measure and mark the boards based on the measurement of your drawers to know what size to cut them.
I cut mine with the Mitre Box and Saw. But you can use whatever cutting tool you have for this purpose OR you can also get them cut at your local hardware store. I know The Home Depot by my house has this service, but first double-check that your does too before going.

Once you cut the boards, you may need to give them a light sanding where you made the cut. You do not need a sander for this, you can just use sandpaper.
Tip: You can stain or paint the boards if they don’t match your drawer color and/or you prefer a certain color.
Step 4 – Check if the board fits and insert it in place.
Since you have already stuck all the adhesives tabs in place earlier, now you can easily just slide the board through the top opening of the adhesive tab on both sides. If for any reason the board is off in size, make the necessary adjustments until it all fits nice and snug.
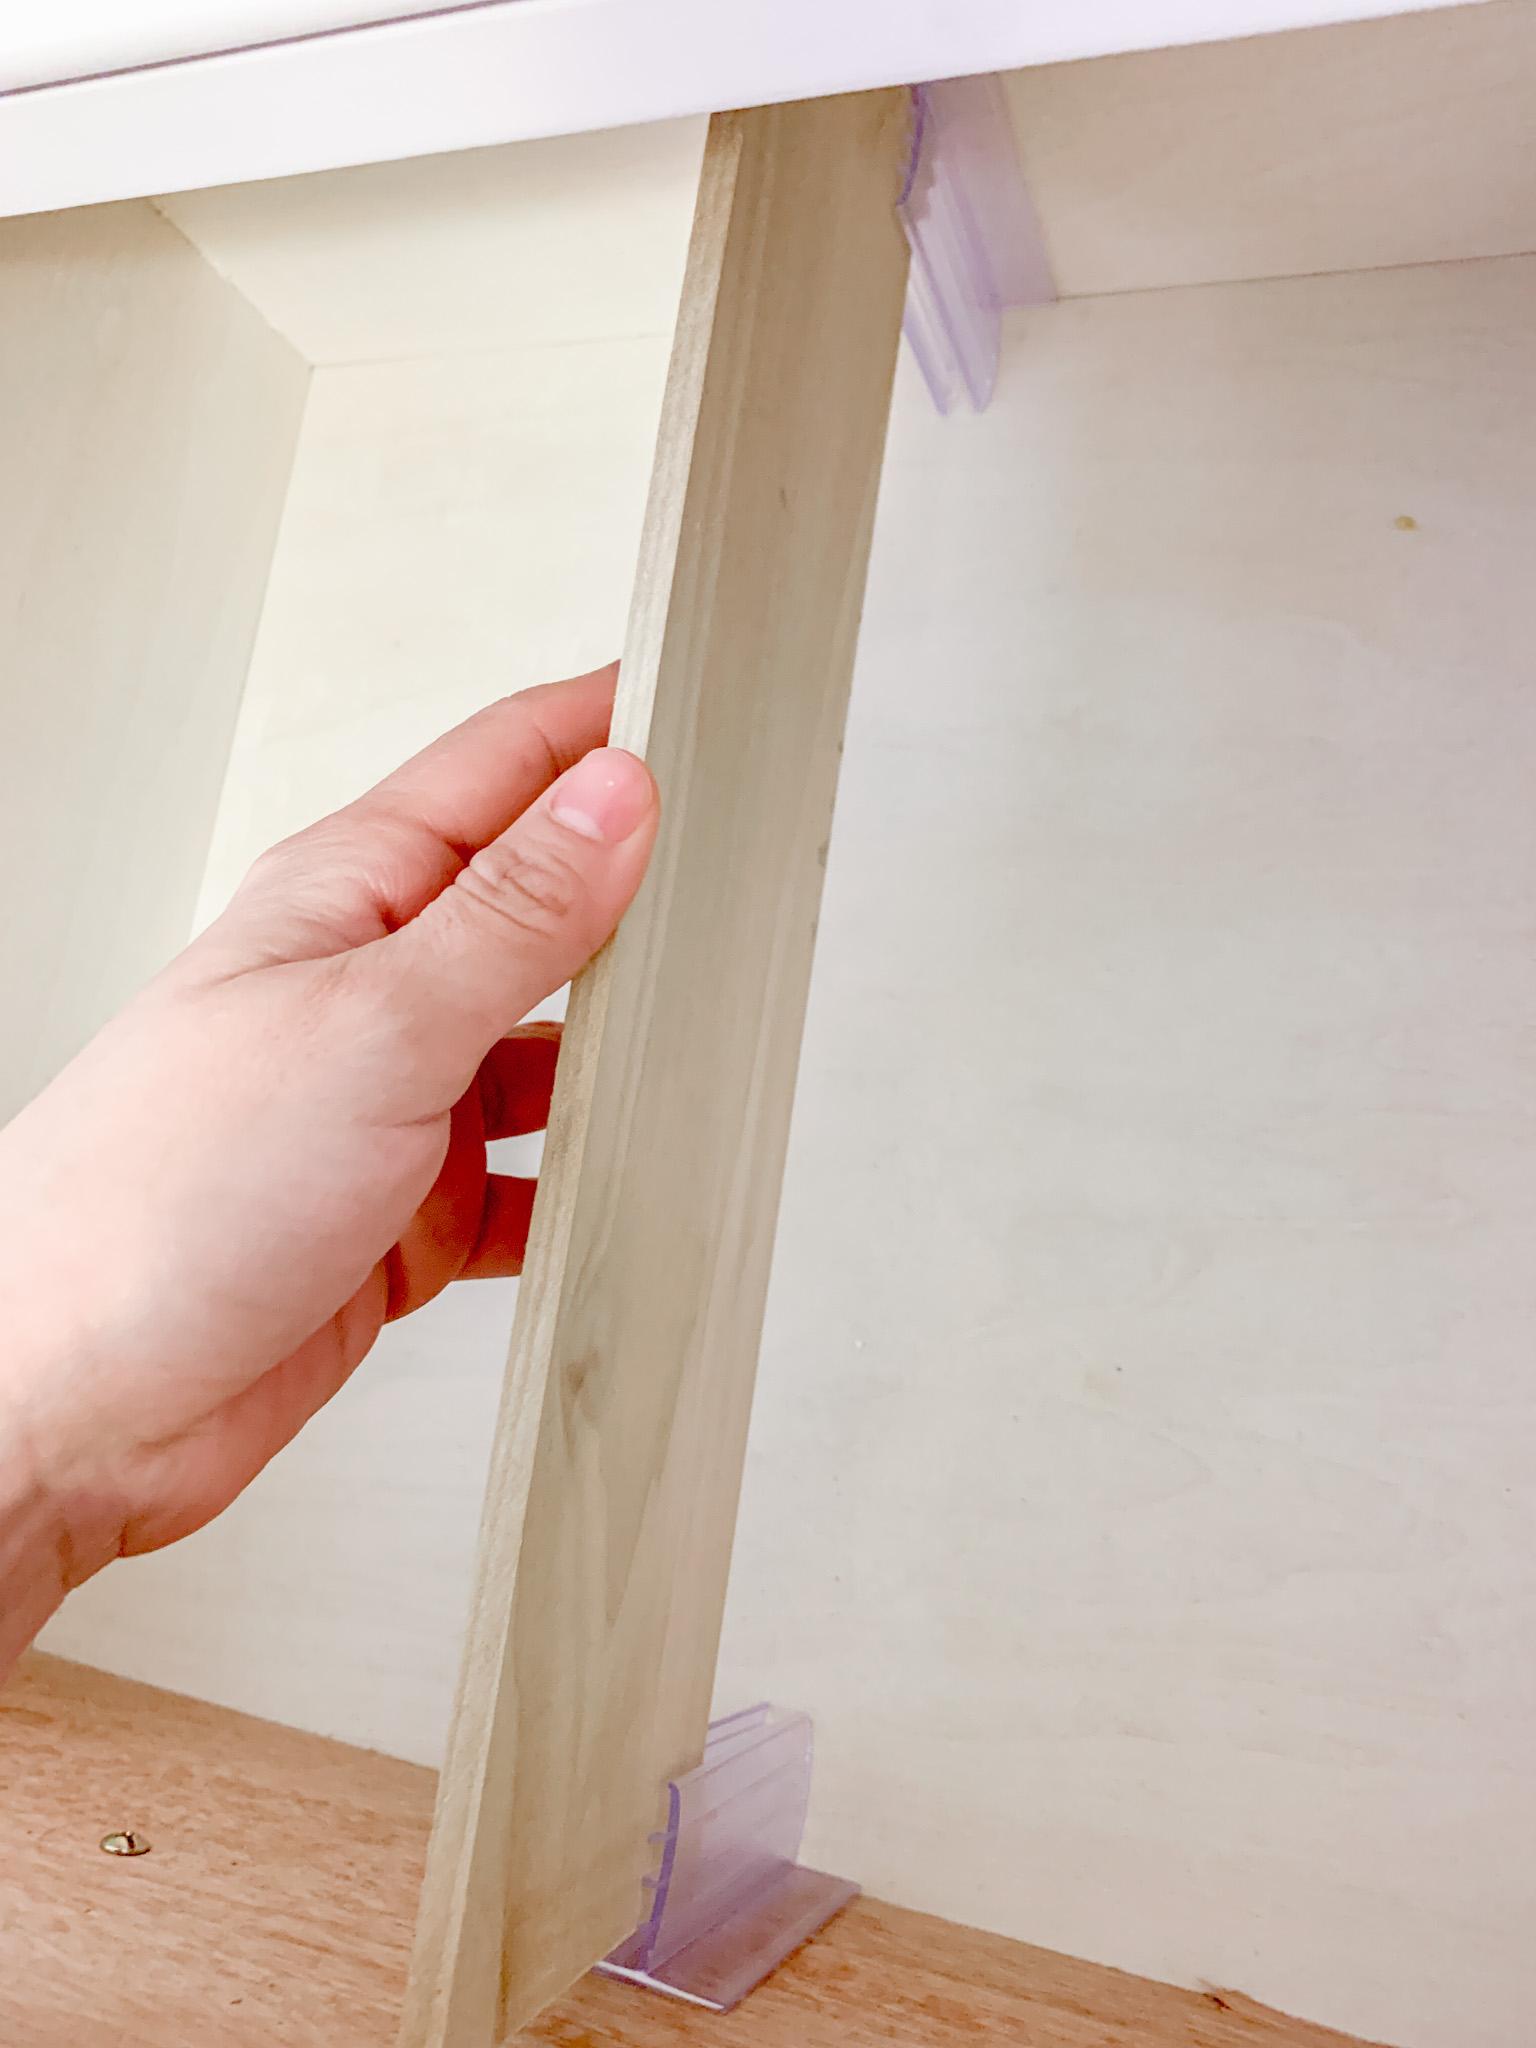
And boom, you’re done! Repeat the steps for however many dividers you want to make.
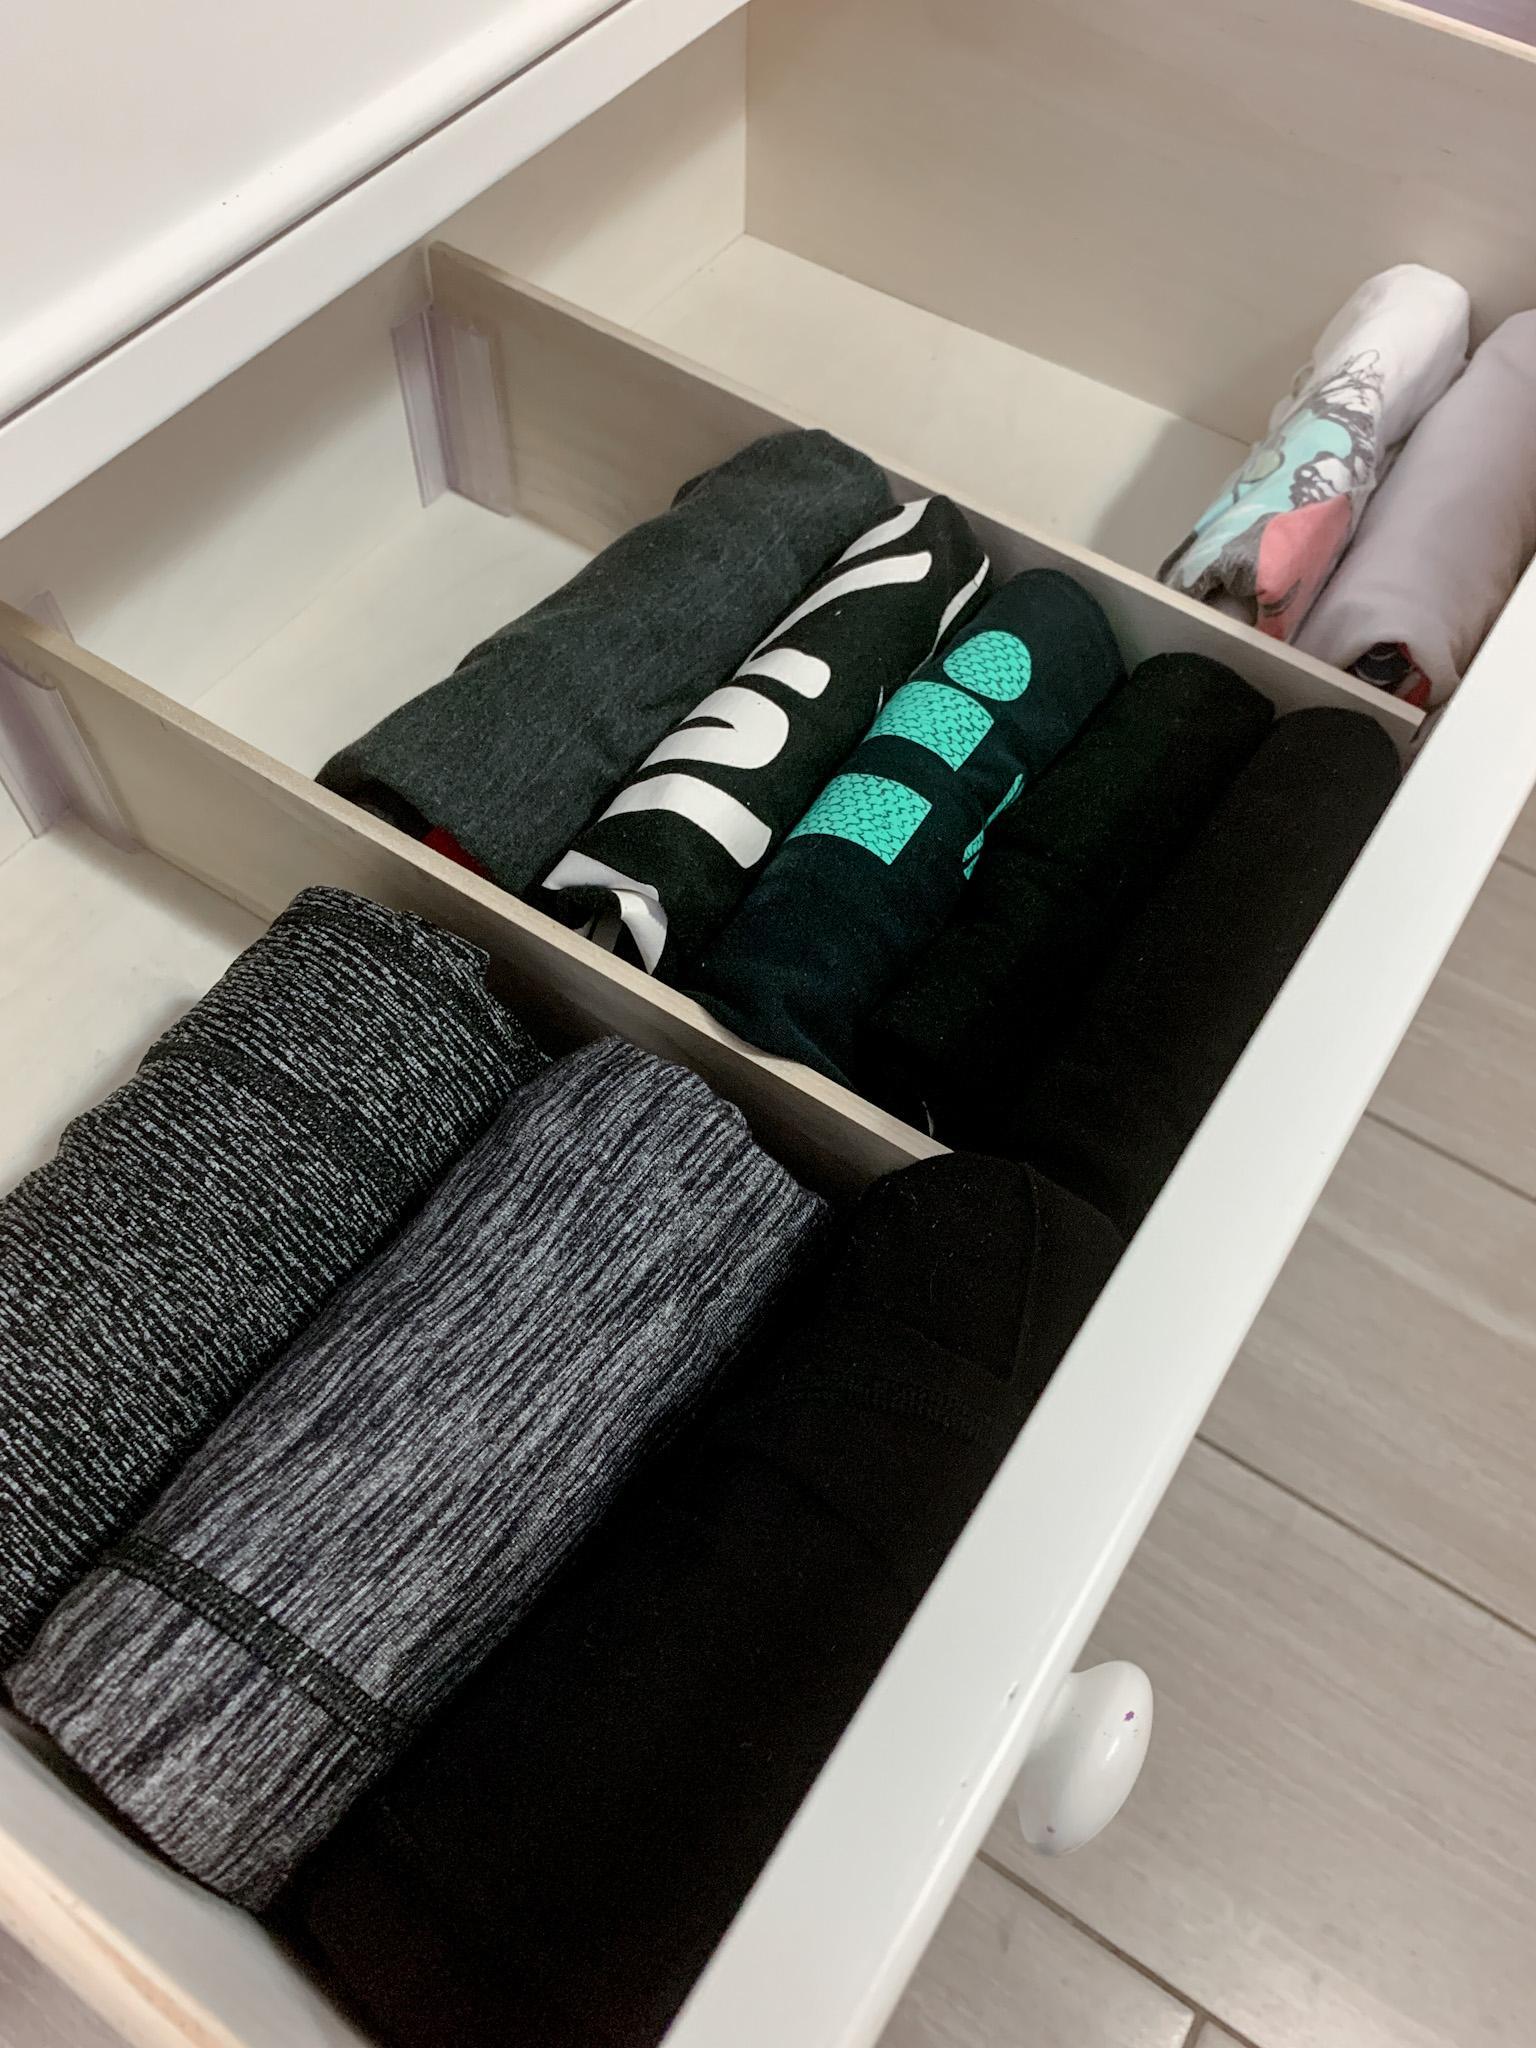
Here is one of mine finished and in use. What a beautifully organized dresser drawer! The organizer in me is very, very happy with these results.
Total cost for drawer dividers
Last but not least, you may wonder is it worth DIYing your own custom drawer dividers when you can just buy something similar online? Well, this is up to you to decide.
I thought it was. And not just because it was way more affordable, but because I can customize them however I want when I make them myself. But that’s just me.
However, I’ll share the total breakdown cost per divider compared to buying already made. Hopefully, this helps you decide if this is something worth DIYing yourself or not.
- Poplar Hobby Board (based on the size that I used: 0.25 x 3.5 IN x 4 FT): About $6.00 per board, and I could make three dividers from each board. So that means that each divider cost me about $2.00.
- Adhesive Tabs: I bought a 24 pack at about $24.00. So that comes out to $1.00 per adhesive. And you need two adhesive tabs per divider, so that is $2.00 for two adhesive tabs.
Hobby Board = $2.00 + Adhesive tabs x 2 = $2.00 = $4.00 per divider!
I don’t know about you, but $4.00 per divider is a steal! Especially compared to the ones you can buy. And they are sturdy and will last a very long time.
So what do you think? Are you giving this super easy DIY a try? Trust me, you won’t regret it! I finally finished all of my kids’ drawers, now I’m moving on to mine and my husband’s dresser drawers.
This post was all about a super-easy way to DIY dresser drawer dividers.
OTHER POSTS YOU MAY LIKE:
Leave a Reply