Learn how to make a DIY basketball hoop for a bedroom, playroom, or kids’ space using plywood, stain, and a second-hand mini basketball rim.
This beginner-friendly project takes about 2 hours and costs significantly less than buying a similar decorative indoor basketball hoop.
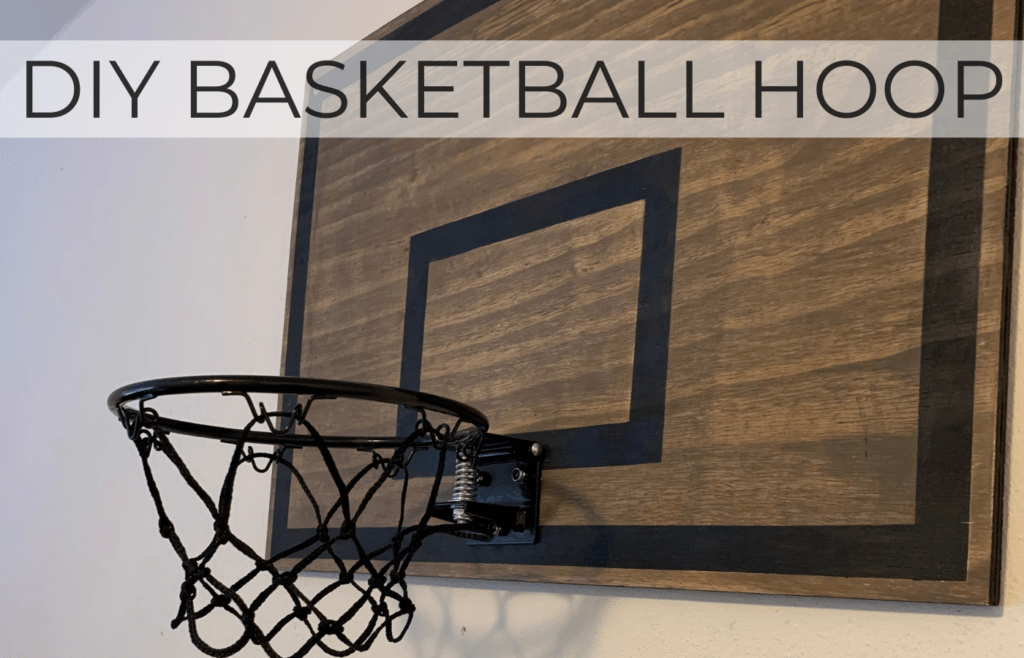
If you are anything like me, who thinks the regular acrylic or plastic, colorful basketball hoops are an eyesore, and you just want a nicer alternative, then a DIY basketball hoop tutorial is perfect for you! This homemade basketball hoop is super easy to make. I made it without a clue what I was doing, so it’s definitely beginner-friendly. We’ve had it for years, and it has held up without any issues.
After redecorating my son’s bedroom, I looked into buying a wooden basketball hoop for bedroom, but was shocked by how much they cost. Some are under $100, but are of poor quality or not the color I was looking for. So I decided to try making a custom basketball hoop out of plywood myself.
In this post, I share my step-by-step instructions for DIY-ing a basketball hoop like the one I made for my son’s bedroom. Although I made it for his bedroom, this basketball hoop is great for an office, playroom, movie room, etc. Just find an empty wall you can mount on, and you’re all set!
This post is all about how to make a DIY basketball hoop.
Indoor DIY Basketball Hoop | Cost Breakdown
| Item | Cost |
|---|---|
| Plywood (you can find cheaper plywood in the scrap pile) | $5 – $10 |
| 8 Inch Rim (get it second-hand) | $7- $10 |
| Stain | Price varies $15+ |
| Hardware (four 4″ lag screws) | $7 – $10 |
| Lint-free rag + Brush | $5 (at the dollar store) |
| 1-inch wide tape | $2 (at the dollar store) |
| Total Project Cost (estimate) | $40 – $60 |
DIY Basketball Hoop Dimensions
| Part | Dimensions |
|---|---|
| Backboard | 17″ x 24″ |
| Target Box | 9″ x 7″ |
| Target Box and Outer Border Width | 1″ |
| Target Box Height from Bottom | 3 3/4″ |
| Space from Target Box to Side Edges | 7″ |
| Outer Border | 16″ x 23″ |
| Border Margin | 1/2″ |
| Plywood Thickness | 3/4″ |
| Rim | 8″ |
Indoor DIY Basketball Hoop | The Steps
Here is how to make a homemade basketball hoop:
Table of Contents
Step 1: Gather Supplies and Tools
- Plywood (mine is 17″ x 24″, and you can get it cut to size at Home Depot)
- Rim + Net (mine is 8 inches; I got it on Facebook Marketplace and removed the original backboard). Ensure you keep the hardware that comes with it; you will need it to attach the rim to your backboard.
- Four – 4-inch lag screws (to secure the basketball hoop to studs on the wall)
- Stain: these are the ones I used: Varathane (Briarsmoke) for the backboard, target box, and border squares; Rust-Oleum (Gloss Black). I did not buy these for this project; I already had them, and they worked out perfectly.
- Lint-free rag
- Brush
- 1-inch wide tape
- Measuring tape
- Stud finder
- Drill
- Mini basketballs – 5 inches in diameter ideally
Tip: I recommend checking Facebook Marketplace, OfferUp, and similar platforms to find a used basketball hoop. They are much more affordable than buying new ones. However, if you prefer to buy a new one, here is the one I used; you can get it brand new, too. This is an 8-inch rim.
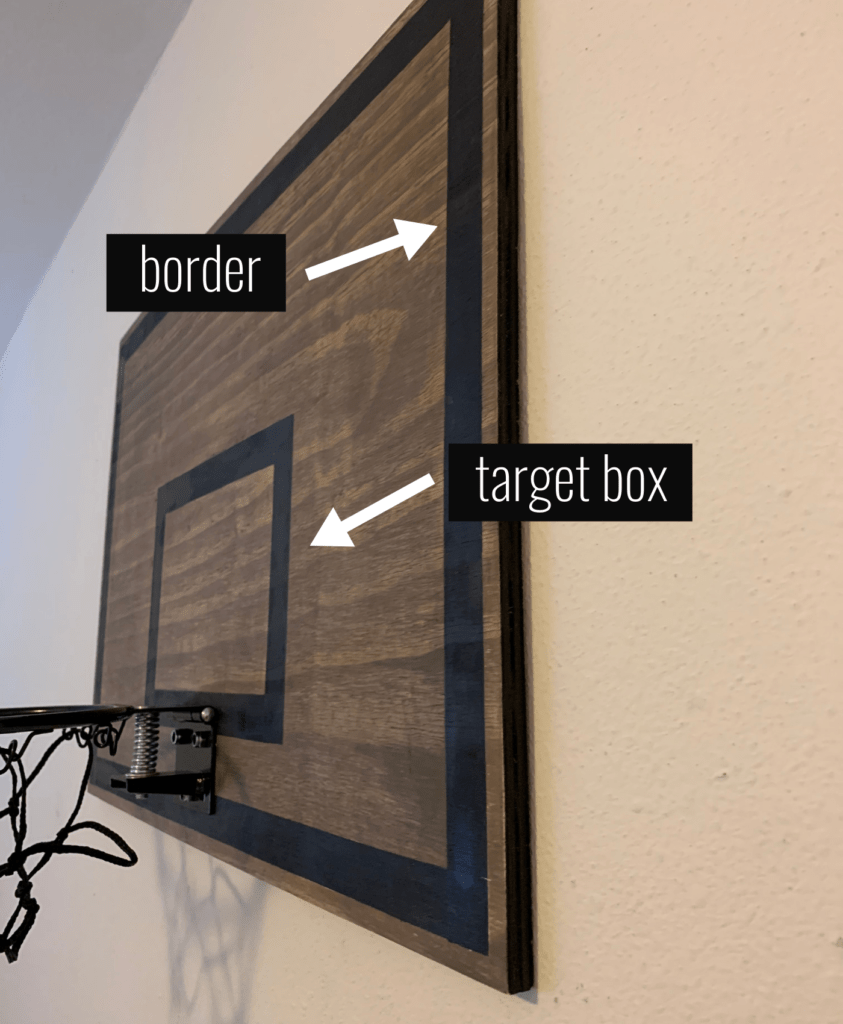
Step 2: Measure and Mask the Target Box and Border
To move forward to this step, you want to have all supplies ready to go and your board cut to size. ( I had mine cut at The Home Depot) My board is 17″ x 24″. I recommend lightly sanding the front of the board.
- Target box: Measure and mark the target box with a pencil, making it 9 inches wide by 7 inches tall. Position it 3 3/4 inches from the bottom of the backboard and center it so there are 7 inches between each side of the box and the edges of the backboard
- Outer border: Next, measure and mark the outer border. The outer box should measure 16 inches by 23 inches, leaving approximately a 1/2-inch margin around the backboard’s edges.
- Apply tape: Once marked, apply 1-inch painter’s tape just inside each pencil line. The tape serves two purposes: it defines the width of the target box and outer border while also protecting the wood underneath from stain. In the next step, you will stain the exposed backboard area, leaving the target box and border unstained. These areas will be finished separately later.
{Related Post: DIY Dollar Tree Wreath | How I Made A Fall Wreath With All Dollar Store Supplies}
Step 3: Stain the Backboard
- Secure tape: Once the tape is in place, firmly press down all edges to prevent the stain from getting underneath.
- Stain backboard: Apply your chosen stain to the entire exposed backboard, working around the taped target box and border. Allow the stain to penetrate and dry according to the manufacturer’s instructions. (Personally, I waited only about 5 minutes.) But I am not a professional, haha!
- Remove tape: Once the stain has dried, carefully remove all the painter’s tape. This will reveal the unstained target box and outer border, creating a clean outline against the stained backboard.
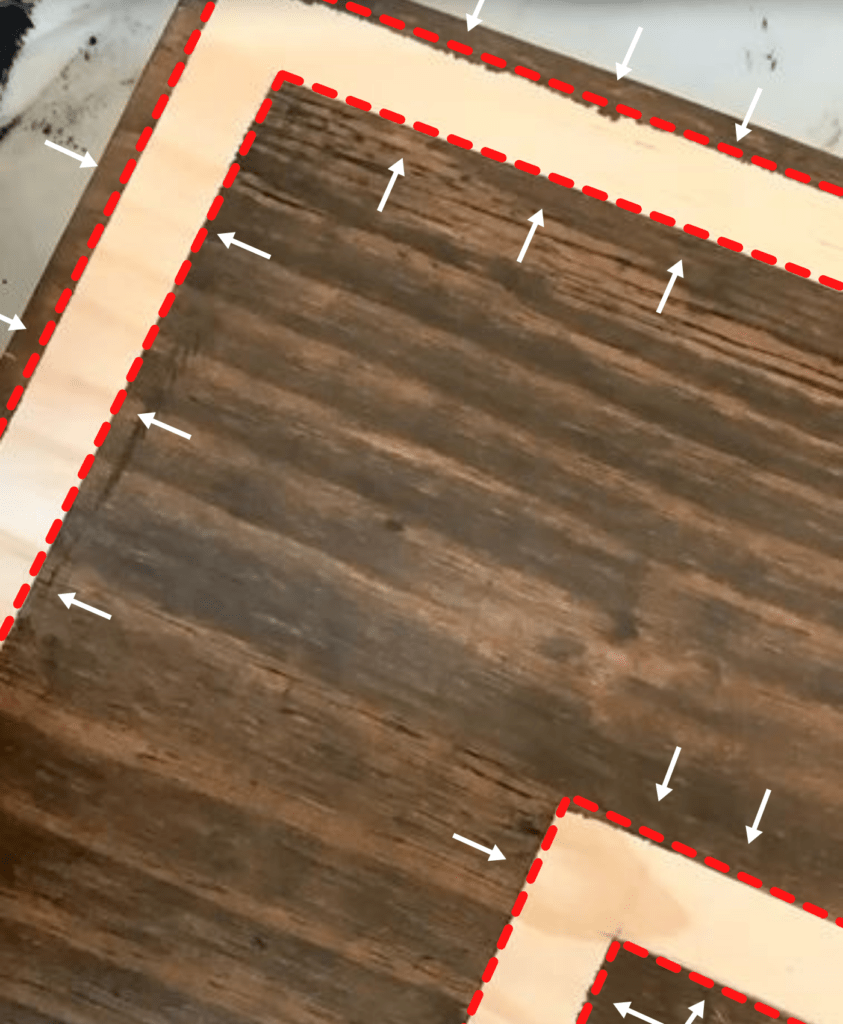
Step 4: Stain the Target Box and Borders
- Tape outer lines of target box and outer border lines: To stain the target box and outer borders, apply fresh painter’s tape along the outside edges of the unstained areas. This will protect the stained backboard while you apply the second stain color. Refer to the image below for guidance on tape placement.
- Stain target box and outer border lines: Using your desired stain color, carefully stain the target box and the outer border lines.
- Remove tape: Once the stain has dried, remove the painter’s tape to reveal clean, crisp lines!
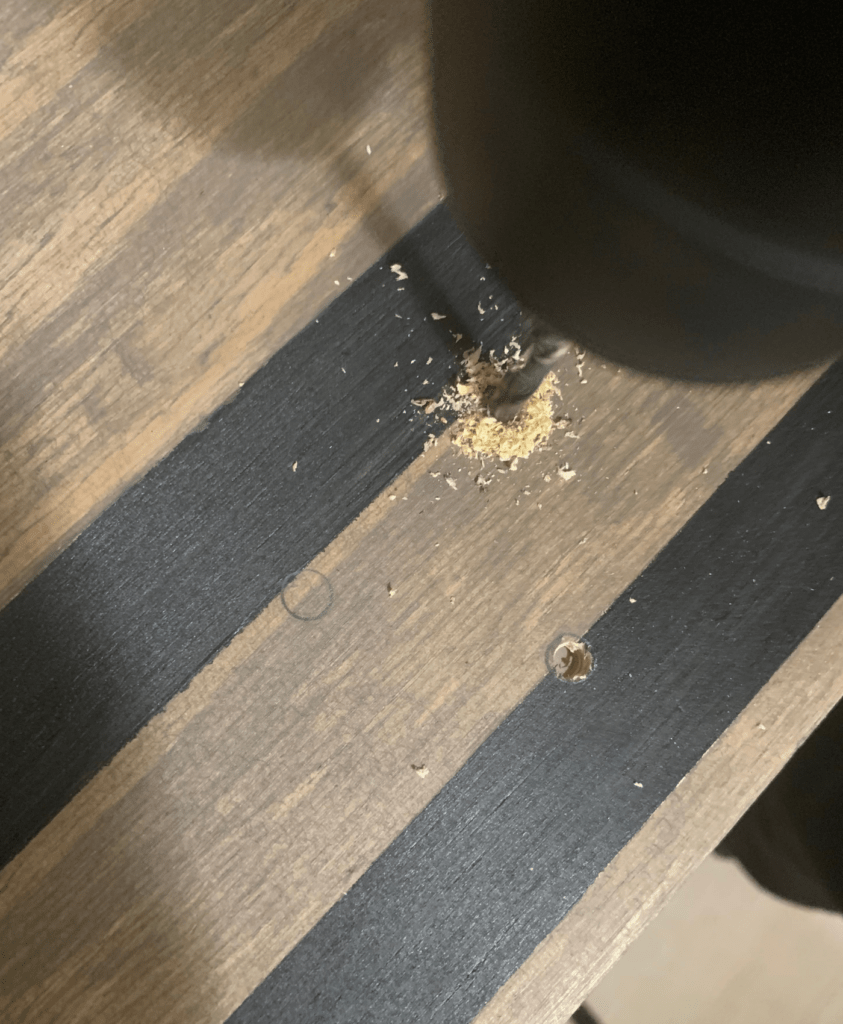
Step 5: Stain Sides and Install Rim
For this project, I used a secondhand basketball hoop. I removed the original backboard and reused the rim, net, and mounting hardware.
- Stain backboard edges: If desired, stain the exposed edges of the plywood now. I stained ours black, but you can use any stain color you prefer or leave the edges natural. Refer to the image below for a better idea of the finished look.
- Install rim: Once the stain has dried, it’s time to install the rim and net. Start by drilling the mounting holes in the backboard (I eyeballed this, to be honest). You can see the placement below. Use the hole spacing from the hardware included with your rim. Drill the necessary holes, then attach the rim using the appropriate hardware.

Optional: At this point, your basketball hoop is complete. If desired, you can apply a clear protective finish to help protect the wood from wear and moisture. I chose to skip this step, and our basketball hoop has held up beautifully indoors for years without any additional finish.
{Related Post: DIY Dresser Drawer Dividers}
Step 6: Mount the DIY Basketball Hoop
To securely mount the basketball hoop, you’ll need four 4-inch lag screws and a stud finder.
- Mount basketball hoop: Use the stud finder to find the wall studs where you’d like to hang the hoop. Position the backboard, then drive one lag screw through each corner of the backboard directly into the studs. Mounting the hoop into studs provides the strongest and most secure installation.
This is just how I mounted our basketball hoop. But there are several ways to mount a basketball hoop, so feel free to choose a method that works best for your space. However, this simple stud-mounted approach has worked great for us. Our hoop has been hanging for years without shifting or falling, even with regular use.
And that is it! Your DIY indoor basketball hoop is ready to enjoy. 🙂
I hope this tutorial showed you how easy it is to build a custom basketball hoop for your home. This project was simple and affordable, and it turned out even better than I expected. Best of all, my son absolutely loves it and still uses it regularly.
I tried my best to explain the steps I took to make this indoor basketball hoop, so I hope it all made sense, haha! I am definitely not a professional, but I hope knowing that encourages you to try it for yourself.
This homemade basketball hoop would be a great gift for dads for Father’s Day or a birthday, an excellent gift for your son or daughter for Christmas or a birthday too, or even just something cool the entire family can enjoy!
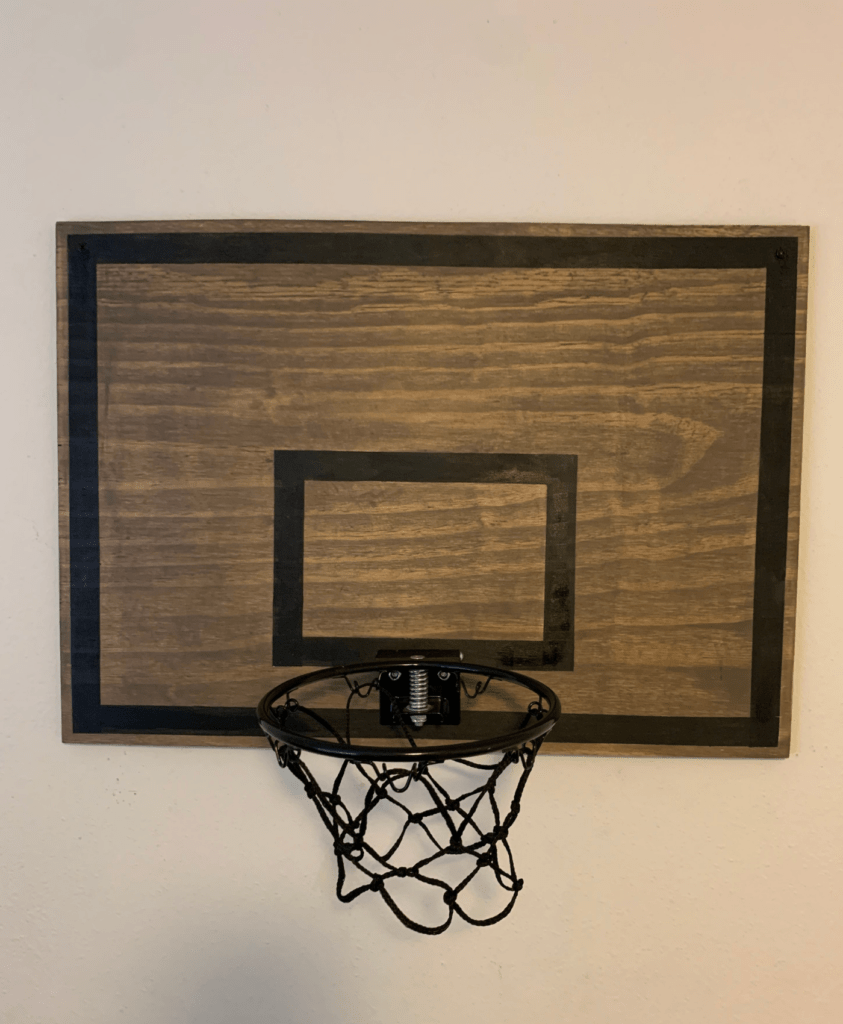
DIY Indoor Basketball Hoop Results
Other Ways to Make a DIY Basketball Hoop
Your Questions Answered
To make a DIY basketball hoop for indoor use, you’ll want to get a lightweight wood if you will be hanging it on your wall. I have used plywood and find it to be the perfect material, with durability, and perfect for hanging on your wall.
Yes, you can easily make a DIY basketball hoop for a bedroom wall yourself. Here is an easy, beginner-friendly step-by-step tutorial to make your own indoor basketball hoop.
Depending on the material you use, the cost can change substantially. However, to make this exact one, you can expect to spend anywhere from $40-$60.
Places like Facebook Marketplace, thrift stores, and garage sales are all great places to find very cheap basketball rims.
This post was all about how to make a DIY basketball hoop.
Other Posts You Might Like:
Leave a Reply