Does your tween/teen love to take photos as much as mine does? Display all their photos by creating a fairy lights photo wall in their bedroom.
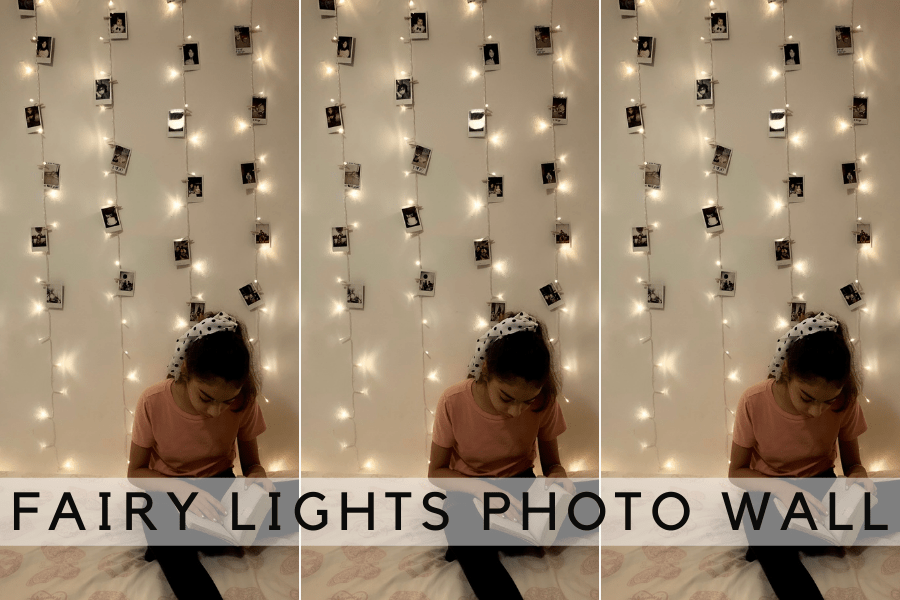
Do you have a teen who has a large collection of Instax photos and you’re looking for ideas to display them? A great way to do that is by creating a fairy lights photo wall. Not only is it a great way to display a ton of photos, but it looks seriously magical!
I am pretty confident this is one of the best, if not THE best, and most functional way to display Instax photos. Because my daughter and I tried many ways to display her photos in her bedroom before this and failed. We tried tapping the photos to the wall, clipping them on a string, pinning them with thumbtacks, and many more. But ultimately, none of them worked out. 🙁
They either just didn’t look good or fell off. I also considered putting them in a large frame – but that would make it hard to switch them up or add new photos. So when we finally tried the fairy lights photo wall idea, we were so happy to have finally figured out a beautiful way for her to display all the photos her little heart desires. So if you are in the same boat, give this idea a try. You won’t be disappointed!
In this post, I am showing you how we created this fairy lights photo wall in my teen’s bedroom wall.
Fairy lights photo wall | The steps
Step 1 – Gather Supplies
These are all the products I used to create the fairy lights photo wall.
- Fairy Twinkle String Lights
- Command Clear Mini Light Clips
- White Wooden Mini Clothespin Photo Clips – I got brown – wish I would have gotten white!
- Fujifilm Instax Mini 9 Instant Camera
- Fujifilm Instax Mini Instant Film
- Flowers – Optional. We got ours at The Dollar Tree & Walmart. Here is an option from Amazon too.

Step 2 – Choose A Wall/s + Apply Command Clips
Start with choosing the wall/s you want to hang your lights on. Then, clean the walls and let them dry. (make sure there is an outlet nearby) Once the walls are clean and dry, measure and mark the measurements (lightly) on the wall before sticking the command mini light clips.
If you want the fairy lights to sit as close as possible to where the ceiling meets the wall, make sure you stick the command clip as close to the ceiling as possible.
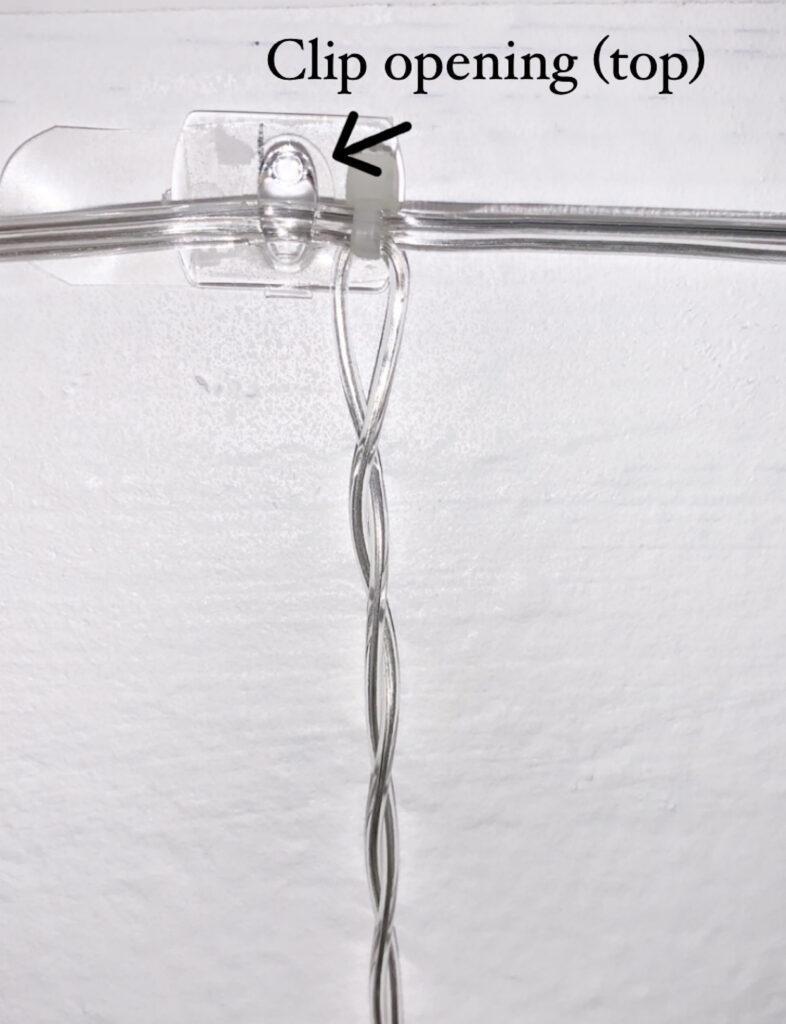
Once you apply the first command clip where you want it, stick the rest of the command clips about every 4 inches apart. Make sure to apply the command clip with the clip opening facing up, so you can clip the lights in place. (as pictured below)
Step 3 – Hang Fairy Lights + Secure
Once the command clips are up, you can start hanging the lights! This should be easy, as all your upper command clips are already in place.
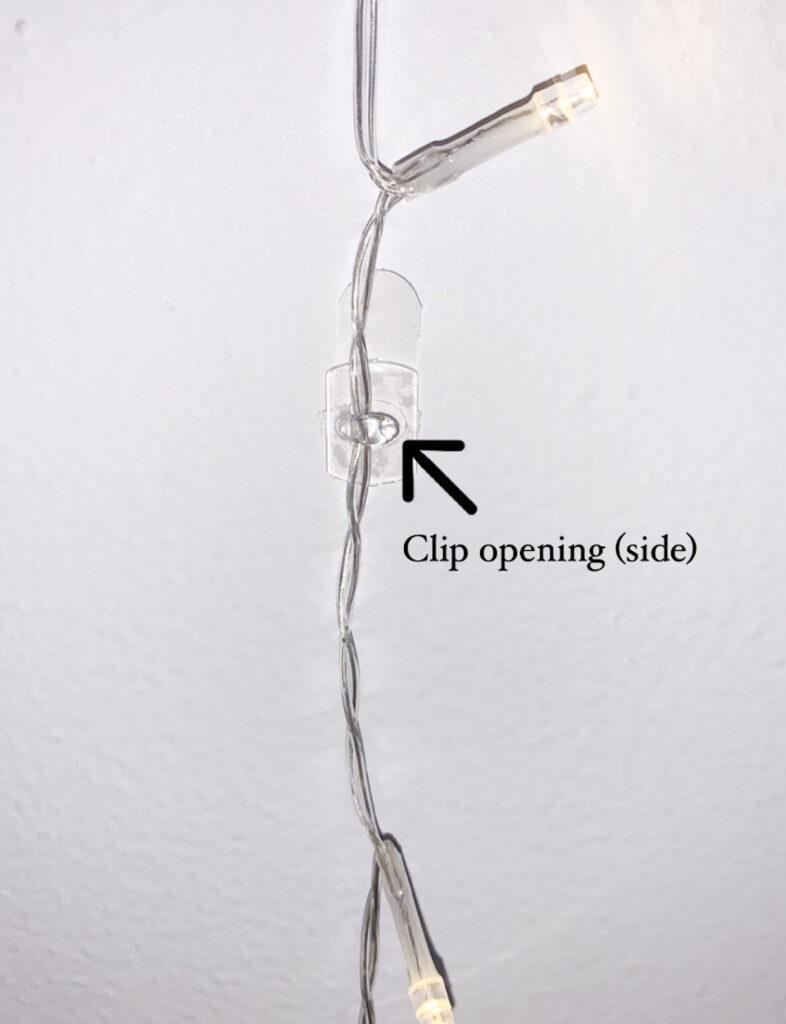
Once the fairy lights are hung from the top, use one command mini clip to secure each individual string of lights. (I added the command clip about 25 inches from the floor, and that was enough to keep each string of light in place)
Apply the command clip with the clip opening facing to the side so that you can secure the light string in place. (as shown below)
Step 4 – Choose And Clip Photos
Now it’s time to clip all your photos! But first, choose the photos you want to display on the fairy lights photo wall.
Try to use a flat surface to lay all your photos on so you can lay them out in the order you want them up on your wall. Once you decide on the order, attach the mini clothespin and start clipping the photos where you want them. (as shown below)
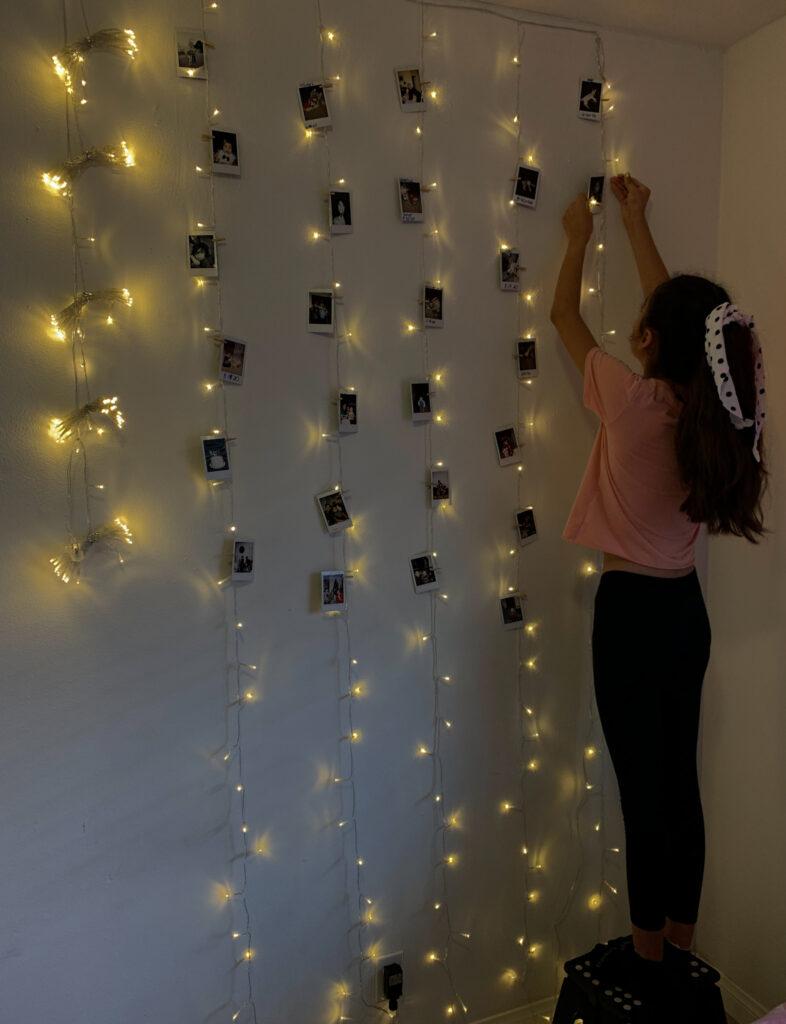
I let my daughter clip all the photos herself. She had a specific way she wanted to clip them, so I let her go at it! We were able to fit a lot of photos with room to spare! It will be super easy to take down old photos and add new ones as needed.
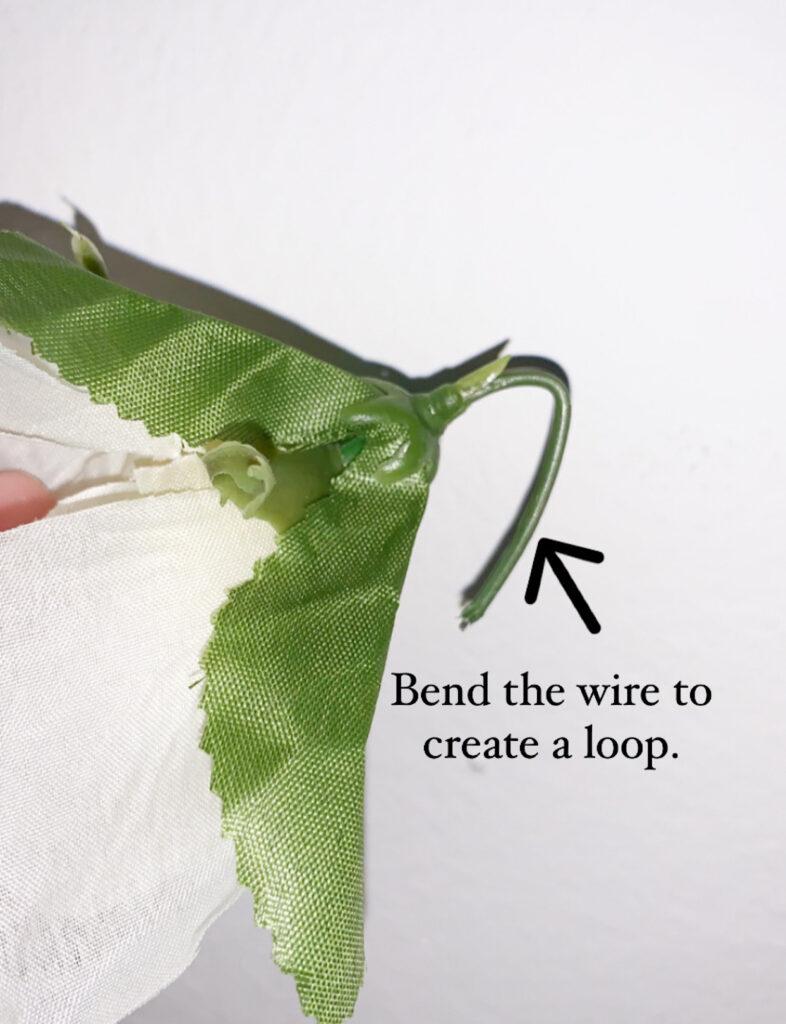
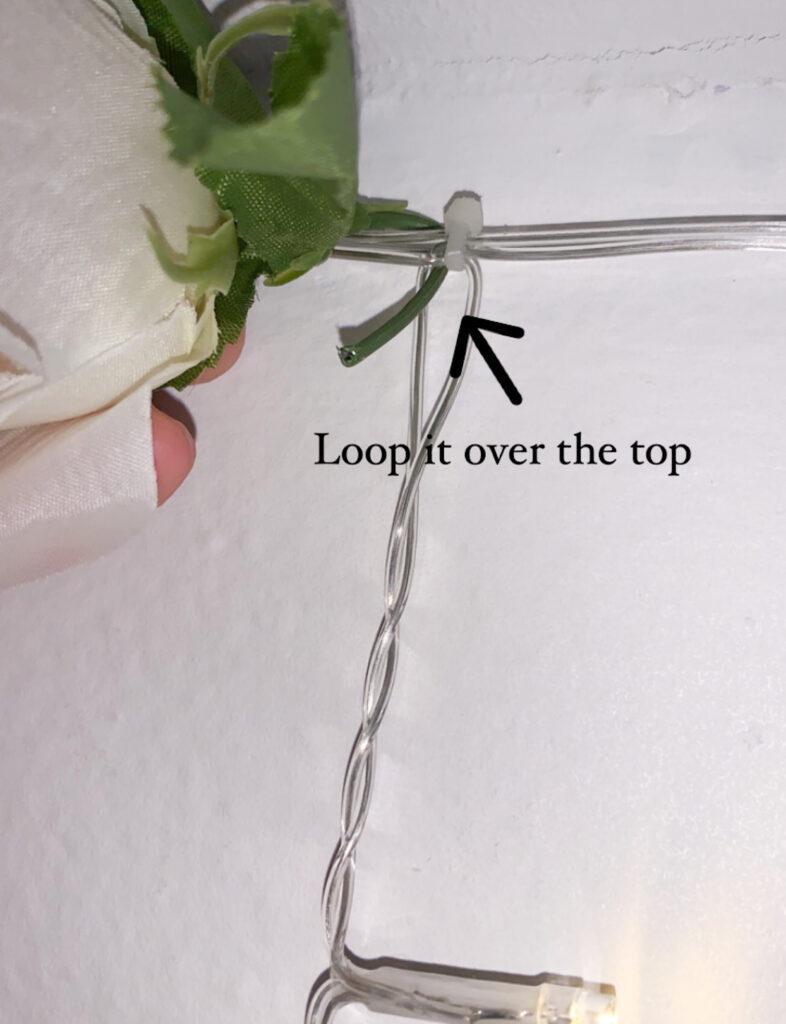
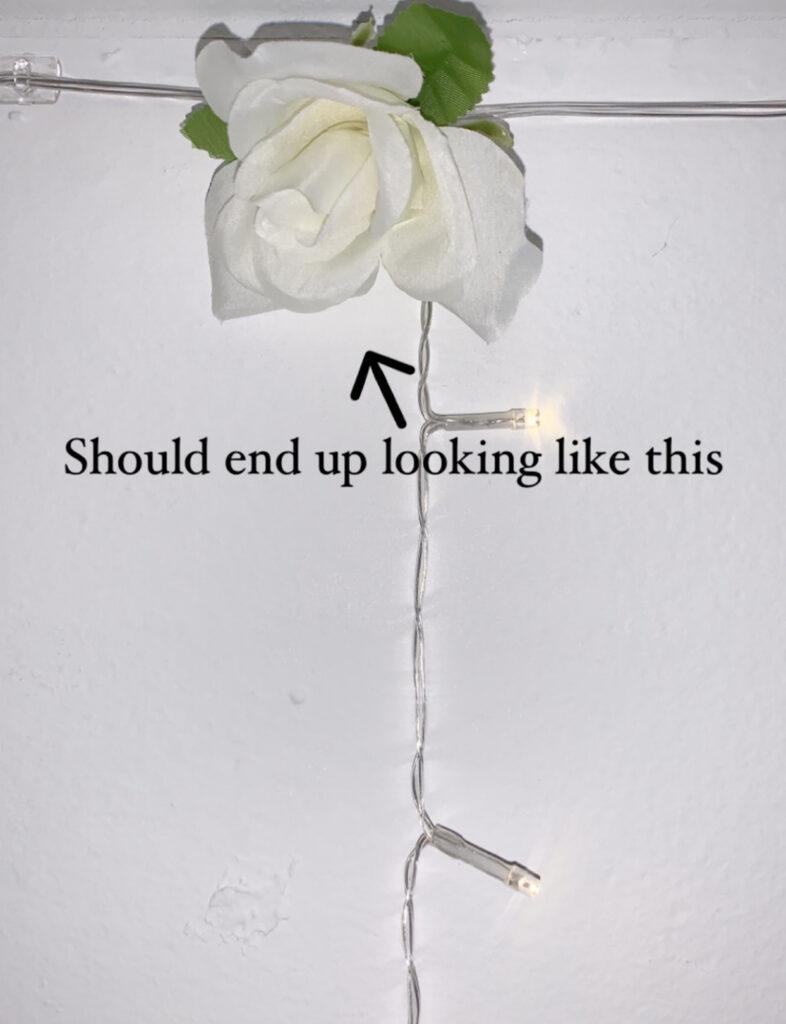
Step 5 – Add Flowers To Finish Off The Fairy Lights Photo Wall
We added these at the last minute. My daughter had this idea. She wanted to add flowers along the top where the ceiling meets the wall.
If you like this little extra detail and want to recreate it, here is how we did it.
We added one flower for every string of lights. We use pink and white, and it looks so pretty! And the best thing is – these only cost me a few dollars! (check the dollar tree before buying anywhere else)
See the images below for a visual of how we applied them,
To say that she is excited about this wall – is an understatement! Here is the final look with the flowers added.
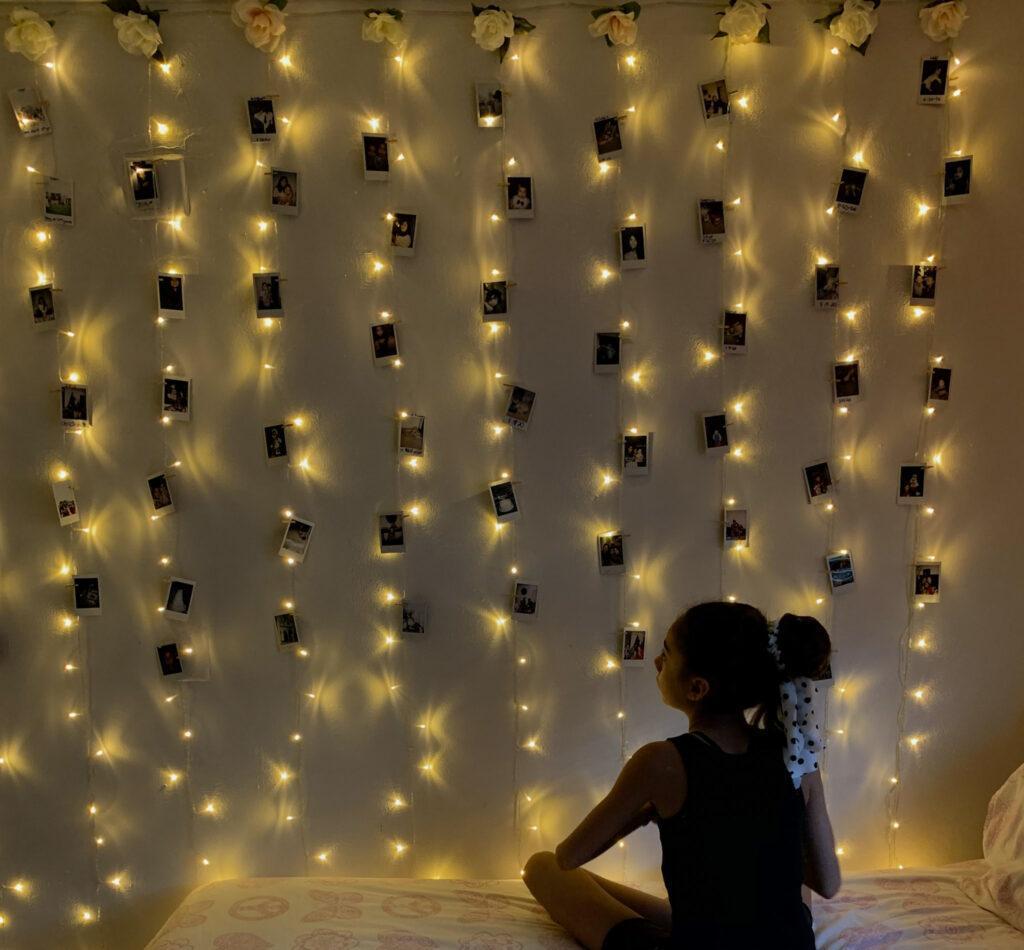
And that’s it, guys! Super easy, right? But wow, does it make a huge difference! Doesn’t it look magical?
This post was all about how my daughter and I created a fairy lights photo wall in her bedroom.
Shop The Post


Leave a Reply