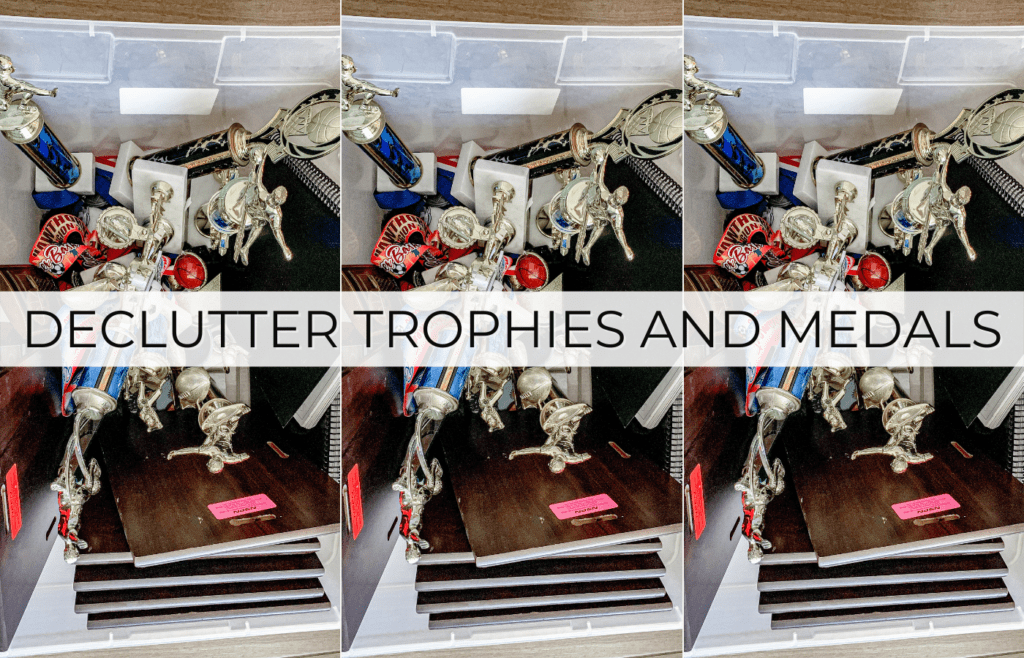
This post is all about how to declutter trophies and medals.
If you’re reading this, you probably have a lot of trophies and medals, just like I do. Maybe you’re looking for some quick ways to clear them out. My two kids have played sports since they were five, and now that they’re 14 and 15, our house was packed with trophies and medals. So trust me when I say, I understand.
It’s tough to decide what to do with all these trophies and medals. We want to save these memories for our kids, but at some point, these keepsakes can feel like clutter.
My main goal was to find a way to treasure these awards without letting them overrun our space, so my kids could feel proud of their achievements without feeling overwhelmed by stuff.
In this post, I’ll walk you through how I declutter trophies and medals, how we keep the collection manageable, and some ideas for what to do with the ones you no longer want. This way, you can keep the memories without feeling overwhelmed.
How To Declutter Trophies And Medals
Here is the gist of what I did:
I removed the engraved parts from all the trophies and donated the trophies themselves. Then, I removed the ribbons from the medals, kept only the medals, and donated the ribbons. Last, I used glue dots to glue the plaques and medals to the sports photos they belonged to.
Table of Contents
Declutter Trophies And Medals | The Steps
Step 1: Gather Supplies (supplies I used)

You will also need a chisel and a donation box.
Step 2: Create a Photo Album (if you don’t have one)
If you dont have these types of photos, see the FREE printables at the end of this post or click this LINK.
Step 3: Consolidate all trophies and medals in one area
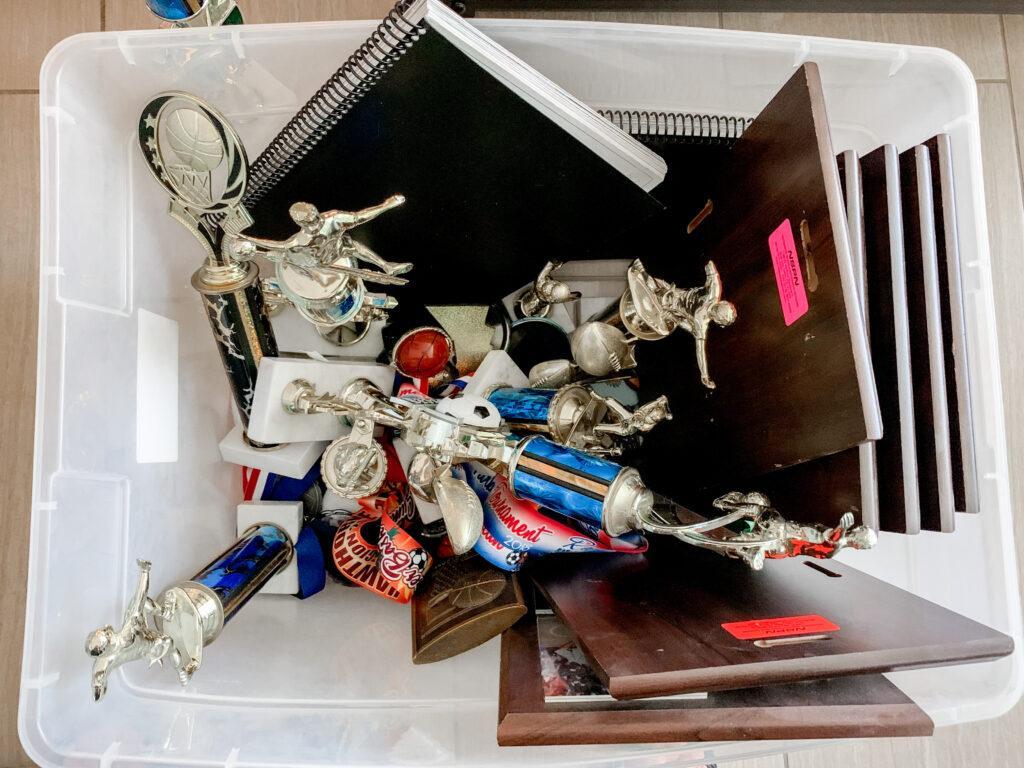
Step 4: Purge
Decide which trophies and medals you want to keep intact and which ones you’re okay with holding, just the plaques and medals. Once you have sorted them, separate the ones you’ll keep intact (if any) from those you’ll remove plaques and medals from.
My kids wanted to keep only these intact. We kept only the plaque and medals for the rest.
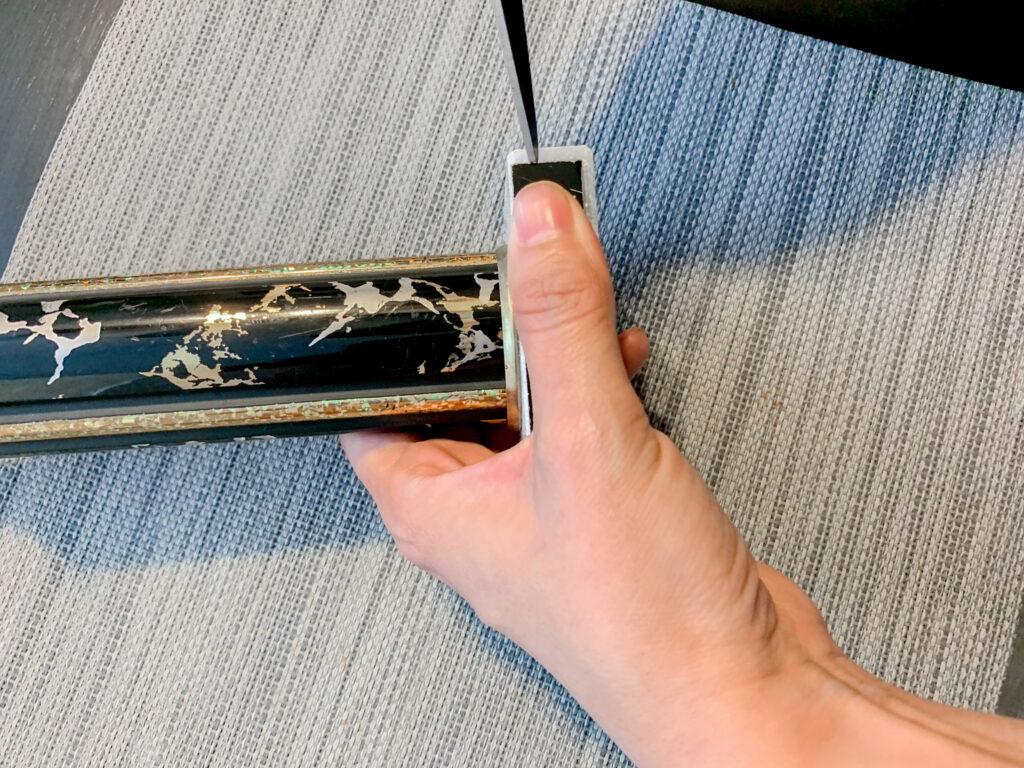
Step 5: Remove Plaques and/or Ribbons
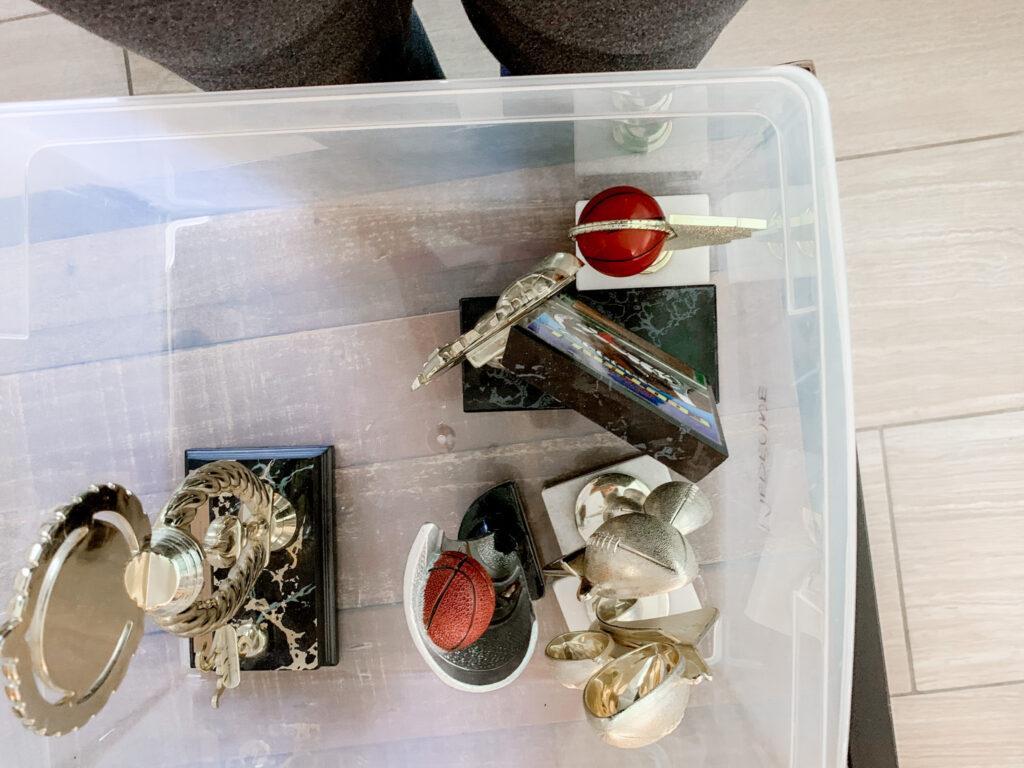
Use the chisel safely to remove the engraved plaques from each trophy. For the medals, just cut off the ribbon.
Some trophies didn’t need the chisel; I removed the plaque with my fingers.
{Related Post: Step-By-Step Guide to Make A School Memory Box | *FREE* Printable Labels Included}
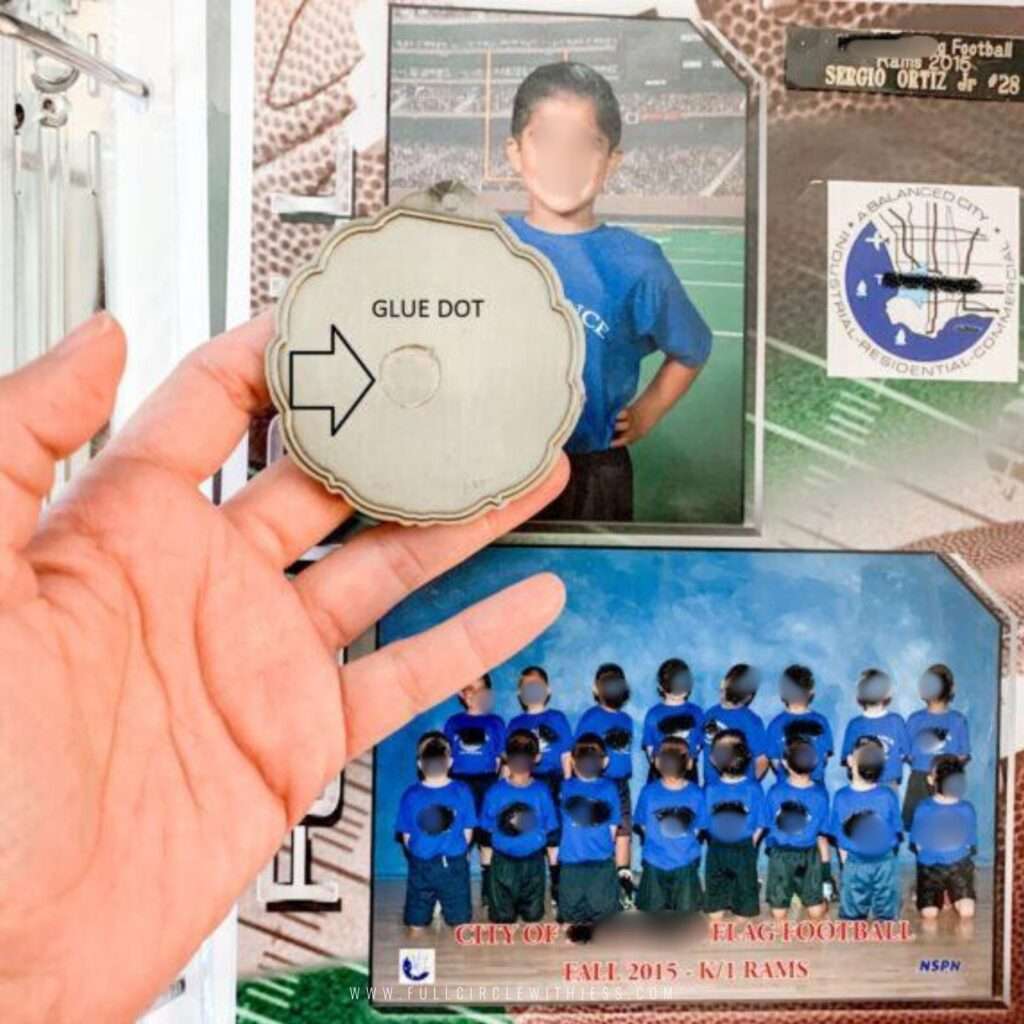
Step 6: How to glue the Plaques and medals
Once you have removed all the plaques from the trophies and cut off the ribbon from all the medals, line them all up on a table in order by year.
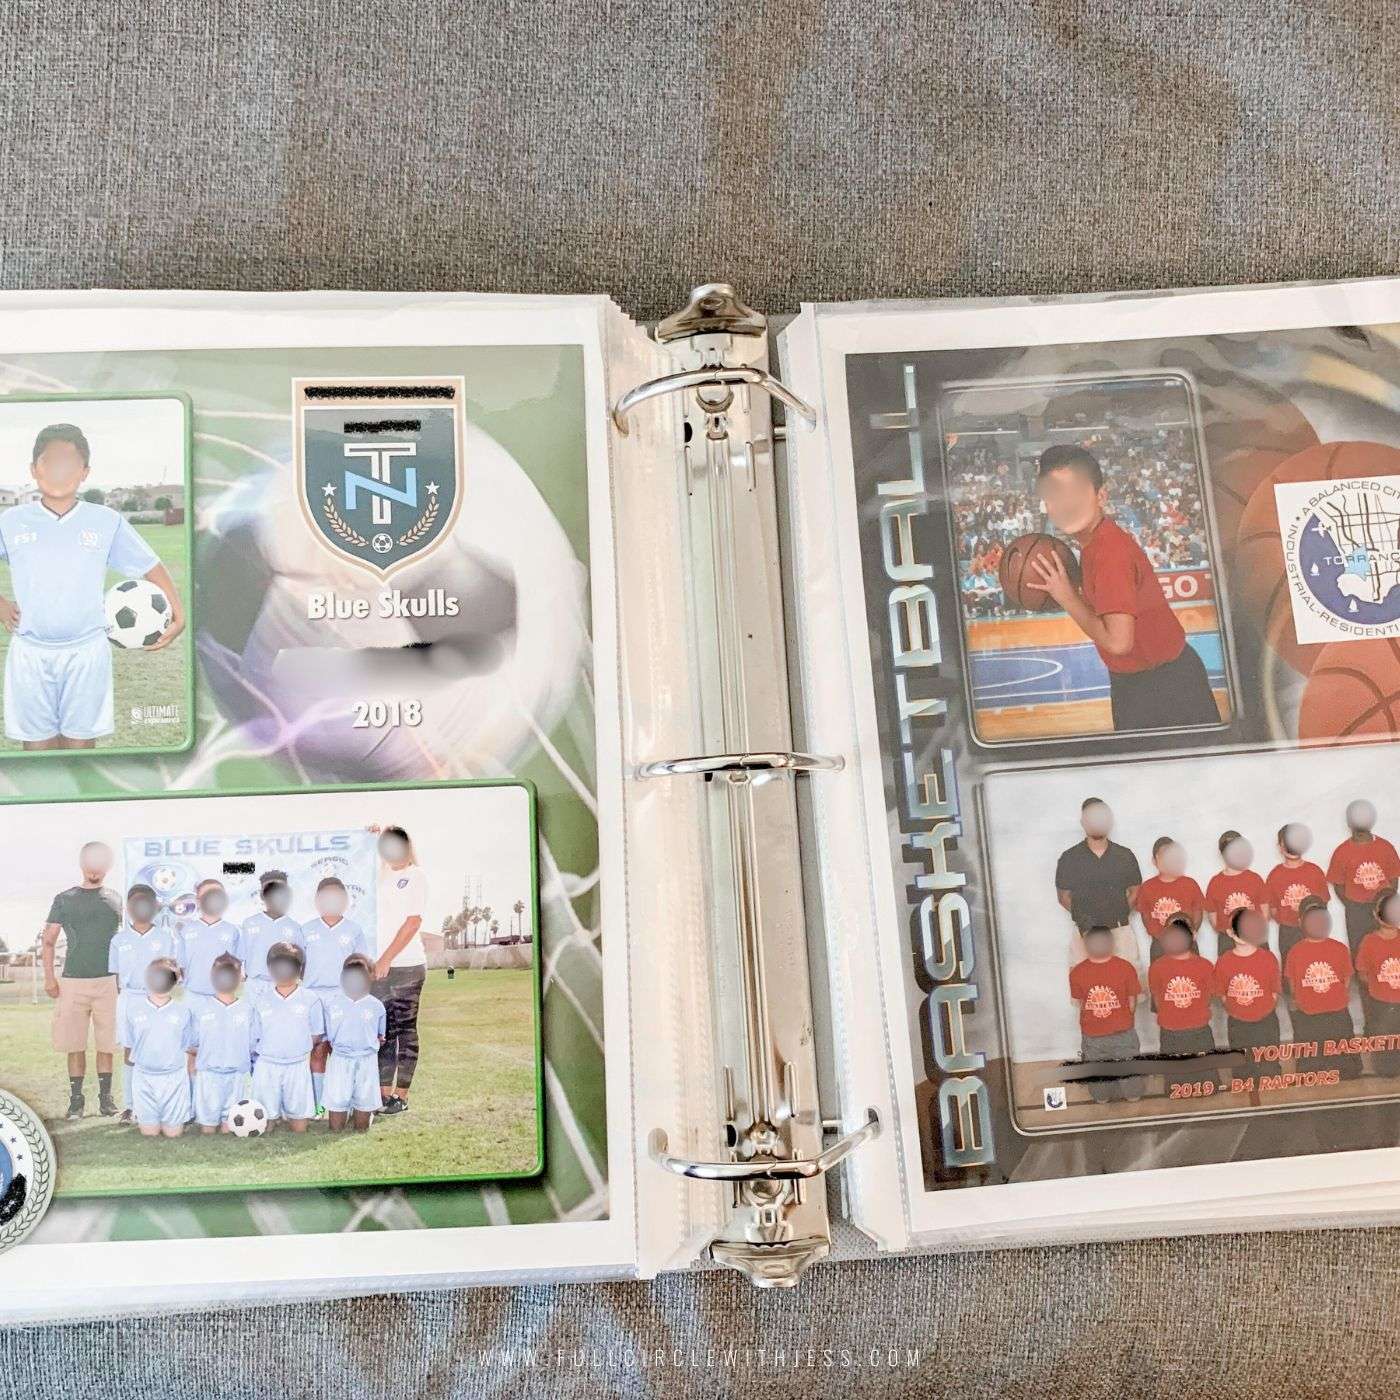
Then, I used glue dots to secure the medals and plaques to their designated pictures. (as shown in the photos below)
Initially, I added only one glue dot per medal, but later I added two, which worked best.
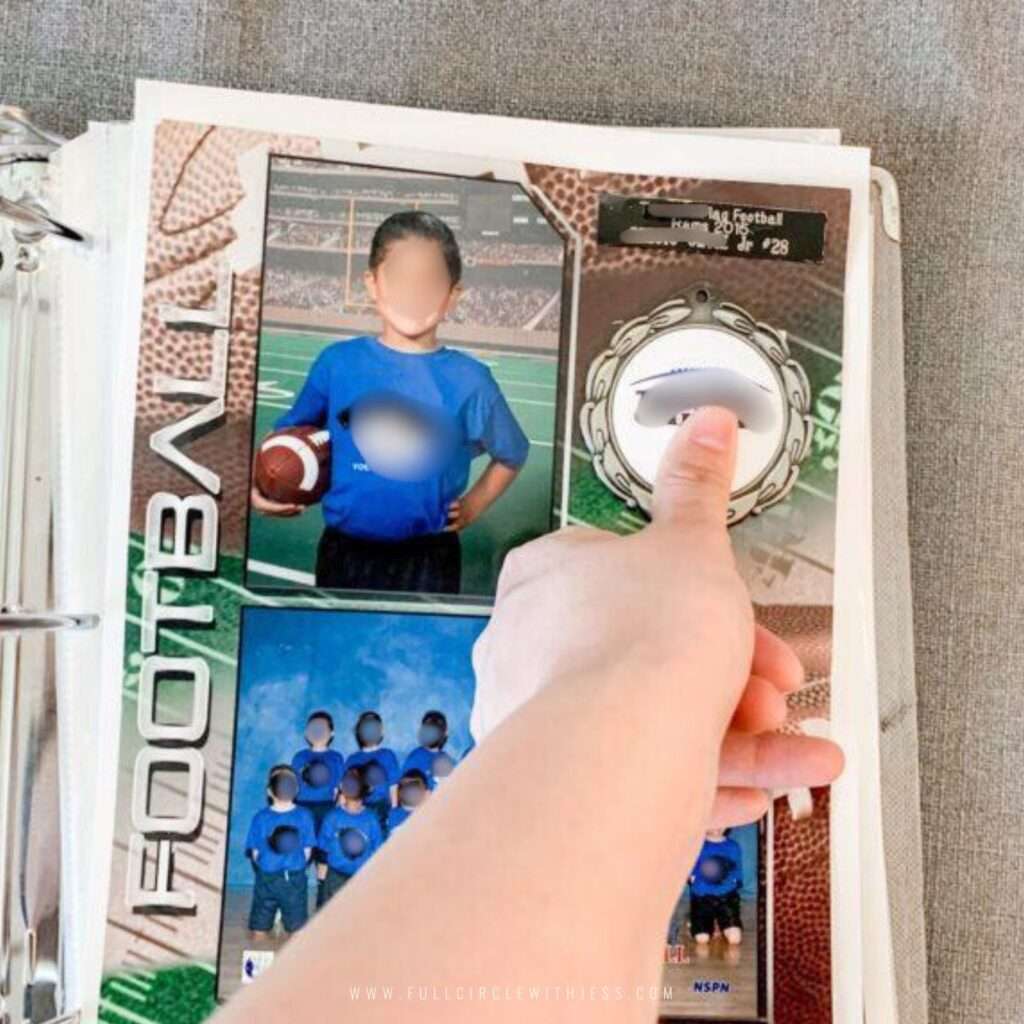
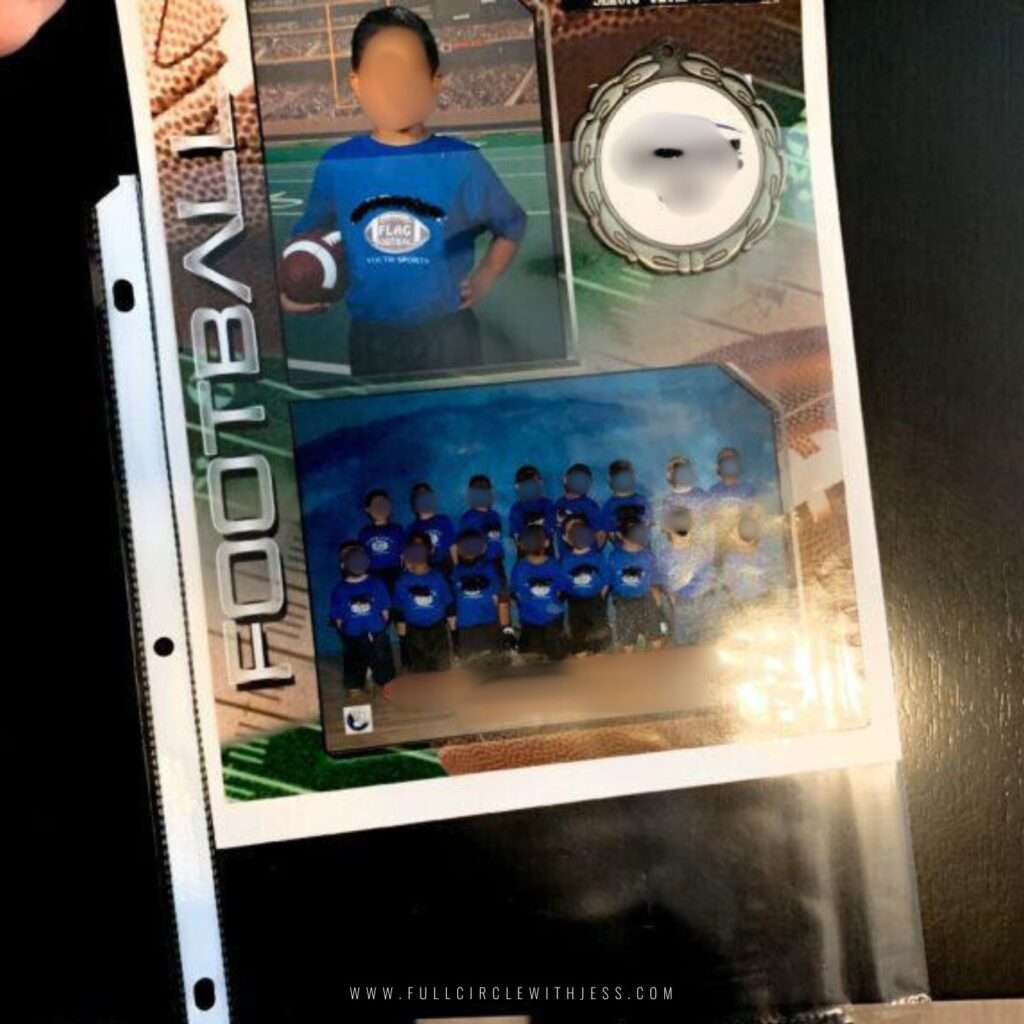
Step 7: Insert into a sheet protector
Gluing the plaques and medals to the photos should look like the picture below. Then, insert the finished product into a sheet protector. (as shown below)
And that is it! Repeat steps 6 & 7 until done.
This helped me eliminate several boxes of trophies and medals, along with a lot of clutter! However, we were still able to keep the parts that matter from each trophy and medal. They are also well displayed and organized, so we can enjoy them for many years!
Don’t Have A Photo Album? Here Are Some Ideas
- If you have the sports photos handy, create a photo album of your child’s sports photos. Here, I show you how I made my kids’ photo albums.
- If you don’t have a picture of the trophy and medals, take a picture of your child holding each trophy and medal and use that picture in place of their team photo for the year the trophy/medal belongs to.
- Don’t want to take pictures? You can use cardstock paper instead. Use glue dots to secure the plaque and medal to the cardstock paper in order by year.
If you dont have a team photo or dont have something similar to the sports photo template I’ve shared above, and only have wallet-size, etc., you might find the printables below useful.
I’ve created a template you can use to add your own photo, along with the plaque, medals, and other items. I have made one for basketball, baseball, soccer, and football.
Find the downloads below!

Click here to download the FREE Sports Photo Album Covers
How To Decide What Is Worth Keeping
I had my kids pick their favorite trophies, which we displayed in their bedrooms. I was surprised to see them pick only a couple and be okay with letting the rest go.
So, what is worth keeping is up to you and your kiddo. But keep in mind that if you keep everything, then nothing is actually special. Give it some thought and keep only the very best!
{Related Post: Portable Homework Station | 7+ DIY Portable Homework Station Ideas To Help You Prepare Your Kids For Back To School}
How To Prevent The Clutter From Happening Again
We are still adjusting to this system. Our plan is to designate a space in the kids’ rooms to display their trophies and medals for one year. After that, we will decide whether to keep the entire trophy or retain only the plaques and medals.
This approach helps reduce clutter while preserving the memories associated with the trophies and medals. Periodically, we will ask the kids if they wish to keep any items. If not, we will remove the plaques or medals and add them to their photo albums.
If the kids still want the items, the trophies and medals will remain. We can adjust this plan as their needs or preferences change. Decluttering sentimental items is not about being ruthless, but about making intentional choices about what to keep.
I’ve made sorting through trophies and other sentimental items part of my regular cleaning routine. That way, I don’t forget, and I do it often enough that it never feels overwhelming anymore.
If you like having systems or need some help with decluttering and cleaning, check out my Complete Home Cleaning System here.
Suggestions For Where To Donate
Once you decide what trophies, medals, etc., you’re getting rid of, you will have to determine what you’re doing with them all. I do not recommend just throwing them in the trash. Here are a few ideas to help ensure they don’t end up in a landfill somewhere.
- Check your local trophy shops to see if any will take them, or ask if they know where you can recycle them near you. Many trophy shops will take these items as donations. They refurbish and resell them. To ensure privacy, remove your information from medals, trophies, and similar items before donating them.
- Consider donating them to awardsmall.com. This website, which I discovered online, charges a flat $20.00 recycling fee that includes 25 trophies. They accept gently used trophies, awards, and medals, which are then recycled, reused, and regifted to non-profits nationwide. By donating to awardsmall.com, you’re disposing of your trophies responsibly and contributing to a good cause. Visit their website to see if this is a suitable option for you.
- Call your local recycling facilities to see if they accept them.
↓ Enjoyed this post? Pin it for later! ↓

This post was all about how to declutter trophies and medals.
Other Posts You Might Like:
- Game Organization | How to Organize Board Games, Card Games, and Puzzles With Zipper Bags + Photo Boxes
- How to Organize Kids’ Memories | 5 Must-Try Organizational Systems That Will Help You Organize All Of Your Kids’ Memories For Good
- 18 Realistic Teenage Closet Organization Ideas That Any Teen Can Very Easily Maintain On Their Own
This is amazing, thank you!
You are very welcome! Thank you! 🙂